6.5. Others
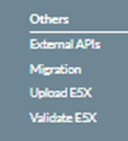
6.5.1. External APIs
There is a set of methods that can be accessed via API. It is accessed by selecting the ‘Administration - Others – External APIs’ menu option.
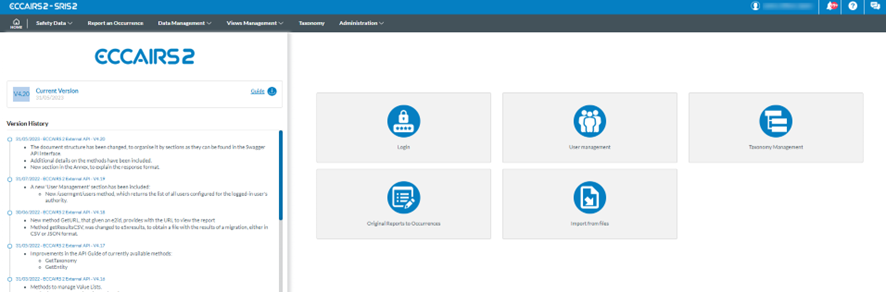
Administrators can select the icons to access the available methods, classified by repository. It will access Swagger, which helps users consume the API services.

The attached document provides further information on all the methods available for API users.
6.5.2. Migration
This option of the Administration menu displays the migration window as follows:
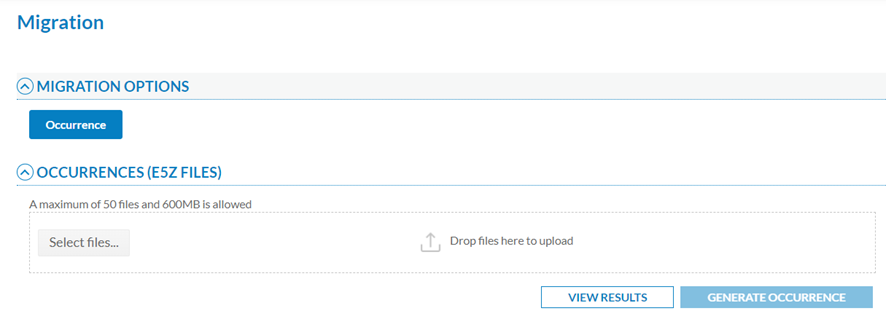
E5Z is the extension given to compressed XML files in ECCAIRS2 that contain one or more occurrences (OCs or SRs) in XML format. If it contains attachments, E5Z files can also include folders with the same name as the corresponding XML.
The Administrator has to select the files through the ‘Select files’ button or by dragging and dropping them in the E5Z files section and clicking on ‘Generate Occurrence’ or ‘Generate Safety Recommendation’ if the Administrator’s Authority is an SIA.
A maximum of 50 files and 600 MB is allowed.
When migrating Occurrences, the system validates if an occurrence already exists in the Authority by checking the following Attributes of the ECCAIRS Central Taxonomy:
· Responsible Entity (453)
· File Number (452)
A new version of the occurrence will be created if there is a match. Otherwise, a new occurrence is created.
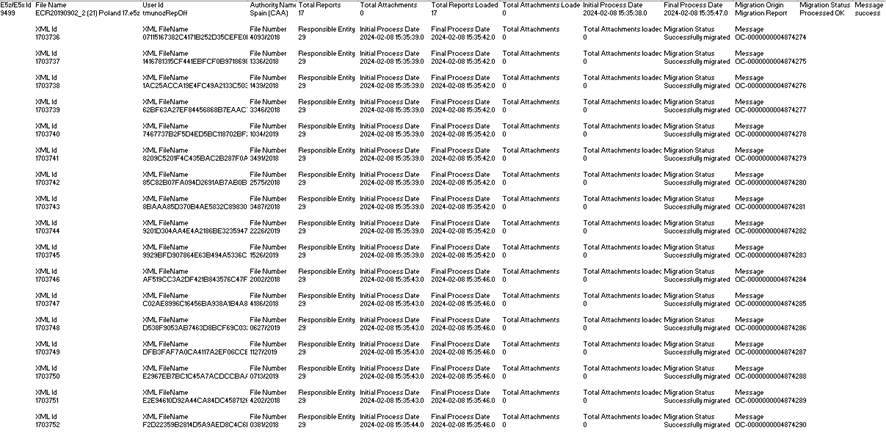
Thus, for new OCs, the system will display a message explaining the OC has been generated. (Simultaneously, the system emails the Administrator to inform them of the migration result). Then the Administrator has to click on ‘View results’. The system will display the list of migrations with the most recent on the top of the table:

The list indicates per column the following data concerning each migration process by which migrations can be filtered:
· Username: the author of the migration
· Filename: of the E5Z file
· Authority to which the Administrator belongs
· Total reports: number of total OCs
· Total attachments: number of total attachments
· Number of loaded reports
· Number of loaded attachments
· Initial Process Date
· Final Process Date
· Migration Date
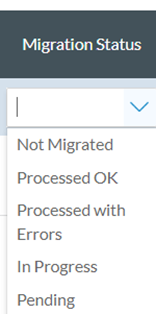
· Migration status: it can be the following:
If the Administrator moves the mouse over the last column of the migration row, the system will display two icons:

The download icon downloads an Excel file with the information of the migration results per XML of the E5Z file, i.e.:
The eye icon accesses a view page with the results of the migration, as follows:
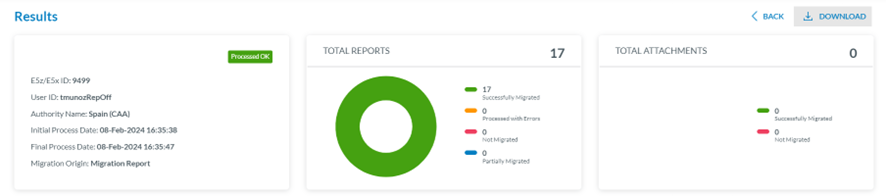
Above the panel, on the right side, there is a Download option that downloads the view page in PDF format.
The first section of the page is the Results section, which indicates the status of the process: whether it has been successfully migrated or has been processed with errors, not migrated or partially migrated.
The central panel shows a percentage drawing showing the number of processed reports and their status.
The left panel indicates the following:
· File ID
· User ID
· Authority Name
· Initial Process Date
· Final Process Date
· Migration Origin
The right panel refers to the attachment and indicates the total number of successfully migrated and un-migrated attachments.
The second part of the page, below, is the Reports section with the table of reports included in the migration:
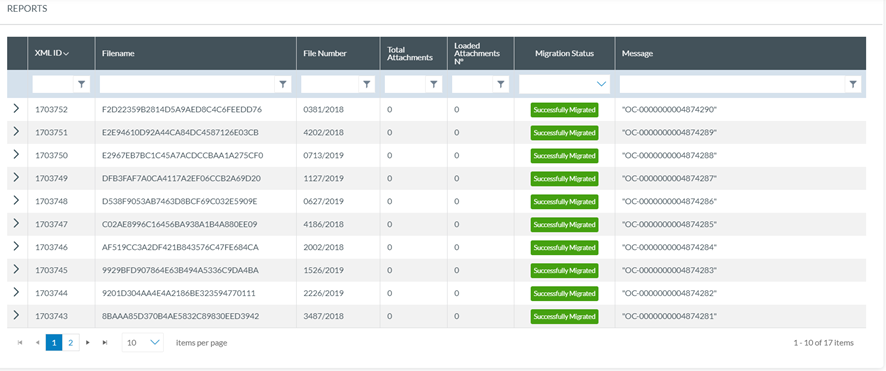
It presents a report per row, and per report, the following columns can also be used as filters:
· The XML ID: Unique for each one
· The File Name: Unique for each one
· Total Attachments (included in the XML)
· Number of loaded attachments
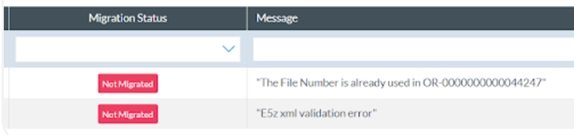
· Migration status: it can be successfully migrated or has been processed with errors, not migrated or partially migrated
· Message: With the E2 ID for the OC in case of a successful migration, like in the image above, or it can be messages explaining the cause of a failed or final migration as follows:
If the user clicks on the arrow at the beginning of a report’s row, the system displays the attachments’ list of that OC below the list:

The list presents the attachment of the specific OC, if it exists, with one attachment per row. Each row is divided into columns that can be used as filters:
· Attachment ID: unique for each one
· Attachment Name: also unique
· Migration Status: migrated, partially migrated, processed with errors, not migrated
· Message: Referring to the success of the migration or explaining the cause of a partial migration, with error or not migrated.
The last section of the view page is the attachment list:

It presents the list of all the attachments of all the OCs of the list of reports. The information is the same as the attachment per report.
6.5.3. Upload E5X files
This option of the Administration menu displays the Upload E5X files window:
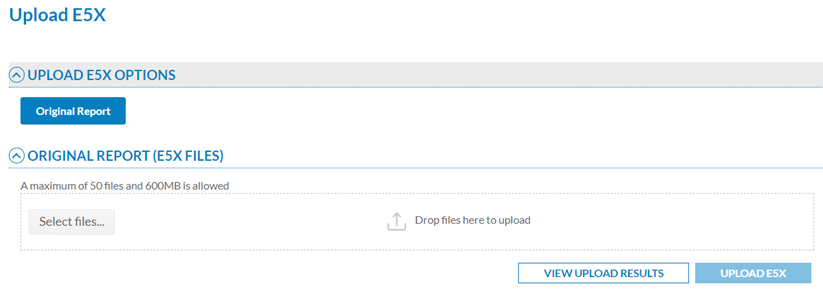
E5X is the extension given to compressed XML files in ECCAIRS2 that contain one or more original reports (ORs) in XML format. E5X files can also contain folders with the same name as the corresponding XML.
The Administrator has to select the files through the ‘Select files’ button or by dragging and dropping them in the E5X files section and clicking on ‘Upload E5X’.
The system will display a message warning that the process can take some time and will communicate if the process has been successful.
In parallel, the system emails the Administrator: Your request to upload the ‘DEMO.e5x content to ECCAIRS2 has been successfully received'.
When the process has finished, the system will send another message on the status of the process.
Then, the Administrator has to click on ‘View upload results’, and the system will display the view page providing the list of all the uploads by date order, with the last upload in first place:
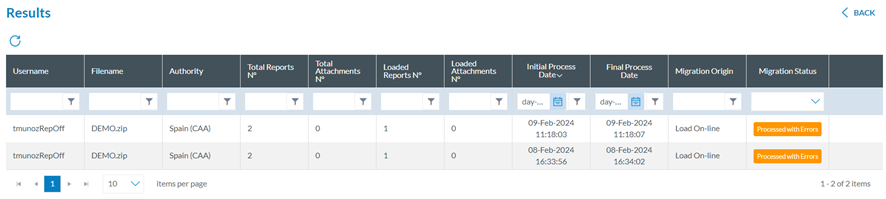
The list functions like the migration process but with original reports instead of OCs. See the previous section for further details.
6.5.4. Validate E5Xfiles
This option of the administration menu displays the following window:
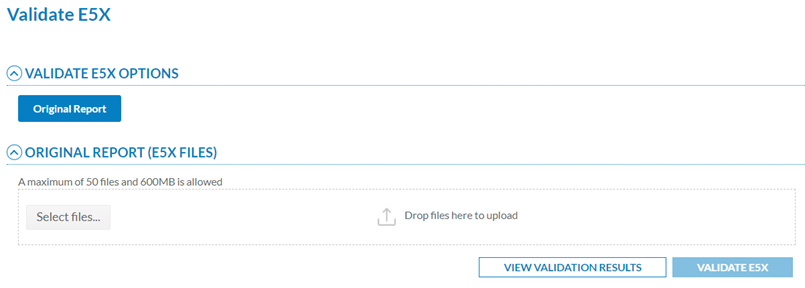
The Administrator has to select the files through the ‘Select files’ button or by dragging and dropping them in the E5X files section and clicking on ‘Validate E5X’.
The system displays a message once it is validated. At the same time, the system sends an email to the Administrator on the result of the validation. The Administrator has to click on ‘View validation results’, and the system opens the following Results page:

It presents a table with the processed validations, with the most recent ones in the first place. The columns per each validation row are the following (they can also be used as filters):
· Username: the author of the validation
· Filename: of the E5X file
· Authority to which the Administrator belongs
· Total reports: number of total ORs
· Total attachments: number of total attachments
· Initial Process Date
· Final Process Date
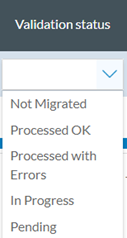
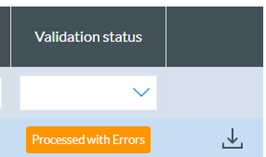
· Validation status: it can be
On the last column of the specific validation row, the Administrator can mouse over, and a download icon will appear.
The Administrator can click on it to download an XLS file with the results of the validation:
