6.3. Roles and Permissions
This option of the Administration menu provides the following submenus:
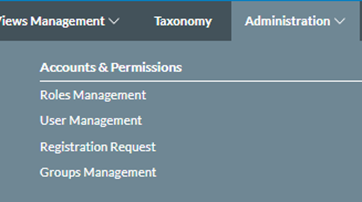
· Roles Management
· User Management
· Registration Requests
· Groups Management
6.3.1 Roles Management
Permissions among the E2 Web Applications can be provided to different types of users through roles.
Administrators have to click on ‘Roles Management’ on the image above, and the system provides the following page:
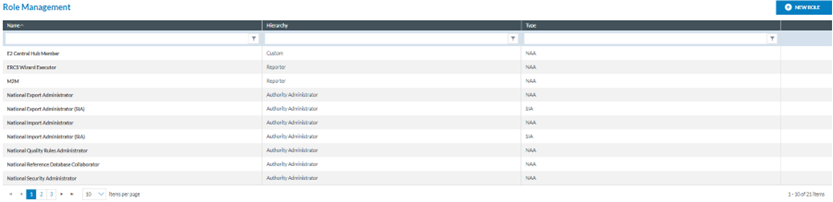
It provides the table of Roles with the following columns that also work as filters:
· Name: Identification of the Role
· Hierarchy: At the Administrator level, the options are only:
ü Authority Administrator
ü Custom
ü Reporter
Each group of permissions is directly related to the role’s hierarchy. This way, when a role with hierarchy level X is created, only the permissions related to hierarchy level X will be available to be assigned to the new role.
Type: NAA (National Aviation Authority) or SIA (Safety Investigation Authorities).
The last section of each row provides the following icons: 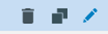
Which are aimed at deleting, copying and editing each Role.
Above the table, the system displays the ‘New Role’ button.
6.3.1.1. Create a new role
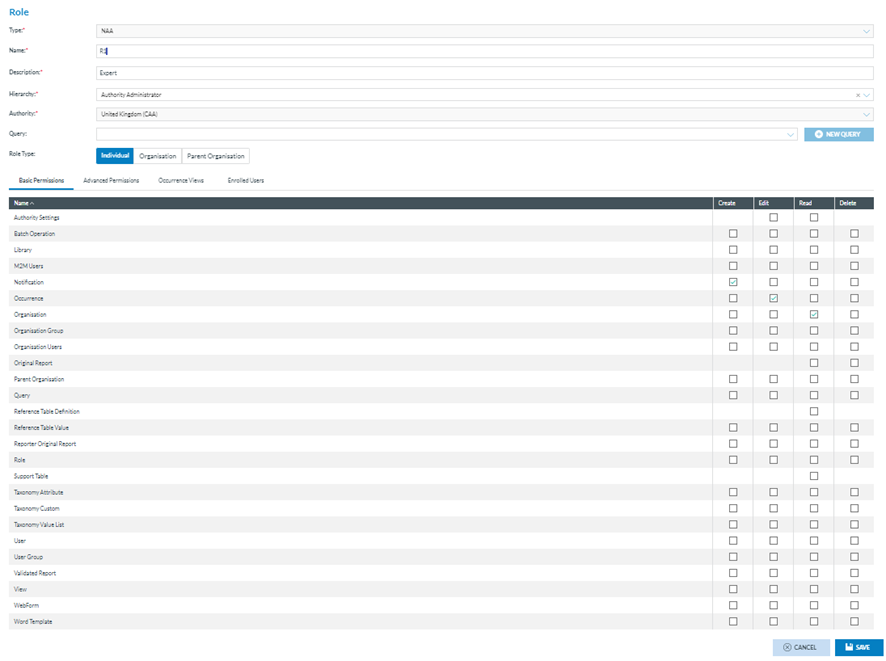
Administrators have to click the ‘New Role’ button above the table of Roles of the Roles Management menu. The system will open the ‘Role’ page:
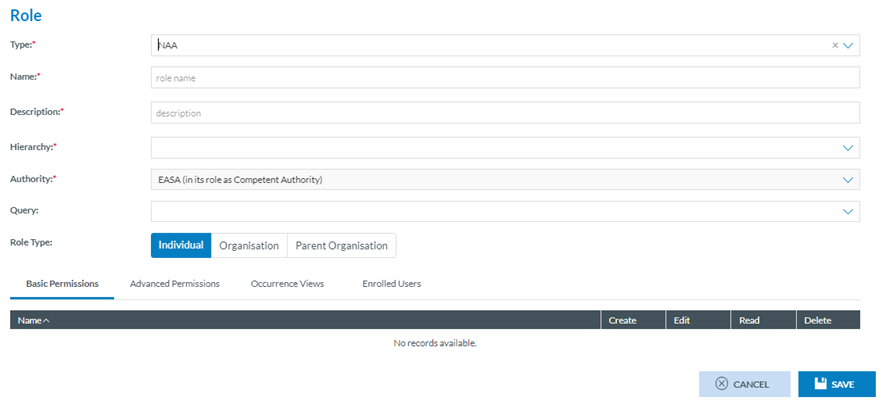
The following fields are mandatory:
· Type: it is by default
ü NAA, for Authorities of this type,
ü SIA, for Authorities of this type and
ü Editable, for NAA/SIA Authorities
· Name: it has to be unique for each role
· Description: it can be the same as other roles.
Hierarchy: a drop-down menu with the options Authority Administration, Custom and Reporter
Depending on the hierarchy selected on this menu, the Basic Permissions table displayed at the bottom of the page will be updated. Filling them is mandatory to save the role. For example:
· Authority Administrator: the system will provide the following table of Basic Permissions
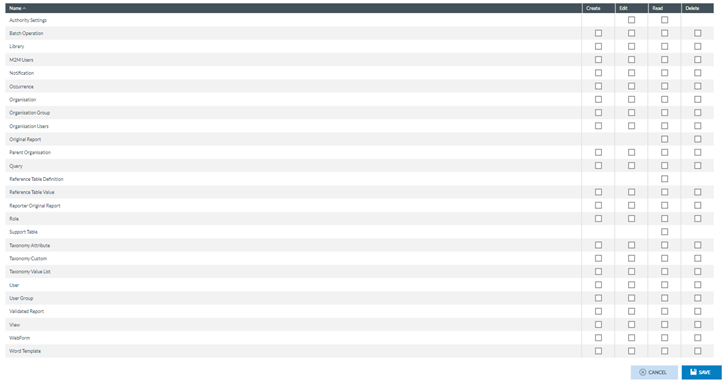
Administrators must select Create, Edit, Read and/or Delete Permissions for each role and click ‘Save’.
Note that there is no checkbox for some options, i.e. Create Authority Settings; Create and Edit Original Reports.
· Authority: it is not editable. The system sets the Authority of the current Administrator by default.
· Query: Administrators can select a query at the Queries drop-down menu. It will provide the Queries the current Administrator has previously saved through the Queries menu (Data Management). See the Queries section for further details on how to manage queries.
· Role Type: By default, the system sets ‘Individual’, but Administrators can also select ‘Organisation’ or ‘Parent Organisation’.
The selected query will restrict the records that can be accessed by users registered in that role to only those resulting from the execution of the query.
Administrators can select the ‘Advanced Permissions’ by clicking on that tab.
This tab provides the ‘Report’ Advanced Permissions, by default, to be selected (Image below). The content varies depending on the chosen hierarchy. For example, the following table corresponds to the Authority Administrator.
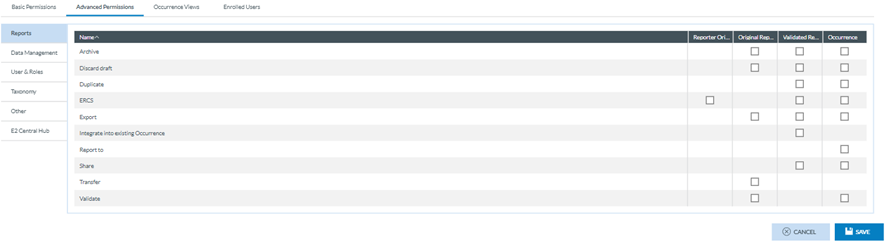
The advanced permissions are grouped into Reports, Data Management, Users & Roles, Taxonomy, Other, and E2 Central Hub. The Administrator can select any of these groups to provide the required permissions to the role and click the ‘Save’ button.
Occurrence Views: through this tab, Administrators can select the actions the users of this role can perform when using a particular View and save the selection. Otherwise, the role cannot be saved.
This tab is as follows:
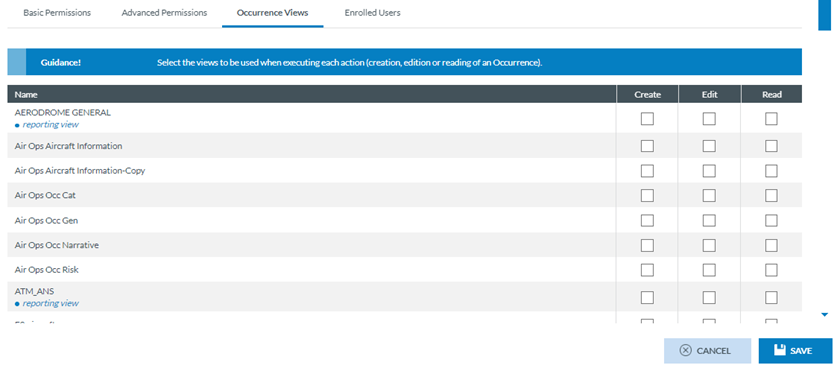
It provides a table of views with all the views available for the current Authority. See Views management for further details on the Views.
Through the checkboxes, Administrators can select the permissions to access the specific View concerning a report's Creation, Edition and Read mode.
Enrolled users: displays the users assigned to this role. This list is built automatically, so Administrators cannot enrol new users from here. See the following section, User Management, for further details.
6.3.1.2. Edit a role
Administrators have to click on the pencil Edit button of the specific Role of the table, and the system will display the Edit Role page:
The management page is the same as the New Role page in the previous section. See it for further details. Administrators must update the needed fields and keep all the mandatory fields filled in. Then, they have to click on ‘Save’; the updates will be saved in the database, and the Roles table will be updated accordingly.
Note: The Users Enrolled tab is not editable. Through the Users management, Administrators can assign a role to a user, so this will be seen in the ‘Enrolled users tab’ of the Role page:

6.3.1.3. Duplicate a role
Administrators must click the ‘Copy’ icon of the specific Role, and the system will display the Role page. It is the same as the Edit page. Administrators have to update at least the Name field and keep the mandatory information filled. Then, they have to click on Save, and the updates will be saved in the database, and the roles table will be updated accordingly.
6.3.1.4. Delete a role
Administrators have to click on the ‘Delete’ icon for the specific role of the table, and the system will display a confirmation message because the action cannot be reversed. If Administrators confirm the action, the role will be deleted from the database and removed from the roles table.
6.3.2. User management
Administrators have to click on ‘User management’ under ‘Administration-Roles and Permissions’, and the system will display this menu:
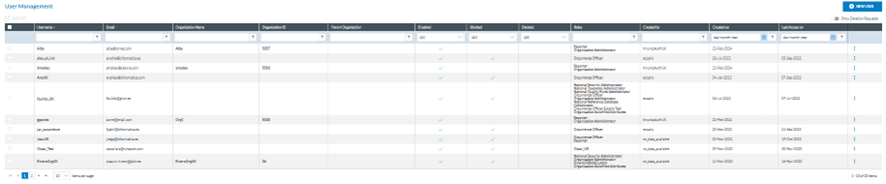
It displays the table of users, which includes the users created through this management and those created through the ‘Organisation Management’ option. See the section on Organisation Management for further details.
Each table row is preceded by a checkbox to select each row.
The first column is a checkbox to select all the tables. The rest of the columns also work as filters:
· Username: it is unique for each record.
· Email: it can be the same as other users’ email.
· Organisation Name: if the User belongs to an organisation, this column will indicate its name.
· Organisation ID: It will set the organisation ID to which the user belongs if it exists.
· Parent Organisation: It identifies the parent organisation if it exists.
· Disabled: When disabled, the field will display a ‘green tick’. By default, the users are created disabled.
· Blocked: if the user is blocked, the field will display a ‘green tick.’
· Deleted: if the user is deleted, the field will display a ‘green tick’ (N/A)
· Roles: it sets the Roles assigned to the user
· Created by: the author of the user
· Created on: Date of creation of the user
· Last access on: Date of last access of the user to the E2 Web Application
Each row's last section has a 3-dot menu providing the Edit and Export options. Note: Administrators cannot delete the users. They can disable and block them.
Above the table in the left corner, another Export option exists for multiple export processes.
On the right-side corner is a ‘Show Deletion Requests’ toggle, disabled; if activated, the table will show users' requests to delete their accounts.
Above the toggle, there is a ‘New User’ button.
6.3.2.1. Create a new user
Administrators have to click the ‘New User’ button above the table:
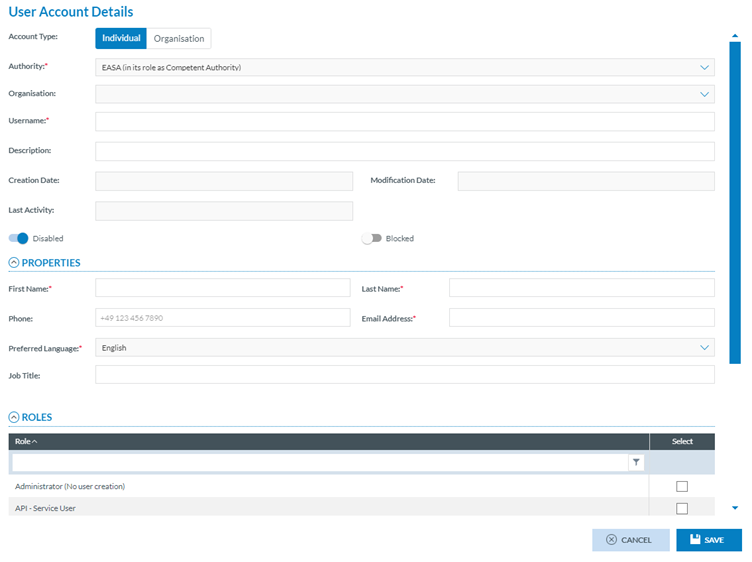
It sets the following fields:
· Account Type: by default, it is Individual; Administrators can update it to Organisation
· Authority: it is not editable. It sets the current Authority of the Administrator
· Organisation: it is not editable for Individual users. It sets the user’s organisation for Organisation users
· Username: it has to be unique for each User
· Description: This field is optional
· Creation Date: This field is not editable and is set by the system automatically when the record is created.
· Modification Date: This field is not editable and is set by the system automatically when the record is updated
· Last Activity: This field is not editable and is set by the system automatically when the user accesses their account in the E2 Web Application
· Disabled toggle: by default, the account is disabled until the user activates it through the activation email.
· Blocked toggle: by default, it is not enabled, and the account is not blocked. If enabled, the account is blocked
· Properties:
ü First Name: It is mandatory and refers to the User
ü Last Name: It is mandatory and refers to the User
ü Phone: it is optional
ü Email address: it is mandatory and refers to the User
ü Preferred language: it is not editable, and by default, it is English
ü Job Title: it is optional
· Roles: It lists all the roles available to the Administrator. The list varies depending on the type of user. The previous image shows the roles of Individual users (non-organisational users). For Organisations, it is as follows:

Administrators must fill in all the mandatory information, select the new User's corresponding roles, and click ‘Save’. The system will save the new user in the database and add the user to the user table in alphabetical order.
6.3.2.2. Edit a user
Administrators have to click on the ‘Edit’ option of the 3-dot button at the table of Users, and the system will open the ‘User Account Details’ page:
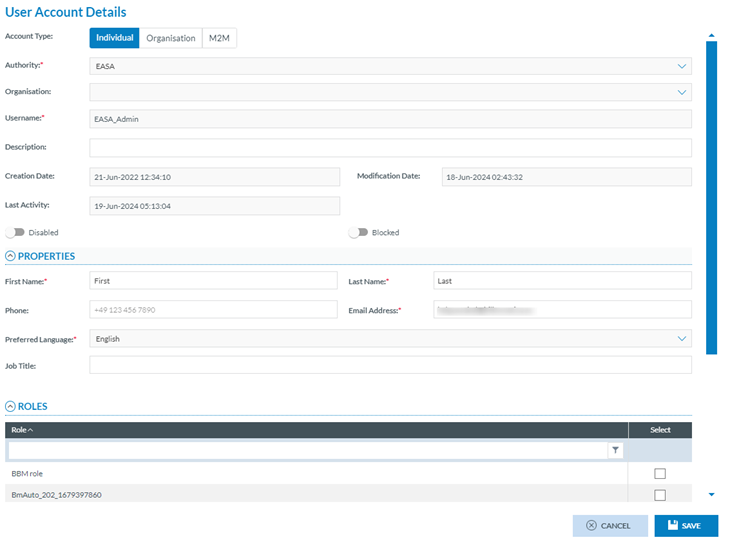
It is like the creation page, but the Account Type is not editable; the creation and modification Dates are already automatically set; if they exist, the Last Activity field is also automatically set.
Administrators have to make the needed updates and click on ‘Save’, and the information will be saved as long as they have kept the mandatory fields filled. The updates will be saved in the database, and the roles table will be updated accordingly.
6.3.2.3. Export a user
Individual export process for users
Administrators have to click on the ‘Export’ option for the specific User of the table of Users, and the system will automatically export that user to an Excel file.
Multiple export process for users
Administrators have to select the specific users through the check boxes of the specific rows or select all the tables through the checkbox provided next to the table columns and click on the ‘Export’ option displayed above the table. The system will email the Administrator a link to download the resulting zip file with the Excel files corresponding to the selected users.
6.3.3. Registration request
Administrators have to click on the Registration Request menu under Accounts & Permissions (Administration menu), and the system will display the table of registration requests for the specific Authority:

This table presents all the registration requests for this Authority introduced through individual reporters' E2 Reporting Portal registration page.
The table provides the following columns that also work as filters:
· First Name
· Last Name
· Username: unique for each user
· Reason to register
· Status: it can be pending, accepted or rejected
· Register date: date and time of the request
On the last section of each row, there is a 3-dot menu that provides the following options:
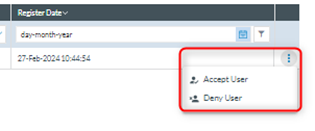
· Accept User: It accepts the user, and the user status turns to ‘Accepted’ in the request table. The system will send an email to the user through which to activate the account. The 3-dot menu will disappear from the specific request at the table.
· Deny User: it denies the registration request. An email will be sent to the requester; the request status will turn to ‘Rejected’ in the table of requests. The Accept option will remain in the 3-dot menu of the request at the table. At the same time, the system will send an email to the candidate informing them of the request’s rejection.
6.2.4. Groups management
Groups are made of users to which some action in the E2 Web Application can be applied, like notifications. See Notifications Manager section for more details.
Administrators have to click on Groups Management under Accounts & Permissions (Administration menu), and the system will display the Groups Management menu:
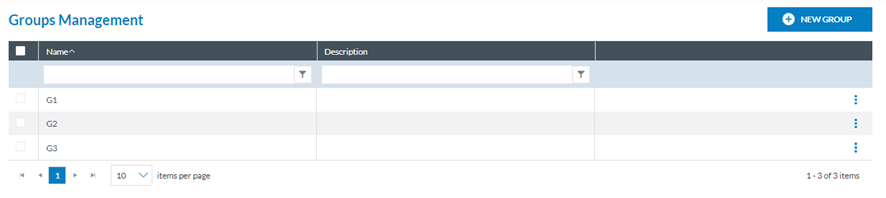
It provides a table of Groups with the following columns also working as filters:
· Name: unique for each Group
· Description: Optional
In the last section of each row, there is a 3-dot menu with the following options:
· Edit Group
· Delete Group
Above the table, there is a ‘New Group’ button.
6.2.4.2. Create a new group
Administrators have to click on the ‘New Group’ button, and the system will display the New Group page:
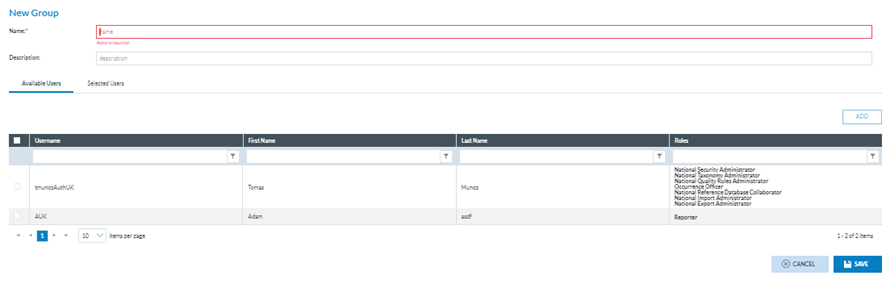
The fields are the following:
· Name: it is the only mandatory field.
· Description: it is optional
· Available Users: it displays the table of active users, excluding organisation users, of the specific Authority. They are added to the Selected Users tab by selecting the needed users through the checkboxes and transferring them to the ‘Selected Users’ tab through the ADD button. The Users can also be removed from the ‘Selected Users’ tab through the ‘Remove’ button.
The system will save the new group in the database, and the group will be added to the group table.
6.2.4.3. Edit a group
Administrators have to click on ‘Edit Group’ on the 3-dot menu of the specific group at the table of groups, and the system will display the Edit Users Group page:
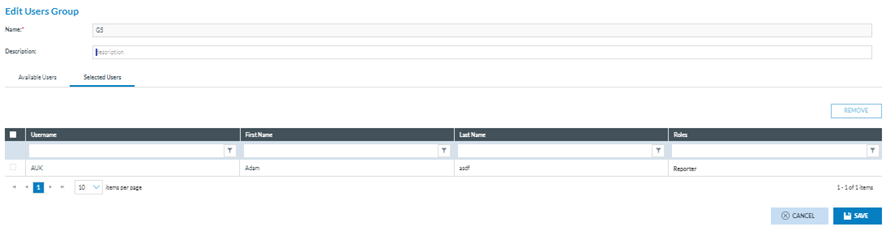
Administrators must update the needed information by always keeping the name filled out and clicking on ‘Save’.
The updates will be saved in the database, and the system will return them to the table of groups with the table updated.
6.2.4.4. Delete a group
Administrators have to click on ‘Delete’ on the 3-dot menu of the specific group at the table of groups, and the system will delete the group from the database and remove it from the table of groups.