6.2. General Settings
6.2.1. Organisation Management
Organisations are defined locally by a user enrolled in the National Security Administrator role. When defining organisations, it can be assigned the webforms that will be used by that organisation when reporting ORs via the E2 Reporting Portal. It can also be determined through predefined Attributes automatically filling with the predefined value when the organisation's users create new ORs.
Administrators have to unfold ‘Administration’ and click on ‘Organisation Management’ under ‘General Settings’. The system will display the Organisation Management menu:

It displays a table of organisations with the following columns per Organisation row, which also work as filters:
· Name: it is unique for each organisation
· Phone: it is not mandatory
· Created by: the Administrator that created the organisation
· Creation date: the date when the organisation was created in E2
The last column provides a delete and edit icon per each organisation, as follows:

Above the table, on the right side, there are the following buttons:
· Import Organisations and Users
· New Organisation
6.2.1.1. Create an organisation
Administrators have to click on ‘New Organisation’ above the table of organisations, and the system will display the ‘New Organisation’ page:

The mandatory fields are the following:
· Organisation Name: it has to be unique for each organisation
· Responsible NAA: the system sets the Authority to which the Administrator belongs. By default, it is not editable.
· E5X: by default, it is ‘Allow Incremental E5X’. Administrators can select ‘Block E5X’ or ‘Allow Total E5X’ instead:
ü Block E5X will not allow users of this organisation to import ORs through E5X files
ü ‘Allow incremental E5X’ refers to importing all the versions of the ORs through the E5X; it means the first version of each OR and all their updates.
ü ‘Allow Total E5X’ refers to import only the last version of the ORs
· Username: it refers to the user that will be created when the organisation is created
· First name: first name of the user that will be created when the organisation is created
· Last name: first name of the user that will be created when the organisation is created
· Email address: User email will be created when the organisation is created. Preferred language: by default, it is English, which is not editable.
The optional fields are the following:
· Organisation Group: drop-down menu providing the organisation groups to be selected, if any
· Phone: telephone number of the organisation
· Responsible contact fields: all of them are optional. They are to contact the responsible of the organisation:
ü Full name: it is referred to the responsible contact of the organisation
ü Email address: it is referred to the responsible contact of the organisation
ü Phone: telephone number of the responsible contact
· User account fields: the following fields are optional:
ü Description concerning the username
ü Job Title
Administrators have to fill in the mandatory fields and click the ‘Save’ button. The system will save the data in the database, create a new organisation with the new user, and add it to the organisation's table.
The created organisational user will have the Reporter and Organisation Administrator roles assigned automatically.
6.2.1.2. Edit an organisation
Administrators have to click on the Edit icon of the specific organisation of the table of organisations, and the system will display the Edit organisation page:
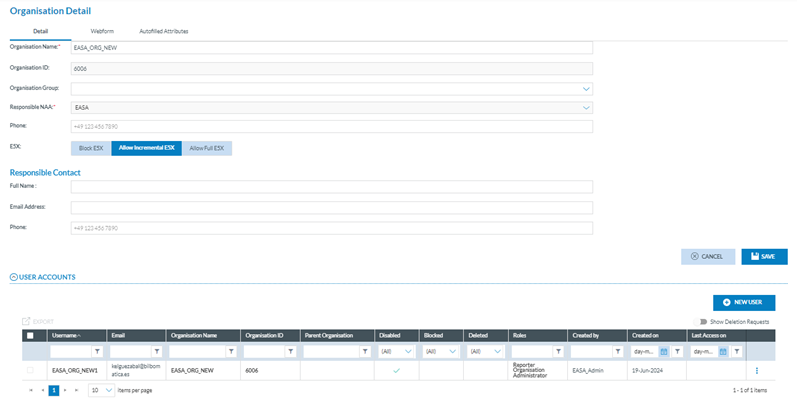
6.2.1.3. Detail tab
The page displays a Detail tab, which reproduces the Organisation creation page, with the addition of an Organisation ID, which is not editable by the system. See the previous section for further details on the fields.
Administrators can update the needed fields.
Moreover, it transforms the user accounts area with a table of accounts with the user accounts for the current organisation.
The table is preceded by a check box and the following columns that can be used as filters:
· Username: of the account
· Email: to which the account is associated
· Organisation Name: as set in the creation page or later edited
· Organisation ID: as generated by the system, it is unique for each organisation
· Parent organisation: the organisation from which the organisation is child
· Disabled: it shows a green tick if the account is disabled
· Blocked: green tick if disabled
· Deleted: green tick if deleted
· Roles: by default, the system assigns the accounts created by Administrators to the Reporter organisation' Administrator role
· Created by: the author of the account
· Created on: date of the account’s creation
· Last access on: date of last access to the account
The last section of the table per each row provides a 3-dot menu with Edit and Export options.
Above the table, there is a ‘Show Deletion Requests’ that shows, if existing, the accounts whose users have requested their deletion.
6.2.1.4. Add more account users to the Organisation
Administrators can add users through the ‘New user’ button above the accounts table.
Administrators have to fill in the mandatory fields:
· Username
· First Name
· Last Name
· Email address
The ‘Disabled’ toggle will be activated and deactivated once the created user activates it through the email they receive after its creation.
The blocked toggle is deactivated; Administrators must activate it if needed to block the account.
Administrators can fill in the optional fields.
At the bottom of the page, the system displays a Roles table, where Administrators can select the roles for the user account. The available roles are Organisation Administrator, Organisation Autofilled Attributes and Reporter. Administrators can choose any one or both. They must fill in the mandatory fields and click the ‘Save’ button. The system will save the data in the database and add the account to the Edit Organisation page.
6.2.1.5. Edit a user account
Administrators can edit an account once on the Edit an Organisation page. They have to click on the abovementioned Edit option of the 3-dot menu of the specific account, and the system will display the Edit user account page:
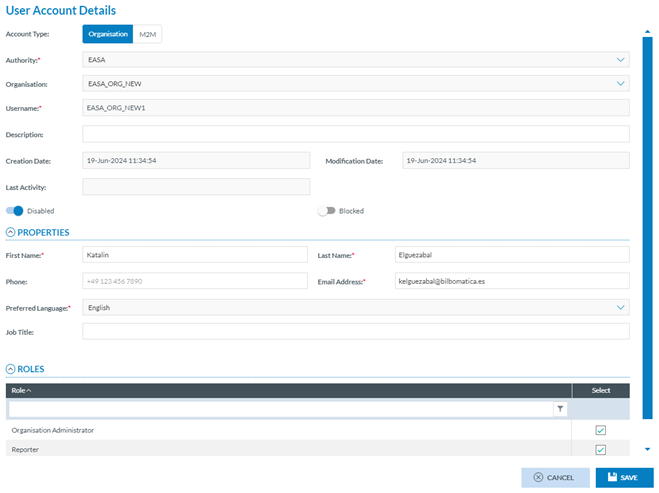
It is the same page as the previous one (adding a user account) but already has the data filled in.
Only the following fields will be editable:
· Description
· Disabled toggle
· Blocked toggle
· First Name
· Last Name
· Phone
· Email Address
· Job Title
· Roles
Administrators can update the needed fields, always keeping the mandatory fields filled.
Then, they have to click on the Save button, and the system will save the updates in the database, and the list of user accounts will be updated accordingly.
6.2.1.6. Export a user account
Individual export: Administrators have to click on the Export option of the 3-dot menu of the specific account at the table of accounts. The system will directly export it to an Excel (XLS) file.
Multiple export: Alternatively, administrators can select the checkboxes of specific accounts in the accounts table.
Administrators can also select all the accounts at a time by checking the check box on the left of the Username column.
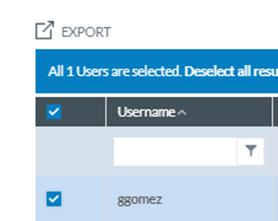
Then, they must click the Export icon above the table on the left.
The system will directly export them to an XLS file.
6.2.1.7. Webforms tab
Through this tab, administrators select the webforms available to the organisation’s users when accessing the E2 Reporting Portal, which is among the organisation's webforms defined at the Authority level.
Administrators have to click on the Webforms tab of the Edit Organisation page, and the system will display the Webforms tab:
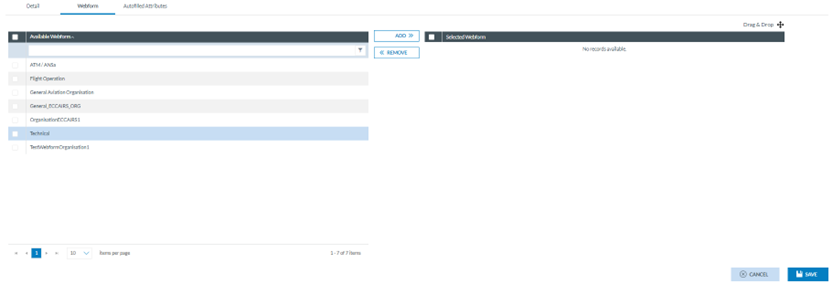
The left panel displays the list of organisation webforms available, with a checkbox to be selected.
Administrators can check the needed webforms and click the ADD button in the middle of the page.
The selected webforms will be added to the right panel where Administrators can order them by dragging and dropping them as needed:

Then, Administrators have to click on the ‘Save’ button, and the webforms are saved for the specific organisation.
6.2.1.8. Autofilled Attributes tab
This tab is to help users when filling the webforms in the E2 Reporting Portal. Thus, it allows us to select Attributes and give them a value, so when users of that organisation are filling a webform, those Attributes are predefined.
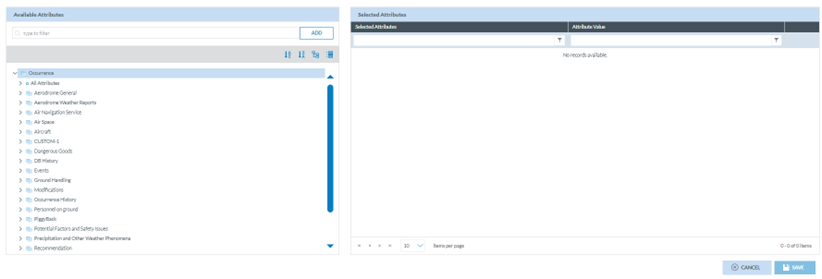
Administrators have to click on the ‘Autofilled Attributes’ tab, and the system will display the ‘Autofilled Attributes’ page:
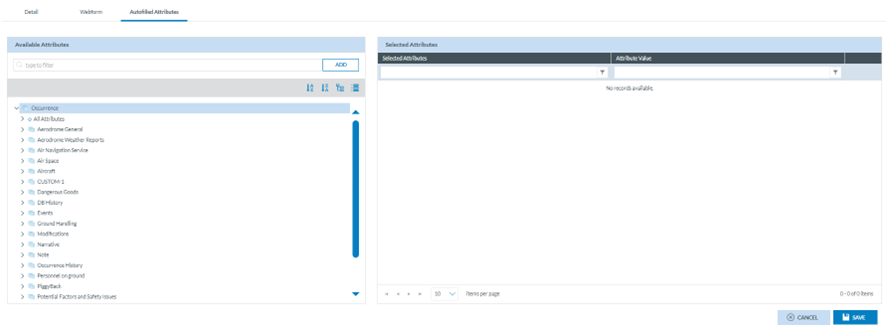
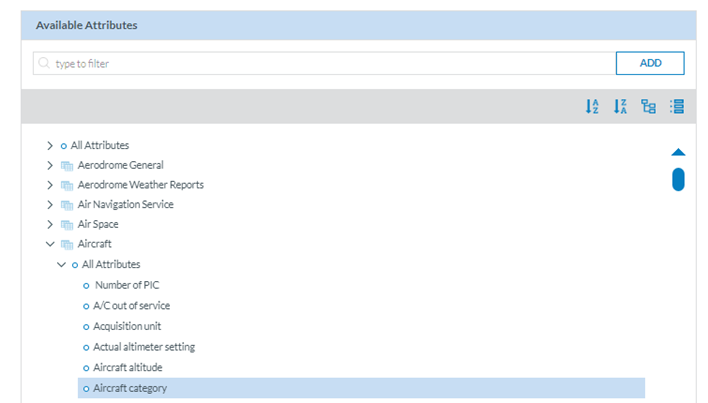
The left panel provides the ‘Available Attributes’ with the Taxonomy browser.
Administrators have to make a search through the filter or navigate through the tree to select specific Attributes. Administrators have to select the particular Attributes, one by one, and click on the ‘ADD’ button:
The system will transfer the Attribute to the right panel:

Each selected Attribute of the right panel will provide an Edit and a Delete icon.
To fill in the value, Administrators have to click on the edit icon, and the system will display a window to fill in the specific value:
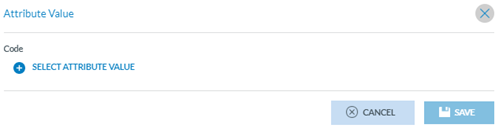
The type of value to be provided by the system will depend on the specific Attribute data type.
In the case above, Administrators have to click on ‘Select Attribute Value’, and the system will open a Select Attribute value window:
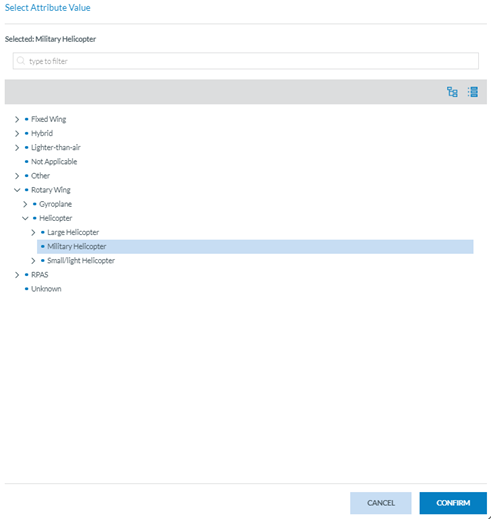
Administrators have to select a value and click the ‘Confirm’ button. The system will display a window to save the value. The system will add the value to the selected Attribute in the right panel:
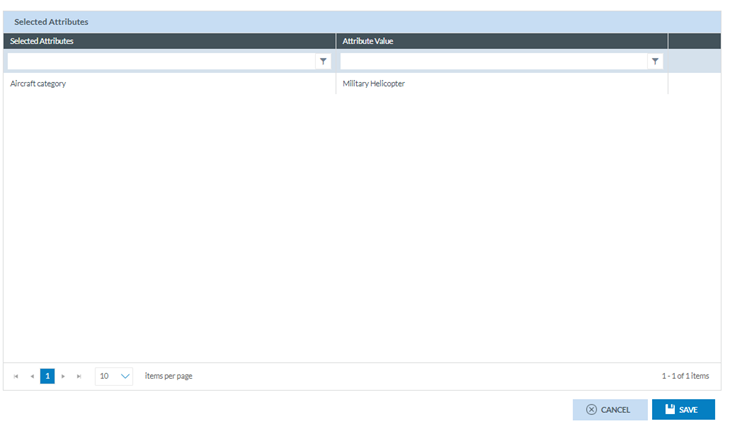
Then, Administrators have to click ‘Save’, and the system will add the selected Attributes to the specific organisation.
6.2.1.9. Delete an organisation
Administrators have to click on the Delete icon of the specific organisation on the table of organisations, and the system will display a confirmation message:
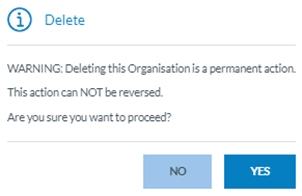
If Administrators confirm, the system will delete the organisation from the database and remove the organisation from the table of organisations. The users from the deleted organisation cannot report ORs anymore but the previously existing ones are kept and those already sent to the corresponding Authority can be manage by the Authority Officers, if they need it.
6.2.1.10. Import organisation and users
Administrators can import the organisation's and its users' data through the ‘Import Organisation & Users’ button above the table of organisations. This button opens the ‘Import Organisation & Users’ window:
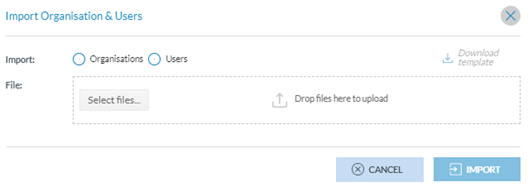
Administrators must select Organisations or Users, and the ‘Download template’ option will be activated. Then, Administrators have to click on ‘Download template’, and the system will download an xls template, which Administrators have to fill in with the data of Organisations or Users depending on the selection. Once the template is filled, they have to upload it to the system through the ‘Select files’ button or by dragging and dropping it to the File area of the window:
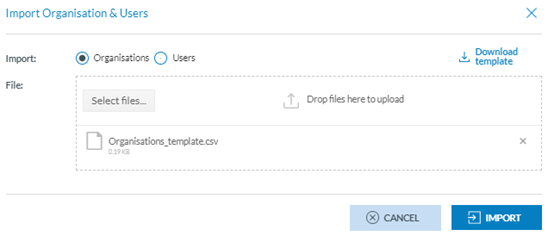
Administrators must click the ‘Import’ button, and the Organisations or Users will be imported into the system, adding the imported data to its database.
6.2.2 Organisation Group management
Administrators can group organisations of the same type to assign them the same webforms or auto-filled Attributes.
When selecting this option, the following table is displayed:

It presents the table of Organisation Groups with the following columns that also work as filters:
· Name: unique for each record
· Description: it is optional
· Organisations included: it has to include at least one organisation. The same organisation cannot belong to various groups.
· Created by: the author of the group
· Created on: the creation date
On the last column of each row, there is a Delete and Edit icon.
Above the table, the system displays the ‘New Organisation Group’ button.
6.2.2.1. Create an Organisation Group
Administrators have to click on ‘New Organisation Group’ above the table, and the system will display the ‘New Organisation Group’ page:
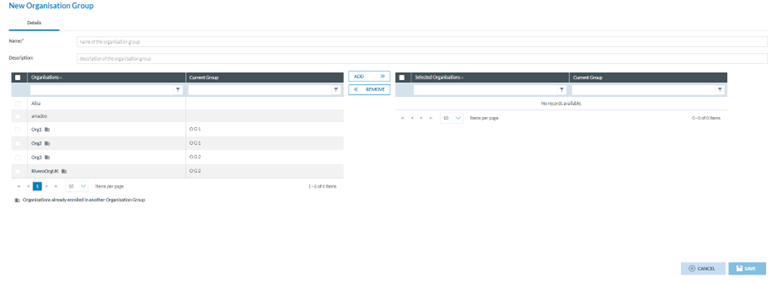
The page provides the following fields:
· Name: unique for each group and mandatory
· Description: optional description of the group
· The left panel has a table of organisations with two columns:
ü Organisations: Organisations already associated with a group display a Group icon next to their name on the table
ü Current Group, if existing
· Right panel with a table of the selected organisations with the following columns:
ü Selected Organisation.
ü Current Group.
Administrators have to fill in at least the Name of the group and can click on ‘Save’ to save the group without organisations.
To create a group with associated organisations, apart from filling in the name, Administrators have to select through the check box the organisation/s needed, click on the ADD button, and they will be transferred to the table of organisations chosen:

When clicking on ‘ADD’, if any of the selected organisations have a predefined configuration, the system will display a confirmation message since, if it is confirmed, the predefined configuration will be lost for that organisation.
Administrators can remove the selected organisations from the right panel through the' REMOVE' button.
Administrators have to click the ‘Save’ button, and the system will save the data in the database. A new Organisation Group will be added to the Organisation Groups table.
Note that if any of the selected organisations already belongs to a group, when Administrators click on ‘Save’, the system will display a confirmation message since, if the information is saved, those organisations will be associated with the new group but not the previous group anymore; the association with the previous group will be removed.
6.2.2.2. Edit an Organisation Group
Administrators must click the Edit icon of the specific group in the Organisation Groups table. The system will display the Edit Organisation Group page:
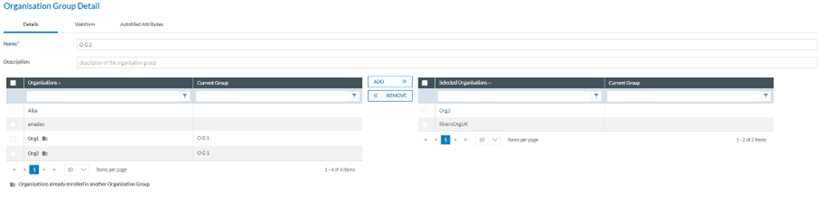
The functioning of this page is like the Creation page described in the previous section. See it for further details. Administrators have to make the needed updates and click on the Save button. The system will save the updates in the database, and the table of Organisation Groups will be saved accordingly.
6.2.2.3. Delete an Organisation Group
Administrators click the Delete icon of the specific group in the Organisation Groups table. The system will delete the Organisation Group from the database.
6.2.3. Parent Organisation Management
The Parent Organisation is a concept to identify some organisations that supervise other organisations. They can be defined by a user enrolled on the National Security Administrator role at the Authority level.
Parent Organisation Management is the third option of the ‘Administration>General Settings’ menu:

It displays the table of Parent Organisations with the following columns also working as filters:
· Name: unique for each record
· Description: Optional
· Organisations included: organisations associated with the parent organisation.
· Created on: Creation date
· Created by: the author (Administrator)
On the last section of each row, each record provides an Edit and Delete icon when hovering over the section.
Above the table, the system provides the ‘New Parent Organisation’ button.
6.2.3.1. Create a parent organisation
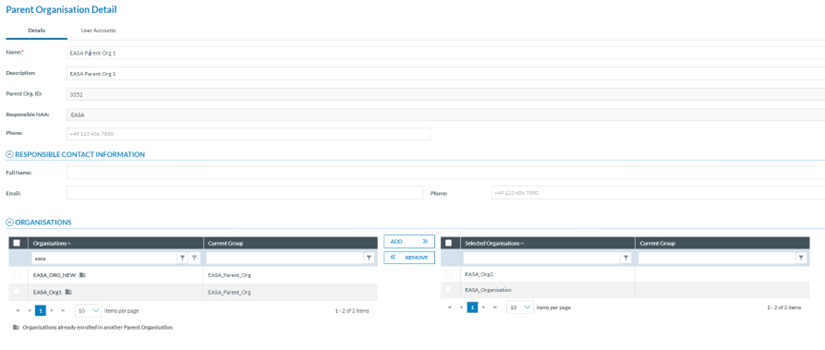
Administrators have to click on ‘New Parent Organisation’ above the table, and the system will display the ‘New Parent Organisation’ page:
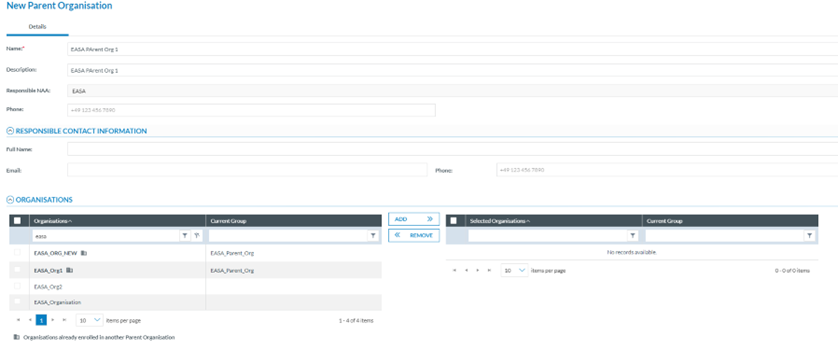
The page provides the following fields:
· Name: mandatory and unique for each parent organisation
· Description: Optional
· Responsible NAA: the system sets by default to which the current Administrator belongs. It is not editable
· Responsible contact information:
ü Full name: optional
ü Email: Optional
ü Phone: Optional
· Organisations:
ü The left panel shows a table of organisations in two columns:
o The Organisation. Organisations associated with another parent organisation display an icon next to their name on the table.
o The associated parent organisation, if existing.
ü Right panel with a table of the selected organisations with the following columns:
o Selected Organisation.
o Current Group.
Administrators have to fill in at least the Name and can click on ‘Save’ to save the parent organisation without organisations associated with it.
To create a parent organisation with associated organisations, apart from filling in the name, Administrators have to select through the check box the organisation/s needed, click on the ADD button, and they will be transferred to the table of selected organisations:
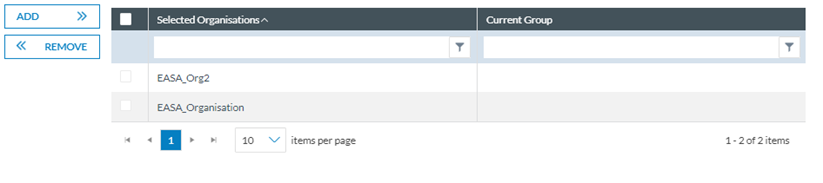
When clicking on ‘ADD’ if any of the selected organisations have a predefined configuration, the system will display a confirmation message since, if it is confirmed, the predefined configuration will be lost for that organisation.
Administrators can remove the selected organisations from the right panel through the' REMOVE' button.
Administrators have to click the ‘Save’ button, and the system will save the data in the database. A new Parent Organisation will be added to the table of Parent Organisations.
Note that if any of the selected organisations already belongs to a parent, when Administrators click on ‘Save’, the system will display a confirmation message since if the information is saved, those organisations will be associated with the new parent organisation but not the previous parent anymore; the association with the previous parent organisation will be removed.
6.2.3.2. Edit a parent organisation
Administrators click the Edit icon on the last section of the row of the specific parent organisation of the table. The system will display the Edit parent organisation page:
Its functionality is the same as in the previous section. See it for further details. Administrators can update the needed fields and click the ‘Save’ button. The system will save the updates in the database, and the table of parent organisations will be updated accordingly.
6.2.4. Authority settings
In the fourth option of the Administration>General Settings menu, you can find the following settings:
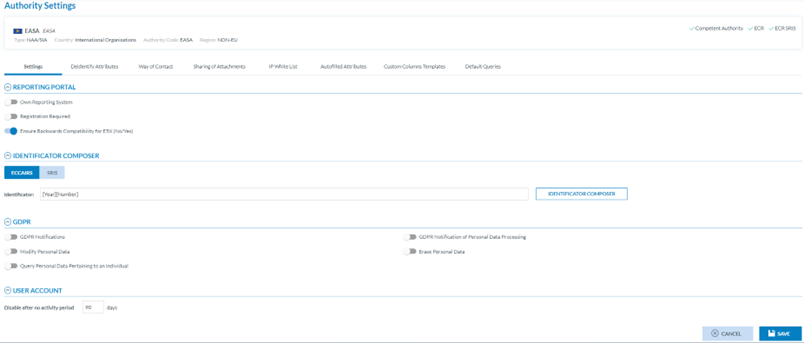
The page provides the Authority settings of the current Administrator, including the Authority type, country, Authority code, and Region.
6.2.4.1. Settings tab
By default, the system displays the Settings tab below the Authority information with the following fields:
· Reporting Portal:
ü Own reporting system: disabled by default. It sets if the Authority has its own reporting system
ü Registration required: disabled by default. It determines whether or not the reporter's registration is required.
ü Ensure backward compatibility with E5X (No/Yes), which is only available for Plan B Authorities. By default, it is enabled, ensuring compatibility with the Taxonomy 4.1.0.7.
· Identificator Composer: it determines the pattern that the File Number will follow for all the reports automatically generated in the Authority:
ü Administrators can customise it based on Attributes, text, dates or a sequence of numbers. They can also concatenate conditions to customize the File Number further based on their needs.
ü In the Identificator text field, Administrators will preview the changes made in the Identificator composer edition section.
ü By clicking the  'add' icon, Administrators can add as many conditions as needed.
ü If you want to delete a condition, click the  ‘delete’ icon.
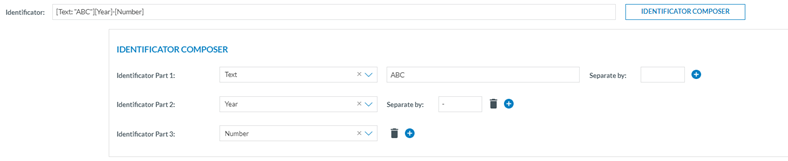
It must, at least, have an incremental number to guarantee the uniqueness of the file number.
· User account: Disable after no activity period: Set, by default, at 90 days. Administrators can update it to another number of days.
Once the period is reached, the system will send an email to the user informing about the inactivation of the account giving him or her 14 days more to login into E2 before the user account is deactivated.
Once Administrators have filled in the tab as desired, they have to click on ‘Save’ before accessing the ‘Deidentify Attributes’ tab.
6.2.4.2. Deidentify Attributes tab
When sharing an occurrence or safety recommendation with other Authorities or the ECR, the Officers can de-identify Attributes.
The Administrator selects the Attributes that will potentially be deidentified through this tab.
The tab provides two panels:
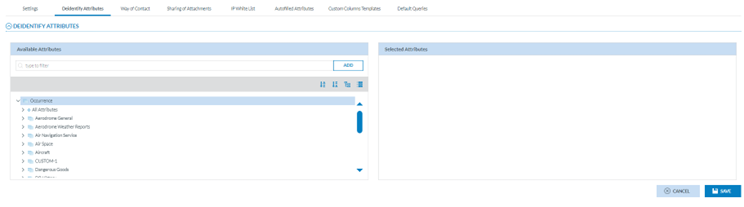
On the left is the Taxonomy browser, where Administrators must select the Attributes to be de-identified. Administrators have to select the specific Attributes and click on the ‘ADD’ button so they will be transferred to the right panel (Selected Attributes):
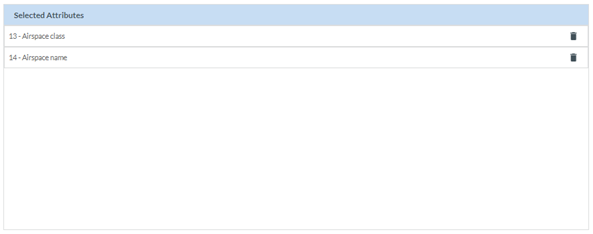
Administrators can remove the selected Attributes from the list through the Delete icon next to each selected Attribute.
Administrators must save the information before accessing other tabs. Otherwise, the data will not be saved.
6.2.4.3. Way of Contact tab
This tab provides the following table of Administrative Contacts:

Each row presents an administrative contact and the related emails. Every time the ‘Way of Contact’ defined in this table is triggered, an email will be sent to the email addresses specified in this field. For example, if a Reporter makes a Registration Request, an email will be sent to these addresses to inform them about the new request.
Administrators are not able to create the contacts. They can only edit the email, which is editable through the Edit icon on the last section of each row.
The icon appears when hovering over the section.
Administrators have to click on the icon, and the system opens the email field of the specific row:

Once Administrators introduce an email(s) in the correct format, the Disc (Save) icon is activated. Administrators must click on it, and the email will be updated in the database.
6.2.4.4. Sharing of Attachments tab
This tab aims to select the authorities that will be available to the users of the current authority for sharing OCs and SRs.
It displays a list of E2 authorities with a check box for each OC and SR (disabled or enabled depending on the authority type – NAA/SIA). The columns work as filters:
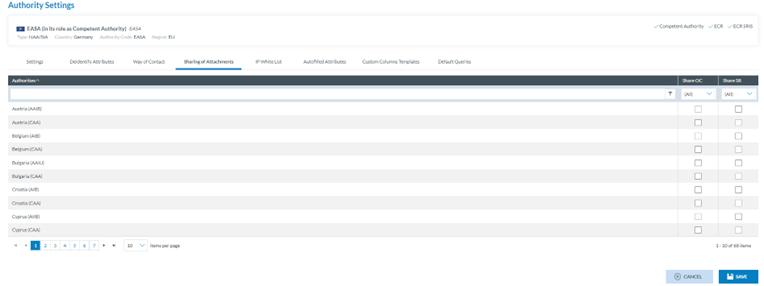
Administrators must select the desired Authorities to which the attachments in OCs or SRs can be shared and click on ‘Save’. The system will save the updates in the database.
6.2.4.5. IP Whitelist tab
The users who want to access the public API methods, via Swagger or otherwise must have their IPs whitelisted.
This tab shows the whitelisted IPs:

Each row provides its IP and Description. The last section corresponds to the Delete and Edit icons that only appear when hovering over the section.
6.2.4.6. Create an IP
Administrators have to click on the ‘New IP’ button above the table that adds a new row to the table:

The IP is mandatory and unique for each record, and the Description is optional.
Administrators must fill in at least the IP address in the IP column and click the ‘Save’ icon. The system will save the data in the database, and the new whitelisted IP is created.
6.2.4.7. Delete an IP
Administrators have to click on the Delete icon of the specific IP, and the system will delete it from the database.
6.2.4.8. Autofilled Attributes tab
The management of this functionality works as Section ‘Autofilled Attributes’ of the Organisation. See the Autofilled Attributes tab section for details. The difference is that Autofilled Attributes of the Organisation works for the webforms of that organisation, and this case is restricted to VRs and OCs created from scratch by the Authority Officers.
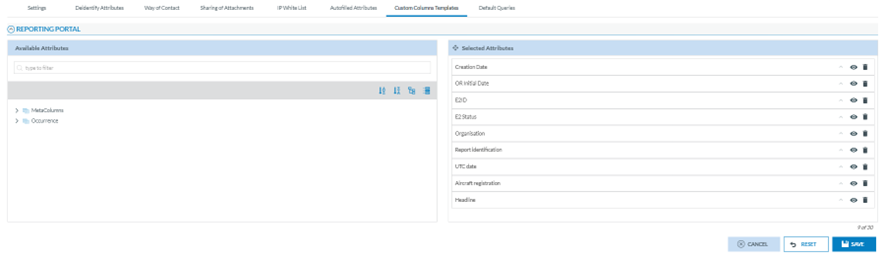
6.2.4.9. Custom Columns Templates tab
Through this page, the Administrator can select the Attributes available in the lists of ORs, VRs, OCs or SRs (according to the Authority type) in the corresponding ‘Safety Data’ or ‘Safety Recommendations’ menus of the Officers belonging to that Authority and the Attributes available in the landing page of the Reporting Portal for their reporters.
This tab is divided into sections, one per document list:
All the sections are managed in the same way, as follows:
The left pane includes a search filter and the MetaColumns, with all its Attributes checked by default:
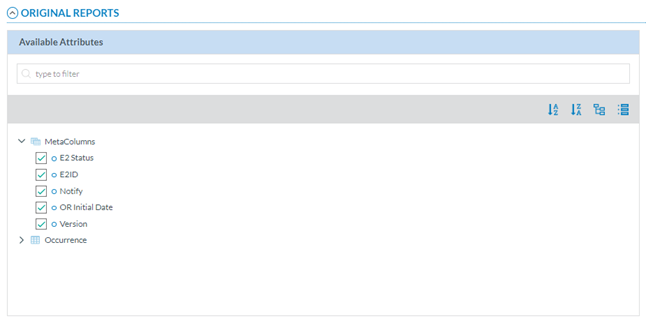
Below is the Taxonomy Central or Custom, if existing for that Authority, through which the Officer can navigate to select more Attributes. See Taxonomy for further details on its navigation.
The right pane provides the selected metacolumns and Attributes. By default, the system provides a list of metacolumns and Attributes.
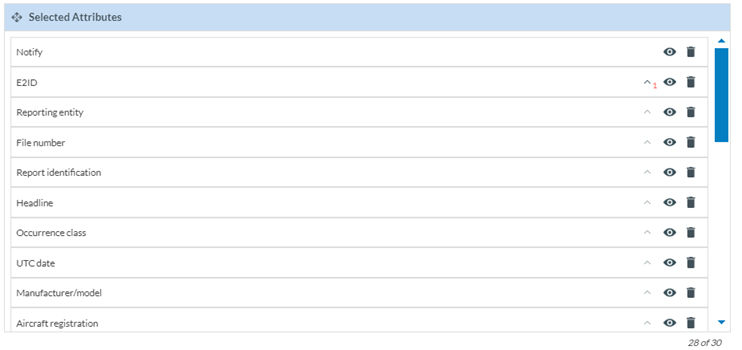
The officer can hide them through the eye icon next to each one.
The rubbish icon is to delete the Attribute of the table of reports.
The arrow next to the eye icon is to set the order of each Attribute:

Administrators can also alter their order by dragging and dropping them.
When the Administrator is updating the Attributes, before saving the updates, they can always click on the ‘Reset’ button below the list of selected Attributes so that the system will set the ‘Selected Attributes’ page to the default selection and order.
Once the Administrator has updated the selected Attributes and metacolumns, they have to click on the ‘Save’ button, and the Custom columns will be updated based on the selected Attributes.
6.2.4.10. Default Queries
This is the last tab in the Authority settings section:

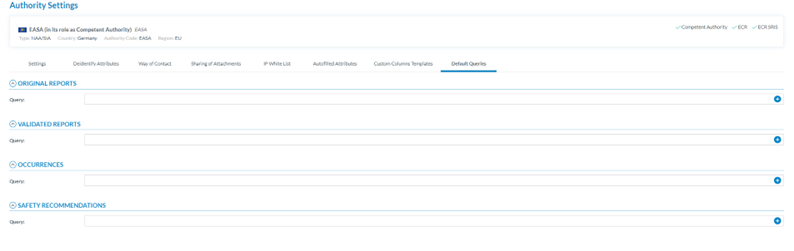
Through this page, the Administrator can select the queries that the system triggers when opening the ORs, the VRs, the OCs or the SRs menus (according to the Authority Type – NAA/SIA) of the users of its Authority.
The Administrator has to click on the ‘+’ icon of the query field, and the system will open the Select Query window:
Therein, Administrators have to select the specific query. If clicking on the ‘Save’ button, the query will be applied to users of this Authority who have not selected their own queries; if clicking on ‘Save for all’, the query will be applied to all the users of this Authority.