How to contribue o a collaboraive RefX
What is a collaborative RefX?
A collaborative RefX database is a shared reference table in which each Authority can upload and maintain the relevant data associated with a specific ECCAIRS2 entity. This setup allows all participating Authorities, European or non-European, to contribute to and all Authorities and their reporters to benefit from a unified and up-to-date dataset, improving data quality and consistency across the network.
Which collaborative RefX do exist?
Although the number of collaborative RefX databases is theoretically unlimited, E2 currently supports only the Aircraft Registration RefX. This specific RefX will be used as the primary example throughout this document. However, the principles and procedures outlined in this “How To” apply equally to any future RefX databases that may be introduced.
Which Authority users can make modification to the RefX?
Every user, whether it be an Authority user or a reporter, has access to the RefX. However, managing the Authority data is restricted to users whose roles include the Reference Table Definition permission. Typically, these are Nation Security Administrators.

How to access the management of RefX databases?
Depending on the permissions the option to manage RefX databases can be found on the home page.

1. The internal ID of the RefX, This ID will later be used when accessing the RefX via an API (this is still to be developed)
2. The name of the RefX
3. An explanation of what the RefX is about
4. The status if the RefX. This status is set by E2 System administrators and indicates that the RefX can be used
5. Possible actions on the RefX
View Table Properties
This Read Only view shows details of what the Refx is made up:

1. General Information. Displays the same details as shown in the list view.
2. RefX Database Status. Indicates the current status of the RefX database.
3. Base Entity. Shows the entity on which the RefX is based. Only attributes from this entity can be included in the RefX.
4. Triggering Attribute. Represents the primary key of the RefX database. Lookups within RefX are performed based on the value of this attribute.
5. Selected Attributes. Lists the attributes included in the RefX database. As noted, this view is read-only and cannot be modified.
6. CSV Template Download. Provides a downloadable CSV template used for uploading data into the RefX database. The template includes both the triggering attribute (see point 4) and the checked attributes (see point 5).
Table Values
Manually adding values in a RefX table is not possible. Values need to be imported using a template. This template can be obtained in the view properties of the RefX (see point 6 above).
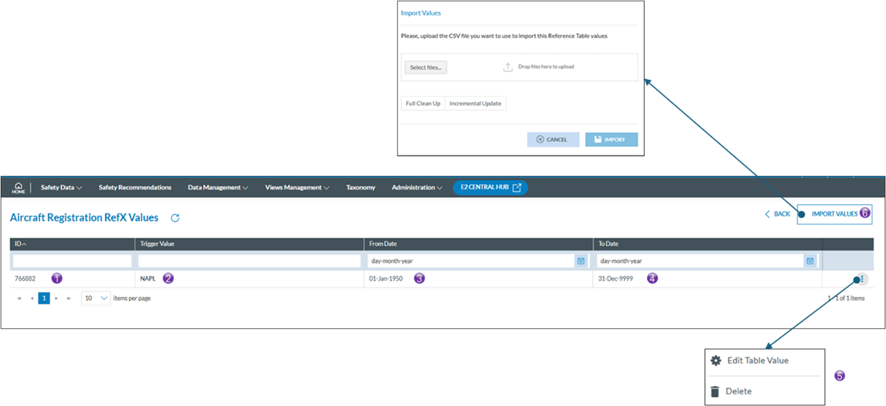
1. Internal ID of the table value
2. This is the triggering value
3. It may be that Authorities re-use aircraft registration numbers, the From date is the date as of which the aircraft was registered.
4. It may be that Authorities re-use aircraft registration numbers, the To date is the date until when the aircraft was registered. If no To date is known the 31 December 9999 entered
5. Possible actions on the selected table row
a. Edit table value
E2 allows users to manually edit table values. When clicking Edit, a modal window opens, enabling direct modification of the values. Once the changes are saved, the updated values become immediately available to all users.
Please note that these modifications are not retroactive. This means that any changes made to the reference data (RefX) will not affect values already stored in the database.
b. Delete the table value entry
Can be easily be deleted without consequence of data already in the database. Deleting values is often used when duplicates are detected.
6. Import values, opens a modal window to upload the values
Uploading values
As mentioned earlier, data can only be uploaded in the RefX table using a CSV-file according to a specific template
The CSV template
The CSV-file contains all attributes that were selected in point 5 from View Table Properties in the view reference table. Please note that the order and the naming of the column headers is NOT to be altered or changed of position. This may lead to the failing of the upload.
Each column header, except to and from date contain the attribute number between “<attribute>”

1. From_date is the date as of which the aircraft was registered, the format yyyy-mm-dd
2. To_date is the date until when the aircraft was registered. If no To date is known is to be provided 9999-12-31
3. Trigger attribute, in this Aircraft registration RefX it is attribute 244 which is the aircraft registration
4. These are all selected attributes see point 5 from View Table Properties in the view reference table
5. This fixed text is NOT to be removed
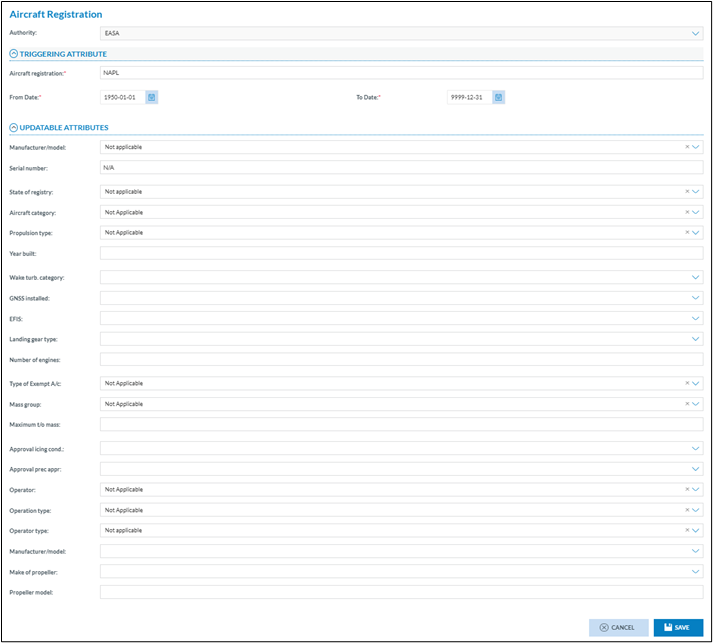
Attributes in the Aircraft Registration RefX
These are the attributes currently defined in the RefX table
· From_date (yyyy-mm-dd)
· To_date (yyyy-mm-dd)
· [Trigger Attribute] - Aircraft registration <244>
· Manufacturer/model <21>
· Serial number <254>
· State of registry <281>
· Aircraft category <32>
· Propulsion type <232>
· Year built <327>
· Wake turb. category <313>
· GNSS installed <128>
· EFIS <90>
· Landing gear type <166>
· Number of engines <209>
· Type of Exempt A/c <1090>
· Mass group <319>
· Maximum t/o mass <175>
· Approval icing cond. <39>
· Approval prec appr <40>
· Operator <215>
· Operation type <214>
· Operator type <216>
· Manufacturer/model <387>
What kind of data is to be provided in the CSV and in what format?
· The to and from dates are to be provided in this format yyyy-mm-dd
· The trigger attribute is in this case the Aircraft registration, so it needs to adhere to the attribute format, which is Upper case
· If an attribute has a Value List, then it is the ID of its value in the value list
Examples
if the propulsion type is Turbofan, then Propulsion type <232> should be 5
If Manufacturer/model is Airbus/A320 then Manufacturer/model <21> should be 2544
Although Excel seems to be the best solution to look into the CSV-file or to edit values, Excel has the tendency to change the yyyy-mm-dd into dd/mm/yyyy, if the saved, the file will fail to upload as it the dates do not respect the yyyy-mm-dd format.
Make sure that there are no empty lines at the end of the CSV-file as this will cause the file not being uploaded
The Upload
Once the CSV-file is created it can be upload using the import values
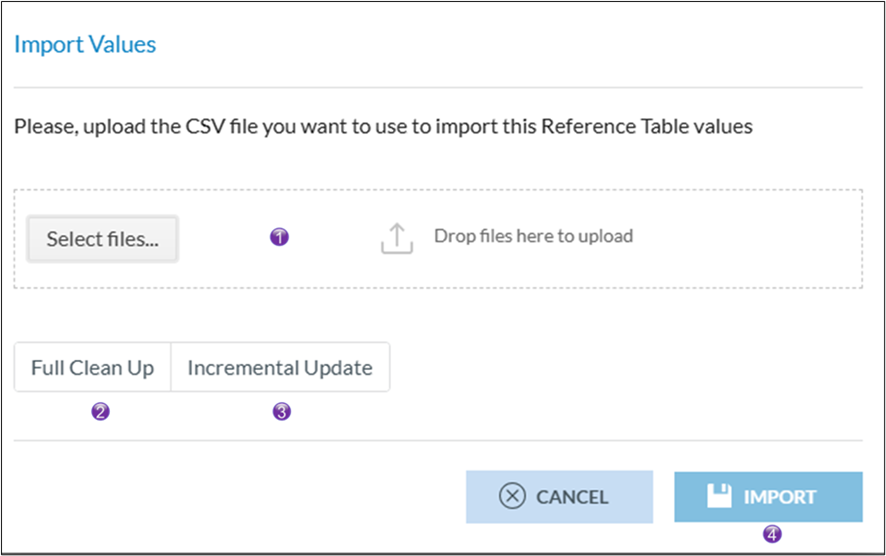
1. Either select the CSV-file to upload or drag and drop it into the box
2. A full clean up will erase ALL entries of you authority and then replace them with the entries in the selected CSV-file
3. An incremental Update will (using From_date, To_date and trigger attribute as key)
a. Add missing Values
b. Modify existing values
It will NOT remove any values, if values have become obsolete, they can be rendered obsolete by providing a To-date
4. Clicking import will start the upload of the CSV-file