7.3. Query-based notifications
E2 can notify selected users of the creation, update, deletion or sharing actions over ORs. VRs and OCs that meet the conditions of a query through query-based notifications.
This is the second tab of ‘My Account’ page:

It displays the table of query-based notifications indicating per notification row the following columns that also work as filters:
· Notification name: unique for each notification
· Source: OR, VR or OC
· Triggering action: create, update, delete or share with my Authority (only available for OCs)
· Query name: unique for each notification
· Created by: the author of the notification
· Email preferences: frequency of notification emails
When the user clicks on the last section of each notification row, the system displays the view and configuration icons for those notifications defined by the Authority administrator.

7.3.1. View the notification:
The Officer clicks on the view (eye) icon in the image above, and the system displays the View notification page:
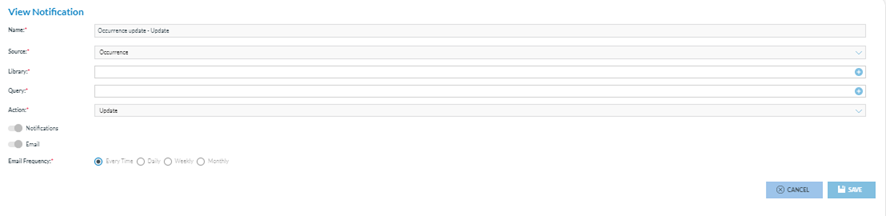
This page is not editable. It shows the following not editable fields:
· Name: unique per notification
· Source: OR, VR or OC
· Library: where the query is stored
· Query: that generates the notification
· Action: create, update, delete or share with my Authority (only available for OCs);
· Notifications toggle: to activate the notifications in the landing page.
· Email frequency toggle can be used every time, daily, weekly, or monthly.
The Configuration icon opens the ‘Set the notification preferences’ window:
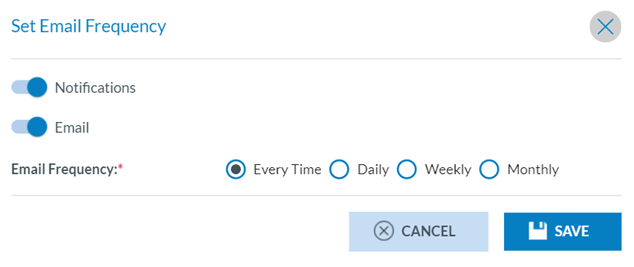
Notifications toggle: refers to the notifications appearing on the landing page of the Officer;
Email toggle: refers to the reception of an email with the notifications (Every Time, Daily, Weekly or Monthly). The Officer can update the fields and click' Save' to store the updates in the database.
7.3.2. Create a notification
Officers can create their own notifications. The Officer has to click on ‘New Notification’ above the table, and the system will display the ‘New Notification’ page:
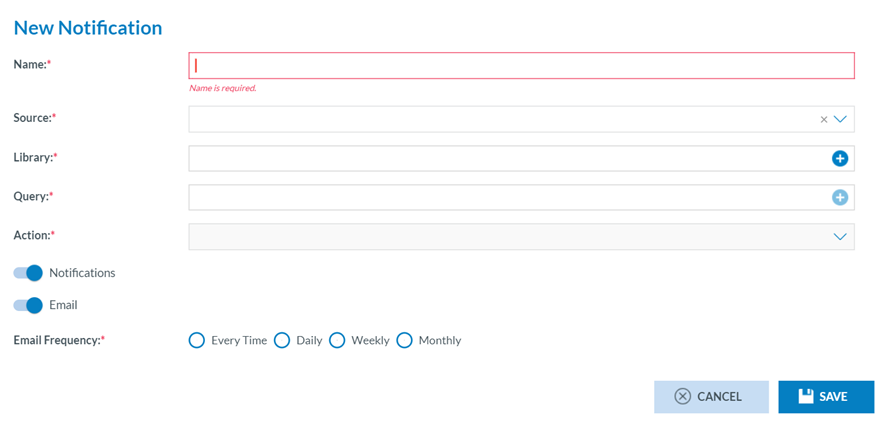
The fields are the same as in the ‘View notification’ of the previous section, but all the fields will be editable except the mandatory ‘Action’, which is only editable as soon as the source is selected in the previous field.
Name, source, library and query are mandatory.
The Officer has to fill in the Name, select a Source, and select a Library through the Library ‘+’ icon that opens the Library selection page:
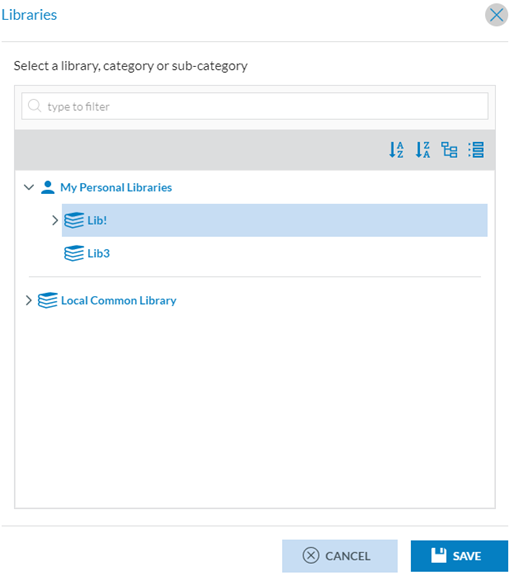
The Officer has to select a Library and click on Save.
Then, the Officer has to click on the ‘+’ icon of the Query field, and the system will display the queries available for the selected library:
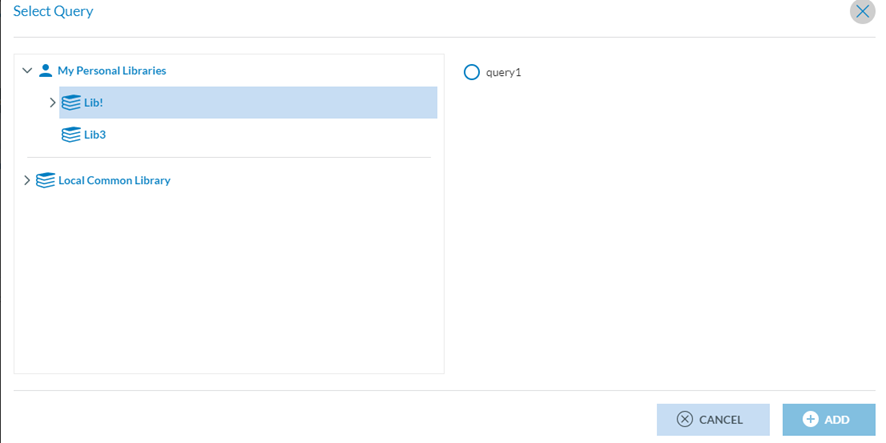
The Officer has to select a query and click on ‘Add’. Then, select the ‘Action’ from the drop-down menu with the following options:

The Officer must check one option and set the Notifications and Email toggles as needed.
By default, both toggles are activated. When the Email toggle is activated, the Officer has to set the Email frequency by checking the corresponding radio button:

And click on the Save button below. The system will save the notification with the selected query in the database and my account's list of query-based notifications.
The Officer can edit and delete the notifications that have been created.