3. Safety Recommendations
Safety Recommendation (SR): Safety recommendations derived from investigations are is-sued by accident investigation authorities to prevent accidents and incidents.
The system recognises the Officer's landing page when the Officer logs in to the E2 Web Application. See section Home (Landing page) for further details.
The Officer uses the Safety Recommendation menu on the upper left side to manage Safety Recommendations.

The Safety Recommendation menu stores the Safety Recommendations (SRs) issued by the SIAs (Safety Investigation Authorities).
Safety Recommendations Versioning
The version of an SR is indicated by two figures, separated by a dot:
· Draft Version:
ü Format: It is always represented as 0.0, regardless of the previous and next ver-sion.
ü Visibility: It can only be seen by the user currently editing the SR.
· Minor version:
ü Format (e.g. 5.1)
o It is determined by the digits after the dot.
o It always has a 1-9 after the dot
ü Visibility: It can only be seen by users who belong to the SR’s responsible Entity (Authority)
· Major version:
ü Format (e.g. 5.0)
o It is determined by the digits before the dot.
o It always has a 0 after the dot
ü Visibility: If a SR is shared, this version can be seen by other Authorities
Safety Recommendations can be saved as drafts, minor, or major versions.
Only major versions can be shared with other Authorities.
2.3.1. Management of SRs
To access SRs, Officers can click on Safety Recommendations in the navigation menu, and the system will display the list of SRs:

The SRs list is divided into columns. Each column refers to an attribute/metadata field of the SR. The columns are set by default. Each row of the SR list is clickable.
The Officer can alter the position of each column by dragging and dropping them.
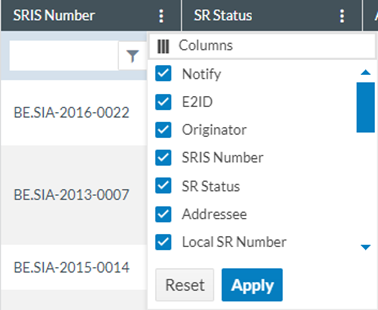
Next to the title of each column, there is 3 points menu through which the Officer can filter the columns to be displayed:
Below each column, there is a drop-down menu through which the Officer can filter the data for the specific column:

This drop-down menu will display operators according to the attribute or field type. Addition-ally, for text or alphanumeric columns, filtering can be case-sensitive .
.
The My Account-Custom columns tab can also update the attributes and order. See the Custom columns section for further details on their update.
2.3.2. Status filters and status
Above the list of SRs, on the right side, the system displays the filter tabs:

The list of results will restrict the SRs based on the selected tab:
· My Drafts: refers to SRs the Officer is editing. The list of SRs will show ‘Draft’ on the ‘E2 Status’ column and cannot be edited by another Authority Officer.
· In Progress: refers to ‘Open’ SRs. The list of SRs will show ‘Open’ on the ‘E2 Status’ column, and if another Officer is editing the SR, it will show a ‘padlock’ icon.
· All: refers to all the SRs belonging to the Officer’s Authority regardless of status.
· ECR-SRIS refers to all SRs shared with the ECR-SRIS by all the Authorities belonging to the ECR.
The status of the SRs can be the following:
· Draft: It is an SR saved as ‘Draft’ by the specific Officer. They can only be accessed by the Officer who is currently editing the report.
· Open: Any Officer of the Authority can edit an open SR.
· Archived: Officers can archive the list's SRs. Once archived, they can be restored to ‘Open’ or deleted.
· Published: The Officer published this SR, which will be visible on the SRIS2 Public portal.
2.3.3. 3-dot menu for an SR – SRs features
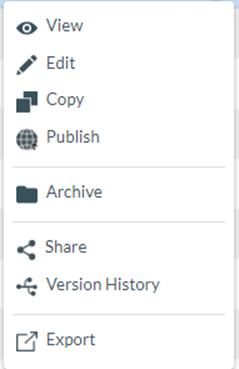
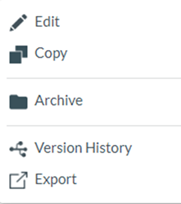
On the last section of each row, the system displays a 3-dot menu with different options depending on the status of the SR:
2.3.3.1. View
When clicking on ‘View’ in the 3-dot menu (or double-clicking in the list on any row), the sys-tem will display the content of the SR with the view the Officer has saved in ‘My Account’. See Favourite Views section of My Account for further details.
Otherwise, the system displays a page where the Officer has to select the specific view:

Once a view is selected, the SR is opened in view mode.

The Officer can share the SR by clicking the ‘Share’ button as explained in the Share section or publish it by clicking the ‘Publish’ button described in the Publish section.
2.3.3.2. Edit
This option is only available for ‘Open’ SRs belonging to the Officer’s Authority and not blocked. It is also available for ‘Published’ SRs. It is unavailable for those SRs shared with the Officer’s Authorities from other Authorities or the ECR-SRIS.
When the Officer clicks on the ‘Edit’ option of the 3-dot menu of the specific SR of the list of SRs, the system will display its content with the view the Officer has saved in ‘My Account’. See Favourite Views of My Account section for further details.
Otherwise, the system displays a page where the Officer has to select the specific view to open the SR:

Officers have to select a view from this menu, and the system will display the ‘Edit SR’ page with the information of that SR:
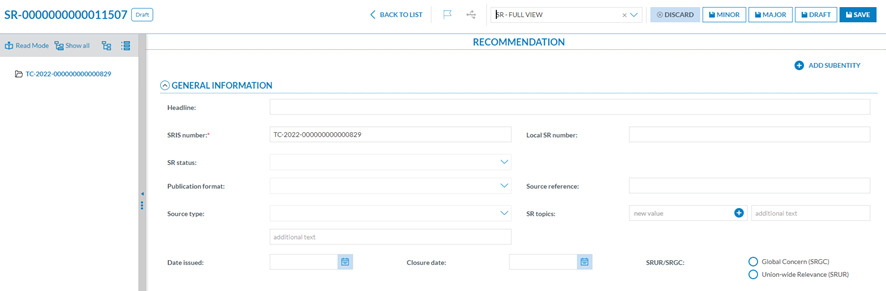
The page works like the View page explained in the previous section, with the following differences:
· The fields are editable, and the SRIS number is mandatory, so it cannot be left empty.
· There is no ‘Actions’ button. Instead, the system provides the following buttons de-pending on the status of the SR:
ü For Open SRs:
o Save: to save the updates of the draft and keep on updating the SR.
o Minor: to save the SR as a minor version
o Major: to save the SR as a major version
o Draft: to save a draft version
o Discard: to delete the draft. It displays a confirmation message. If the Officer confirms the action, the system will return to the list of SRs, and the updates will be lost.
ü For Published SRs:
o Save as Minor: to save the SR as a minor version
o Save as Major: to save the SR as a major version
2.3.3.3. Copy
All SRs can be copied or duplicated except for blocked open SRs.
When the Officer clicks on the ‘Copy’ option of the 3-dot menu of the specific SR, the system will display the Copy SR page with the view the Officer has saved in ‘My Account’. See Favourite Views of My Account section for further details.

Otherwise, the system displays a page where the Officer has to select the specific view to open the copied SR:

This is similar to the editing page. The Officer can update the necessary fields, making sure to change the SRIS number, which cannot be repeated, and click on one of the saving options. See the previous sections for further details on the saving options for Open and Published SRs.
For Archived SRs, there will not be a discard button, and the saving options will be the following:
· Minor, Major and Draft buttons: to save the specific versions and close the SR.
2.3.3.4. Share
Only SRs saved as a major version can be shared with ECR. Officers have to click on the Share option of the 3-dot menu of the SR to be shared, and the system will display the Sharing window:
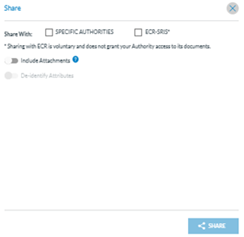
This window is also accessible through the ‘Share’ button when viewing the SR. See the View section for further details on this button.
Officers can check the ECR-SRIS checkbox and/or the ‘Specific Authorities’.
If the ‘Specific Authorities’ checkbox is checked, the system will display the Authorities drop-down menu below:
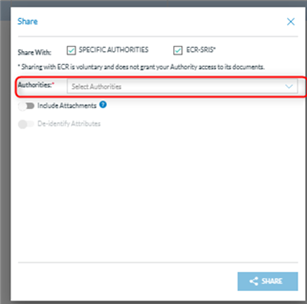
In that case, officers must select the Authorities with whom they wish to share the SR.
· The Officer can choose whether they want to share the attachments by enabling the toggle.
ü All the attachments will be shared with the Authorities previously selected in the Authority Settings option ‘Sharing of Attachments’ if enabled.
Once Officers click the ‘Share’ button, the SR will be shared with the selected Authorities and enabled to publish.
2.3.3.5. Publish
Only Open, major versions shared to ECR-SRIS and not blocked SRs can be published. It can be done either through the ‘Publish’ button displayed when viewing the SR (See View section for further detail on this button) or through the ‘Publish’ option of the 3-dot menu of the specific SR at the list of SRs. Thus, Officers can click the ‘Publish’ button or option, and the system will display a confirmation message.
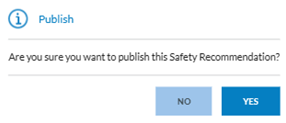
If Officers confirm the action, the system will publish the SR, and the E2 Status will turn to ‘Published’ for the specific SR in the list of SRs. Once published, the SR becomes visible in the SRIS2 Public portal.
2.3.3.6. Unpublish
Only published SRs can be unpublished. Officers can do it through the ‘Unpublish’ option of the 3-dot menu of the published SRs of the list or through the ‘Unpublish’ button displayed when viewing the SR (See View section for further detail on this button).
The system will display a confirmation message. If Officers confirm the action, the system will unpublish the SR, and its E2 Status will be updated accordingly in the list of SRs. Once un-published, the SR is not visible in the SRIS2 Public portal.
2.3.3.7. Archive
Only Open (i.e. not blocked) SRs can be archived. Officers can click on the ‘Archive’ option of the 3-dot menu of the specific SR, and the system will display a message indicating that the SR has been archived. The list of SRs will be updated accordingly, and the E2 status of that SR will be ‘Archived’.
2.3.3.8. Restore
Only Archived SRs can be restored. Officers can click on the ‘Restore’ option of the 3-dot menu of the specific archived SR, and the system will display a message indicating that the SR has been restored. The list of SRs will be updated accordingly, and the E2 Status of that SR will turn to ‘Open’.
2.3.3.9. Delete
Only Archived SRs or Draft SRs can be deleted. Officers can click on the ‘Delete’ option of the 3-dot menu of the specific archived SR, and the system will display a message indicating that the SR has been successfully deleted. The list of SRs will be updated accordingly, and it will no longer include the deleted SR.
2.3.3.10. Version History
Officers can see the version history of all SRs. Officers have to click on the ‘Version History’ option of the 3-dot menu of the specific SR, and the system will display a modal view that shows all the changes that the SR has been through, including modification dates and users, as well as changes in the attributes, if edited.

Officers can also restrict the Changes through the Actions drop-down menu and filter the result only to the desired action/s (i.e. Edited), and the window will be updated accordingly.
Actions: All the Actions a document can go through are registered in the Version History with a different colour:
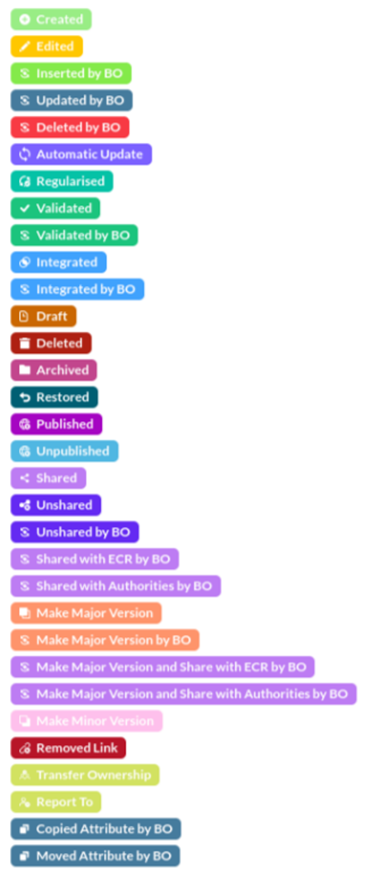
Together with each action, the Modification Date and the user account of the user who made the action are included. For some of the actions, such as ‘Edit’, a ‘Show Changes’ section is included, showing the attributes that were added, changed, or deleted.
2.3.3.11. Export
The Officer can export one or more SRs in different file formats.
· To export one report: This 3-dot menu option works for each SR of the list.
· Export in bulk: The export option can be performed by selecting multiple SRs on the list and clicking the File drop-down menu above the list of reports.
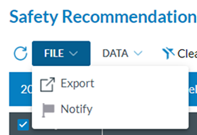
The system displays the Export window once they select the specific SRs and click on Export. (The window is the same for individual exports):
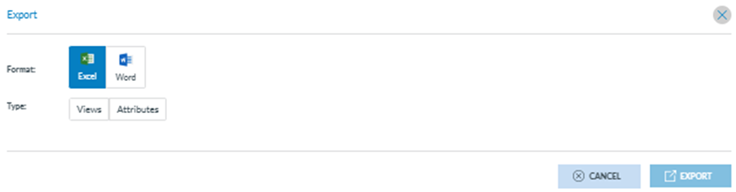
Officers can export SRs to Word and Excel format.
· Excel Format: When it is selected, the system will display:
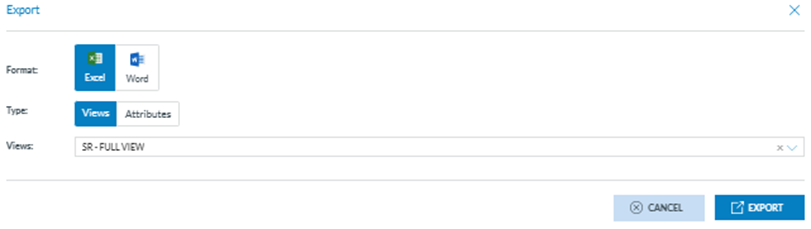
ü Views
A view is a template used to view the data; this export will take the same attribute se-lection in the same order as displayed in the view. The system displays the views drop-down menu with all the views available for the Officer, and they must select the specific view to export the SRs, i.e.:
Then, click on the ‘Export’ button. The system will send an email notification to the Officer with a link to the export file.
ü Attributes
When the Officer selects ‘Attributes’, the system will display the Attributes List drop-down menu and the ‘New Attribute List’ button:
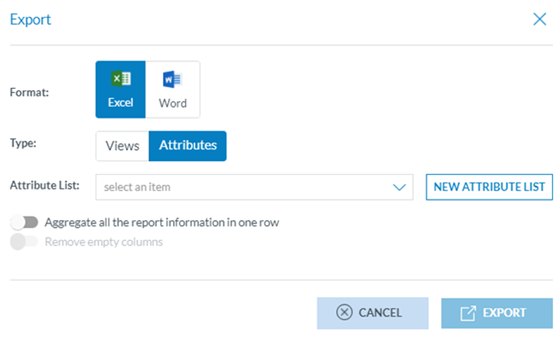
An Attribute List is an export profile available for the Officer, where they can save ex-port preferences. If no Attribute List item is available, the Officer can create one on the fly.
The Attribute Lists can also be created through the ‘My Account’ menu ‘Export by Attribute’ tab. See section Export by Attribute for details.
When the Officer clicks on ‘New Attribute List’, the system will display the Attributes List pop-up window:
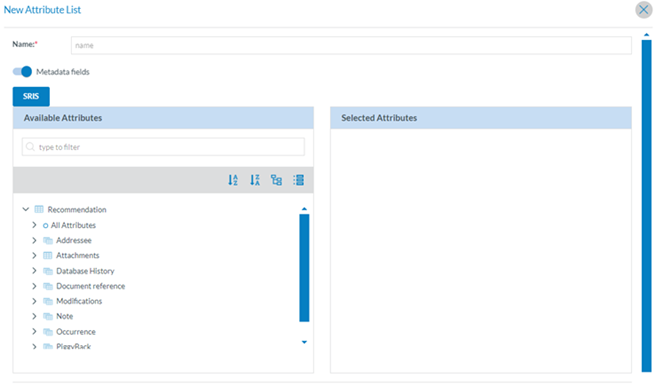
The Officer has to fill in the Name field, which must be unique for each Attribute List. The metadata fields check is activated by default. The Officer can deactivate it so the metadata of the selected SRs will not be exported.
Below, the system displays the taxonomy tree, through which the Officer can navigate and select the specific attributes they want to be exported.
The arrows unfold the items contained under each Entity. See the Taxonomy browser section for further details on its navigation. The Officer can also write in the Filter field to find the specific attributes. The Officer then checks the specific one/s they need, and they will appear under the ‘Selected Attributes’ title, i.e.:
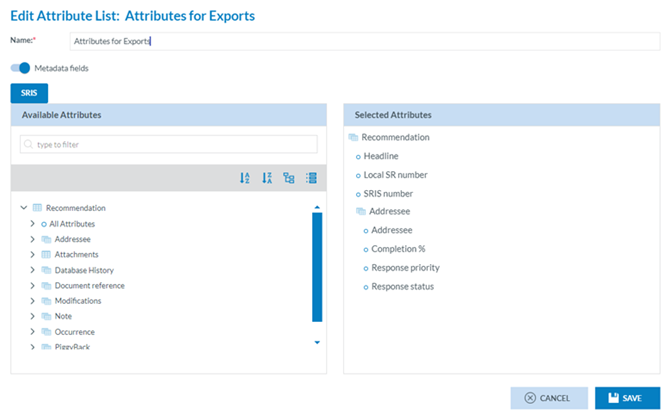
The Officer has to click on ‘Save’, and the system will return to the Attributes List selection window:

The Officer must select the corresponding created ‘Attribute List’ from the drop-down menu and decide whether to ‘Aggregate all the report information in one row’ or ‘Remove empty columns’. Then, the Officer clicks on ‘Export’, and the system will email the Officer’s address to send the Excel file with the SR/s.
ü Word format
When exporting SRs to a Word format, the system picks the data in the SR and transforms it into a Word Template to generate ready-to-distribute documents.
When it is selected, the system will display: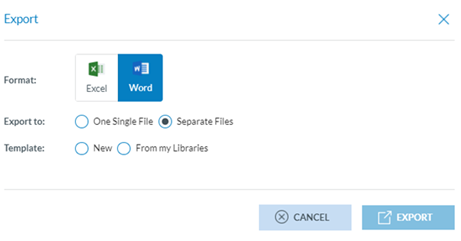
o Export to radio button:
We present two alternative options: ‘One Single File’, if the Officer wants a compressed file containing one Word document for all the reports or ‘Separate Files’, if the Officer wants a compressed file containing one Word document per report.
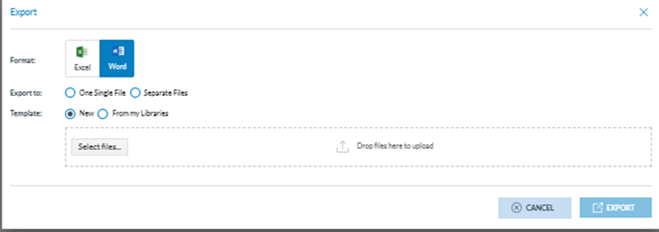
o Template radio button:
When the Officer selects ‘New’, the system will display a files section where the template can be uploaded through the ‘Select files’ button. The Officer can also drag the file/s and drop them in this section.
Officers can select ‘From my Libraries’ if a template is already available in the libraries available to the Officer.
The Officer must upload the template file and click ‘Export’. The system will email the Officer a download link when the export is ready.
From my Libraries: when the Officer clicks on this option, the system will display the Libraries pop-up window:

The system will display below ‘My Personal Libraries’ with the tree of Libraries available to the Officer.
The Officer will unfold the libraries through the arrows, select the specific template, and click on ‘Export’. Then, the system will email the Officer’s address so that the Officer can send the Word file with the SRs.
Nonetheless, the creation of word templates is also managed through the Data Management menu, ‘Word Templates’. See section Create a Word Template for further details.
2.3.4. Creation of an SR from scratch
Once in the SRs list, the Officer can click on ‘New Safety Recommendation’ above the list of SRs:

The system will display the view the Officer has previously defined through ‘My Account’. See Favourite Views of My Account section for further details, i.e.:
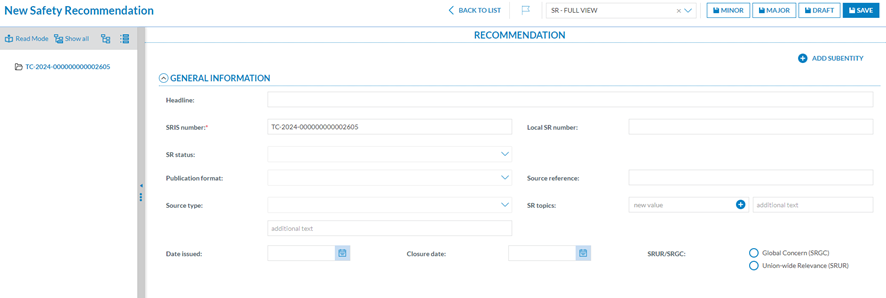
If no View had been previously defined on ‘My Account’, the Officer has to select one on the ‘View’ drop-down menu. The Officers have to fill in at least the mandatory fields. The management of this form is like the editing page. See the Edit section for further details.
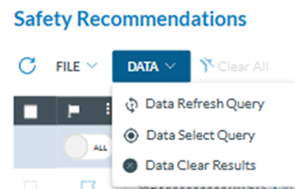
2.3.5. Data Menu – Re-execution of Queries
Next to the File menu, above the list of SRs, the system displays the Data menu:
Data select Query: This button displays a modal window with the libraries available to the Officer to choose a query:
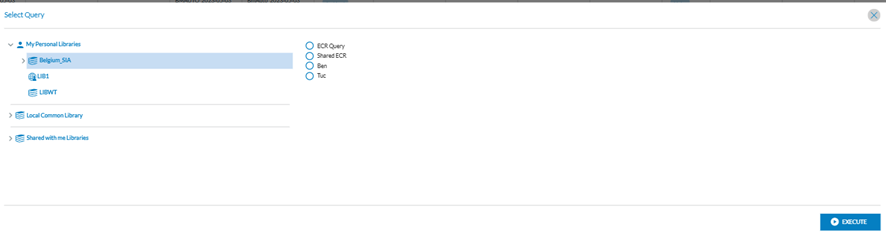
The Officer has to navigate the available libraries, select a query, and click ‘Execute’.
The system will update the list of SRs based on the query conditions.
The last 10 queries executed through this button will be available through the ‘Data Refresh Query’ option.
Data Refresh Query: When the Officer has selected queries through the ‘Data Select Query’, as explained above, the system will show them in the Re-Execute Query window where the Officer will select a specific query and will click on ‘Execute’:
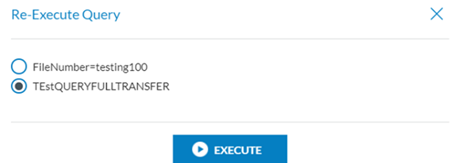
The system will execute the query and update the results list based on the selected query.
Data Clear Results: This button deletes the application of the queries in the list of results. When the Officer clicks on it, the system updates the list of SRs, removing all the filters and presenting all the results.
 Refresh icon: to refresh the page.