4.2 Word Templates
Word Templates in ECCAIRS2 are used to export reports in Word format. The Word template has to include the complete path of the attributes according to the Authority’s released taxonomy so that the system can fill each of the template fields with the corresponding attribute value in the report.
Each table in the Word Template corresponds to an entity in the taxonomy. i.e.:

The Word Template will have tags included in token « » with the following characteristics:
· Attribute: A
· Attribute custom: AC
· Entity: E
· Separation token: .
· ID: TaxonomyCode
Examples:
· «E1.A1» -> ENTITY.1.ATTRIBUTE.1
· «E1.E45.AC1» -> ENTITY.1.ENTITY.45.ATTRIBUTES_CUSTOM.1
Depending on the attribute data type, it should be indicated what part of the attribute will be included in the Word Template:
|
Attribute Data Type |
Field |
Example |
|
Date, Time, Text, Alphanumeric, Number |
content (default) |
«E1.A1» |
|
Code |
content (default) |
«E1.A1» |
|
Code and Additional Text |
content (default) additionalText |
«E1.A1» «E1.A1.additionalText» |
|
Code or Alternative Text |
content (default) alternativeText |
«E1.A1» «E1.A1.alternativeText» |
|
Decimal |
content (default) unit |
«E1.A1» «E1.A1.unit» |
|
ECCAIRS Resource Locator |
filename (default) description |
«E1.A1» «E1.A1.description» |
|
ECCAIRS Embedded Data |
eccairsNumber (default) |
«E1.A1» |
|
ECCAIRS Data Link |
eccairsNumber (default) |
«E1.A1» |
|
Latitude & Longitude |
|
«E1.A1.degree» «E1.A1.minutes» «E1.A1.seconds» «E1.A1.direction» |
Once the Word template is configured, the Officer can save it into E2 libraries. This is the second menu of Data management:
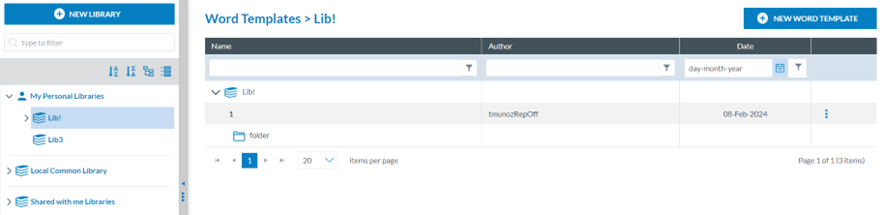
4.2.1 Create a Word Template placeholder
To create a Word Template (from now on WT), the Officer has to click on ‘New WT’ at the top of the page, and the system will display a modal window to create it:
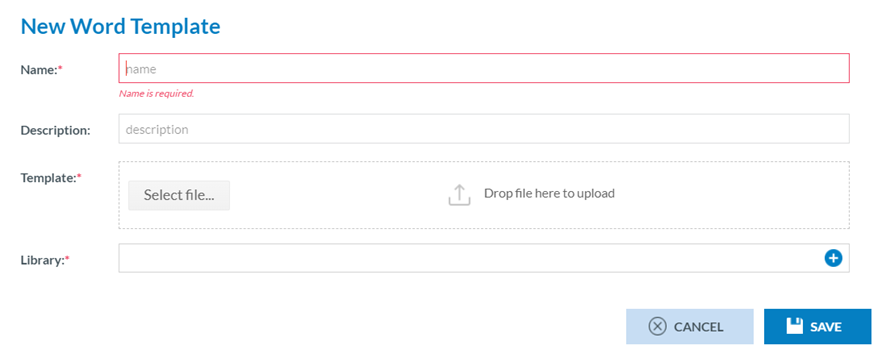
The Officer has to fill in the Name that has to be different from the existing ones, upload the needed Word Template file to the Template section through the ‘Select file’ button or drag and drop it to the section and select a Library, a category and a subcategory.
The description field is optional.
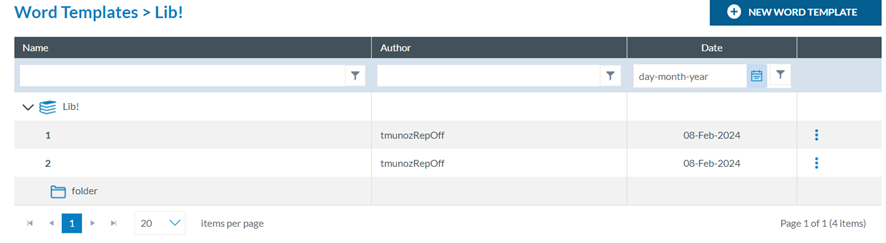
Then, the Officer has to click on the ‘Save’ button. The system will save the WT in the database, return to the WTs page, and add the specific WT to the table of WTs.
The saved WT will be available in the export options for ORs, VRs, and OCs in Word format. See the Export section, which applies to all reports, for further details.
4.2.2 Management of Word Templates
4.2.2.1 Edit a WT
The Officer has to double-click on the Name of the specific WT of the list of WTs or click on the ‘Edit’ option of the 3-dot menu of the WT on the list, and the system will display the Edit window:
The Name field cannot be updated; only the other fields of the WT, including the library, can be updated.
The Officer has to update the corresponding fields, and click ‘Save’. The system will save the updates in the database and return to the WT menu with the updated list of WTs.
4.2.2.2 Copy a WT
The Officer has to click on the ‘Copy’ option of the 3-dot menu of the WT on the list, and the system will display the Copy WT window:
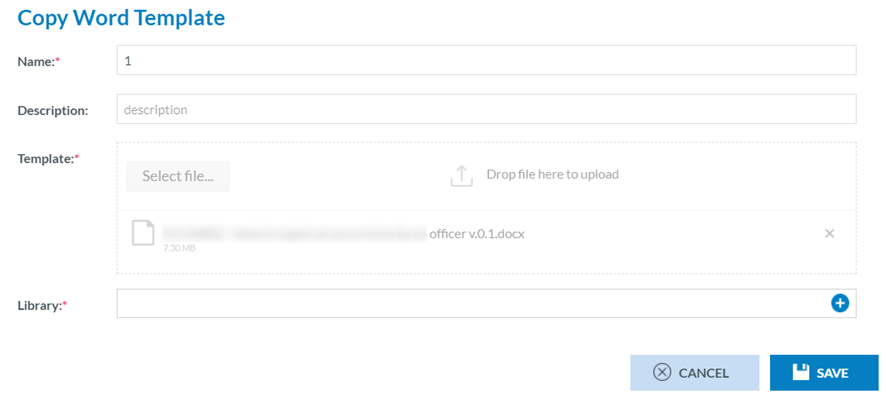
The management of this window is the same as the editing option above, with the only difference being that the Name field can be updated. The Officer can select a library different from where the WT was stored previously.
4.2.2.3 Share a WT
The Officer has to click on the ‘Share’ option of the 3-dot menu of the WT on the list and the system will display the Share WT window:

This option works as described in the ‘Share a query’ section Data Management-Queries -Management of queries – table of queries with the only difference being in the information shared.
4.2.2.4 Download a WT
The Officer has to click on the ‘Share’ option of the 3-dot menu of the WT on the list of WTs, and the system will download the WT.
4.2.2.5 Delete a WT
The Officer has to click on the ‘Delete’ option of the 3-dot menu of the WT on the list of WTs, and the system will delete it from the database and update the list of WTs accordingly.