4. 1 Queries
Queries are a powerful tool the officer can use to filter occurrences, validated reports, and original reports through various stages on the platform. The Officer can:
· Filter the number of reports displayed based on the Officer’s selected parameters.
· Export the result of a query to JSON or CSV formats.
4.1.1 Create a query
The Officer can access the Query Builder through the 'Data Management’ menu at the top of the page, then click on the 'Queries' option (Data Management > Queries).
In this section, the Officer will be able to create queries, share them with other users or manage queries shared by other users with the Officer.
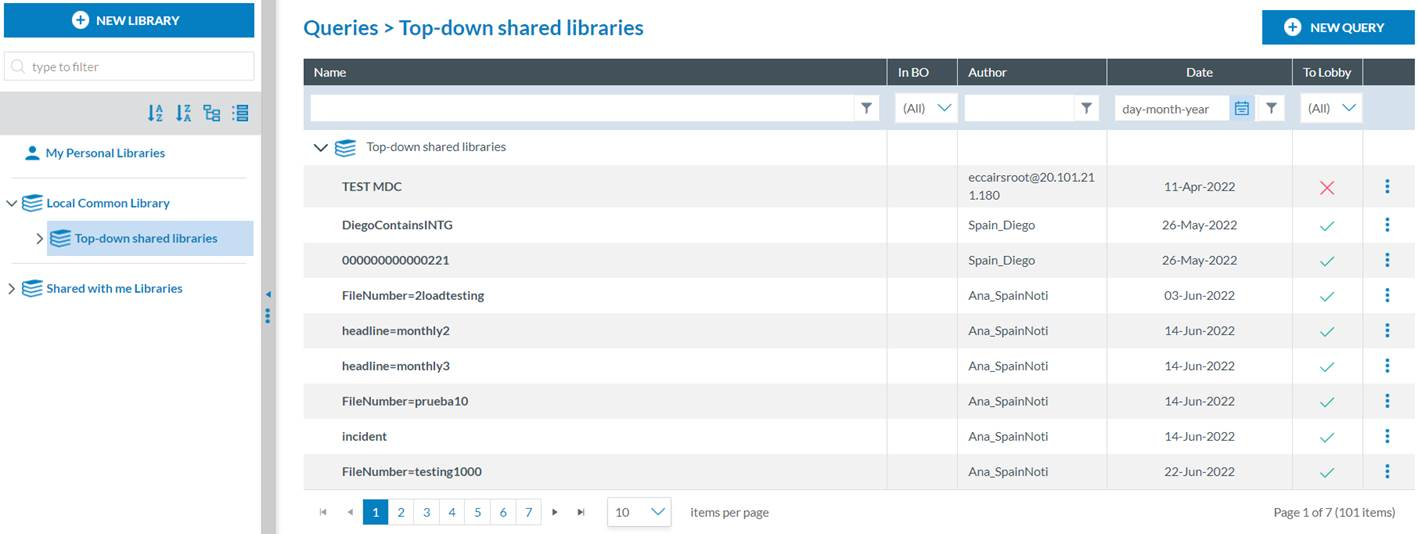
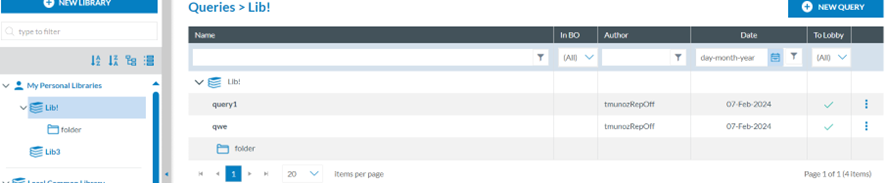
‘In BO’ column indicates whether the query is included in a batch operation. The Officer can see the BOs using the query by hovering over the ‘edit properties’ option in the 3-dot menu.
‘To Lobby’ column, with values yes or no, filters if the query can be exported between UAT and PROD environments or between Authorities depending on whether the query to be exported has custom attributes. If it has custom attributes, it cannot be exported.
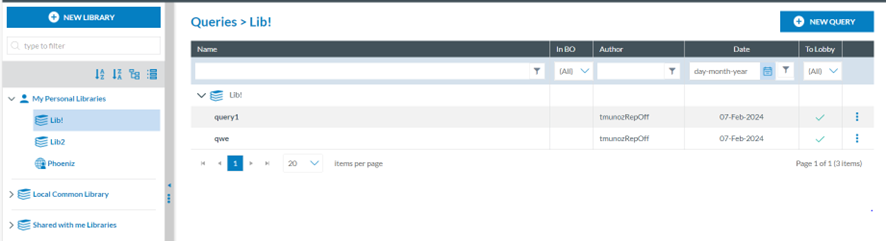
The Officer will have a library tree on the left panel, including all the libraries available to the Officer. Those are the folders that can have categories and subcategories. Find more information about Libraries in Query libraries section.
To view the Queries inside a library, category or subcategory, the Officer has to click on the corresponding folder. The right side of the window will display the list of queries available for that selected folder:

The Officer can click the 'New Query' button to create a new one in the selected library or folder. A new window will be displayed with the Query Builder:
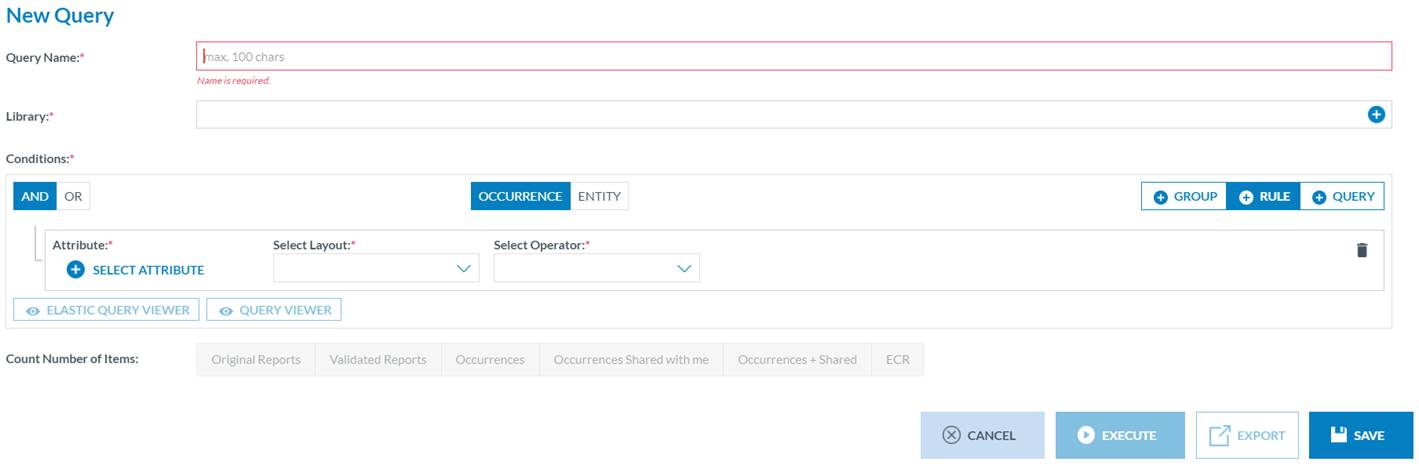
The Query Builder allows the Officer to build queries to search ORs, VRs, and OCs with attributes or metadata fields that meet the given conditions.
The queries are executed against the reports indexed in ElasticSearch.
The Officer has to fill in the unique Query Name for each Officer query and select a Library where to store the query. See Query libraries section for more information on the libraries.
Before executing, exporting or saving a query from the Query Builder, it is required to select over which reports the query will be executed on the ‘Count Number of Items’ section:

They will be activated as soon as the mandatory fields of the query are filled.
ECCAIRS queries (based on ECCAIRS Taxonomy)
· Original Reports, including the ‘Archived’ ones
· Validated Reports, including the ‘Archived’ ones (Draft versions are not included)
· Occurrences: including ‘Archived’ ones (Draft versions are not included).
· Occurrence shared with me: Occurrences shared by other Authorities, specifically with my Authority (so not the ones shared with us as they were shared to the ECR)
· Occurrence + Shared: My major occurrences and the ones shared by other Authorities, specifically with my Authority
· ECR: All occurrences shared to the ECR by mine and other Authorities (major versions only)
4.1.2 Query conditions – Attributes and metadata
Once in the Query Builder, the Officer has to select the query parameters to set each rule by clicking on ‘Select Attribute’ under the ‘Conditions’ section.

The system will display a modal window where the Officer can choose between:
· Attributes: Any of the attributes available for the Officer’s Authority Taxonomy:
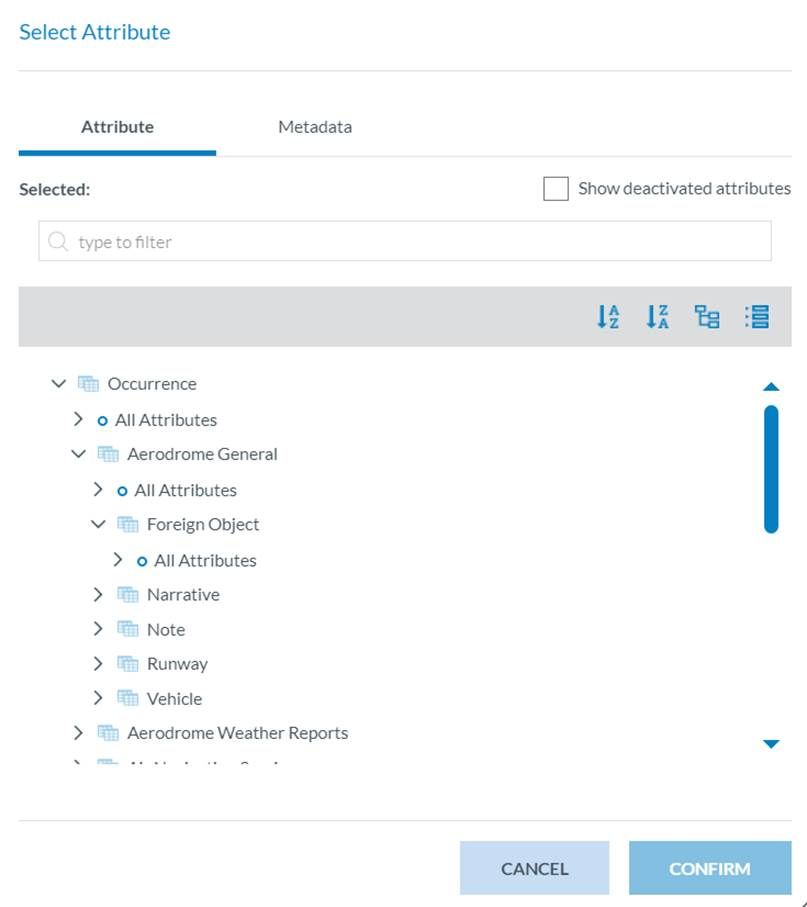
· Metadata: additional information found at the database level that can be relevant for the Officer to query by:
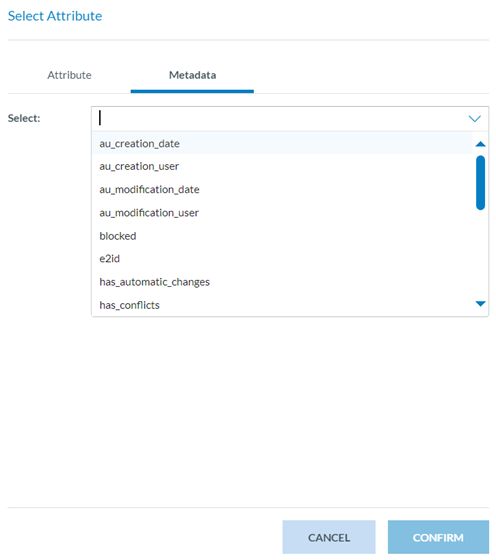
· e2id – E2 identifier of ORs, VRs or OCs
· Audit fields – they refer to the information of the specific version of the report:
ü au_creation_date: the date when the report has been created
ü au_creation_user: user who has created the report
ü au_modification_date: the last date the report was updated
ü au_modification_user: the previous user that updated the report
ü blocked – it is set to TRUE when a batch operation blocks the report to prevent the users from editing it
· has_automatic_changes – it is set to TRUE when the report has had any automatic changes from the OR that no Officer has acknowledged yet.
· has_conflicts – it is set to NOT NULL if the report (VR or OC) has any conflicts coming from an OR update.
· organisation name – the name of the Organisation of the reporter, if applicable.
· personal_details – it is set to NOT NULL if there is any personal information from the reporter.
· receiving__date – it determines when the OR was sent to the Authority.
· reporting_entity_id – Authority to which the report belongs.
· reporting_method – what reporting method was used to report the OR
· responsible_entities_id – id of the responsible entity (Authority in E2)
· status – the report status, as described in section 2.1 Occurrences lifecycle (OR to OC).
· Version – version number
4.1.3 Query structure
The queries are made using at least one rule. A rule is a condition the search made by the query has to meet.
Queries can also include various rules and groups of rules. A query can include one or more existing queries (subqueries). Queries cannot be edited while they are included as a subquery of another query.
A rule contains a condition to be met concerning an attribute or metadata field. Layouts and operators vary depending on the attribute and metadata field type, i.e.:
If the Officer selects ‘Air temperature’ as an attribute, the system will display ‘Value’ as the unique possible selectable layout and the Select Operator filter:

And will generate a ‘Decimals’ field to be filled out by the Officer.
Attributes
· Alphanumeric and Text attributes or metadata fields can be searched in documents by a complete word using the layout ‘Value (Word)’ or by a string of characters using the layout ‘Text’. i.e.:
ü Value (Word) in ‘Aircraft’ (complete word)
ü Text begins with ‘Airc’ (string of characters)
|
Data Type |
Layout |
Operators |
|
Alphanumeric, Text |
Value (Word) |
equal does not equal in not in is null is not null |
|
Text |
in not in begins with does not begin with ends with does not end with is null is not null |
· Code attributes can be searched in documents using layouts:
ü Value: selecting one or more values of the value list
ü Level: when the value list has more than one level, selecting all the values of a branch (level) in the value list, starting from the selected value(s)
ü Alias: when the value list has alias(es), selecting one of the them
|
Data Type |
Layout |
Operators |
|
Code |
Value |
equal does not equal in not in is null is not null |
|
Level * if the Value List has more than one level |
equal does not equal in not in is null is not null |
|
|
Alias * if the Value List has alias(es) |
in not in begins with does not begin with ends with does not end with |
· Code and Additional Text, Code or Alternative Text attributes can be searched in documents using layouts:
ü Value: selecting one or more values of the value list
ü Level: when the value list has more than one level, selecting all the values of a branch in the value list
ü Alias: when the value list has alias(es), selecting one of them.
ü Text: typing a string of characters
|
Data Type |
Layout |
Operators |
|
Code and Additional Text, Code or Alternative Text |
Value |
equal does not equal in not in is null is not null |
|
Level * if the Value List has more than one level |
equal does not equal in not in is null is not null |
|
|
Alias * if the Value List has alias(es) |
in not in begins with does not begin with ends with does not end with |
|
|
Text Used to search in the Text part of the attribute |
in not in begins with does not begin with ends with does not end with is null is not null |
· Date and DateTime attributes can be searched in documents using layouts:
ü Value: when searching by date or range of dates
ü Date of the Month (1-31): when searching by the day of the month
ü Date of Week (1-7): when searching by the day of the week
ü Month (1-12): when searching by the month
ü Year: when searching by year
|
Data Type |
Layout |
Operators |
|
Date, DateTime |
Value |
equal does not equal less than less or equal greater than greater or equal between not between |
|
Day of the Month (1-31) |
equal does not equal less than less or equal greater than greater or equal between not between |
|
|
Day of Week (1-7) |
equal does not equal less than less or equal greater than greater or equal between not between |
|
|
Month |
equal does not equal less than less or equal greater than greater or equal between not between |
|
|
Year |
equal does not equal less than less or equal greater than greater or equal between not between |
· Time attributes can be searched in documents using layouts:
ü Value: when searching by hours and minutes
|
Data Type |
Layout |
Operators |
|
Time |
Value |
equal does not equal less than less or equal greater than greater or equal between not between is null is not null |
· Latitude and Longitude attributes can be searched in documents using layouts:
ü Value: when searching by degrees, minutes and seconds or range of them
|
Data Type |
Layout |
Operators |
|
Latitude, Longitude |
Value |
equal does not equal less than less or equal greater than greater or equal between not between is null is not null |
· Decimal attributes can be searched in documents using layouts:
ü Value: when searching by a decimal number
|
Data Type |
Layout |
Operators |
|
Decimals |
Value |
equal does not equal less than less or equal greater than greater or equal between not between is null is not null |
· Number attributes can be searched in documents using layouts:
ü Value: when searching by an integer number
|
Data Type |
Layout |
Operators |
|
Number |
Value |
equal does not equal less than less or equal greater than greater or equal between not between is null is not null |
· ECCAIRS Resource Locator attributes can be searched in documents using layouts:
ü File Name: when searching by the name of an attached field
ü Description: when searching by the description given in the attached field
|
Data Type |
Layout |
Operators |
|
ECCAIRS Resource Locator |
File Name |
equal does not equal in not in is null is not null |
|
Description |
equal does not equal in not in is null is not null |
· ECCAIRS Embedded data attributes can be searched in documents using layouts:
ü Eccairs number: when searching the former document’s Eccairs number
|
Data Type |
Layout |
Operators |
|
Eccairs Embedded Data |
ECCAIRS number |
in not in begins with does not begin with ends with does not end with is null is not null |
· ECCAIRS Data link attributes can be searched in documents using layouts:
ü Eccairs number: when searching the former documents Eccairs number
|
Data Type |
Layout |
Operators |
|
Eccairs Data Link |
Eccairs number |
in not in begins with does not begin with ends with does not end with is null is not null |
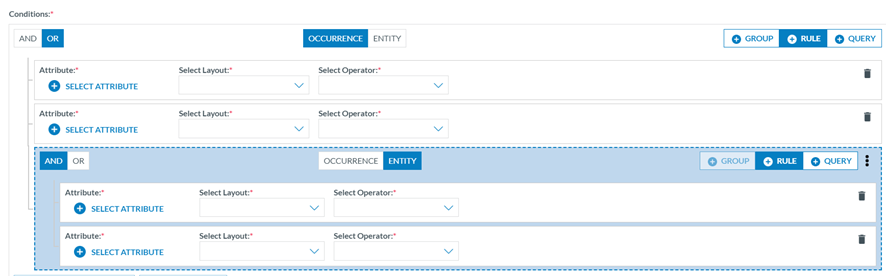
Groups can include one or more rules and one or more groups, combined with AND/OR clauses. The Officer can click on the ‘Add Rule’ button to add more rules. For groups, on the ‘Group’ tab. If the Officer wants different sets of rules to be evaluated together, the Officer has to click on the 'Add group' button. The Officer can also add groups inside other groups.
Groups and rules can be rearranged, dragging and dropping them where needed.
At the top centre of each group are the OCCURRENCE/ENTITY alternative tabs, which show whether conditions of the given attributes shall be met in any instance of the entity or if the conditions shall be met in the same instance of the entity. Thus, when specifying restrictions in a query, the restrictions can be evaluated across all the entities of a record at once OR can be evaluated to each entity of a record one by one. By default, the restrictions of a query will be evaluated across all the entities of a record at once, with the OCCURRENCE option selected by default.
With the selector OCCURRENCE/ENTITY, the Officer can change that, and the restrictions will be evaluated entity by entity. There is a limitation in creating groups based on the restriction selected here. If a group is restricted to ENTITY, no more groups can be added inside that ENTITY group.
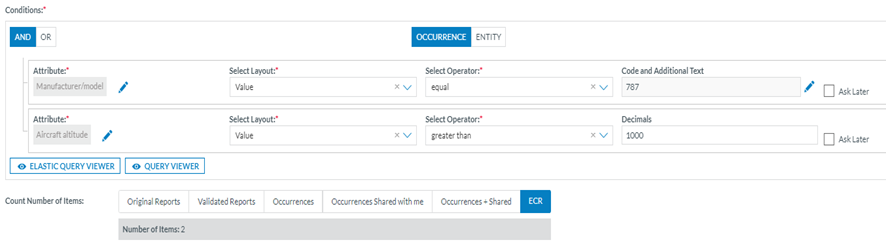
Example of search by occurrence and by entity:
1. OCCURRENCE: If we want to obtain the Occurrences where the Manufacturer model (21) is equal to ‘BOEING > 787’ and the Aircraft altitude (22) is greater than 1000 ft, independently if the conditions are met in different aircraft of an occurrence:
2. ENTITY: If we want to obtain the Occurrences where the Manufacturer model (21) is equal to ‘BOEING > 787’ and the Aircraft altitude (22) is greater than 1000 ft when the conditions are met in the same aircraft.

The Officer can set rules with AND/OR clauses and combine them as needed with groups by clicking on the ‘Group tab’ and selecting AND/OR clauses, i.e.:
Subqueries: The officer can add a subquery to the query through the ‘Query’ tab. The aim is to add an existing query to the current query. When the Officer clicks on the ‘Query’ tab, the system will display the subquery section:

The Officer can click on ‘Select Query’, and the system will display a window to select the subquery:
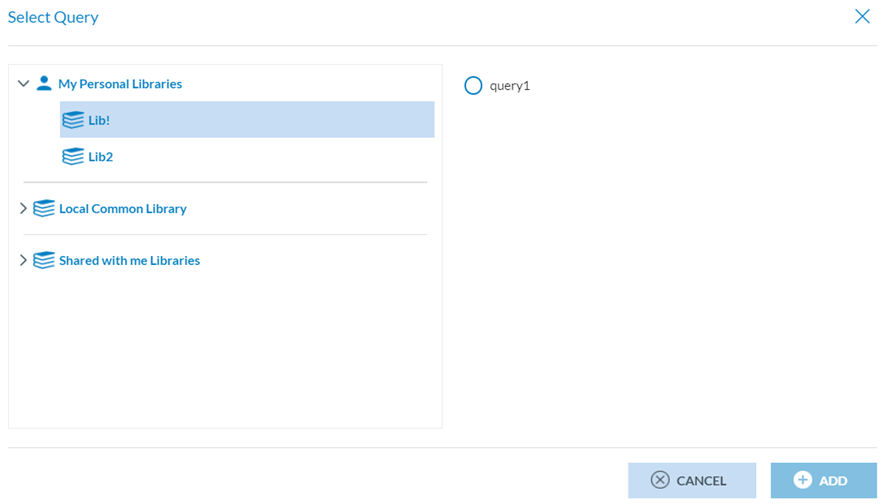
The Officer must select a query from the available libraries and click ‘Add’. The system will add the subquery to the conditions of the current query. A query included as a subquery of another query cannot be edited.
4.1.4 Query action buttons
Once the query is completed, the Officer can click on:
· Cancel button: the system will return to the Queries page.
· Execute button: the system will display the list of results according to the conditions set by the query.
· Save button: The system will save the query in the list of queries of the selected library and display the table of queries with the new query on the queries page.
· Execute button: the system will display the table of the specific reports based on the query's conditions. To re-execute the queries, the system provides the data menu that works as explained in the section Data Management - Features applicable to all reports - Data menu - Refresh Queries.
· Export button: this button only works when the Officer selects a type of report (OR, VR, OC, OC Shared with me, OC + Shared or ECR) with results for the current query. The Officer has to click on ‘Export’, and the system will display a modal window where the Officer can select the format (JSON or CSV):
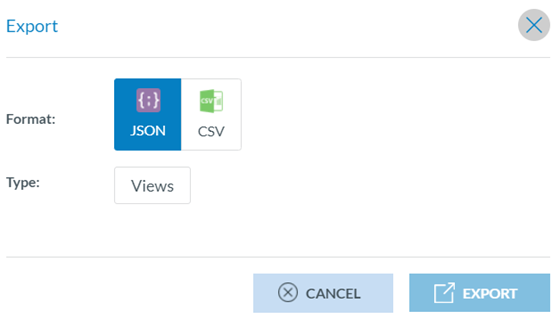
· Export in JSON: The window displays a Views tab. When the Officer clicks on it, the system displays a ‘Views’ modal window. The Officer must select one of the available views and click ‘Export’.

Once the process is finished, an email will be sent to the Officer with a zip file with the query results in the selected format.
· Export in CSV: The Officer clicks on the ‘CSV’ tab, and the system displays a modal window where the Officer has to select between ‘Views’ and ‘Attributes’:
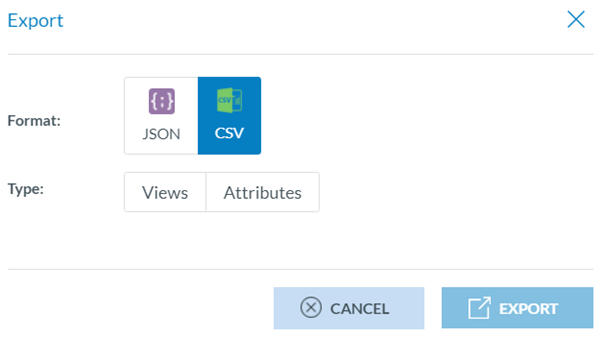
ü If the Officer clicks ‘Views’, the system will display a ‘Views’ modal window. The Officer must select one of the available views and click ‘Export’. Once the process is finished, an email will be sent to the Officer with a zip file with the query results in CSV format.
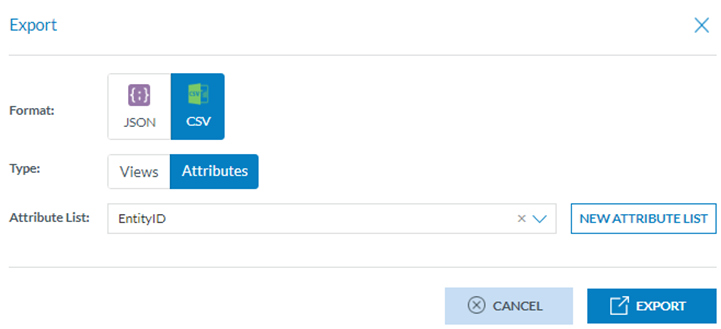
ü If the Officer selects ‘Attributes’, the system will display an Attributes List drop-down menu and a new Attributes List button:

If the attributes needed do not match any available Attribute Lists, the Officer can click on ‘New Attribute List’, and the system will display a modal window to create it:
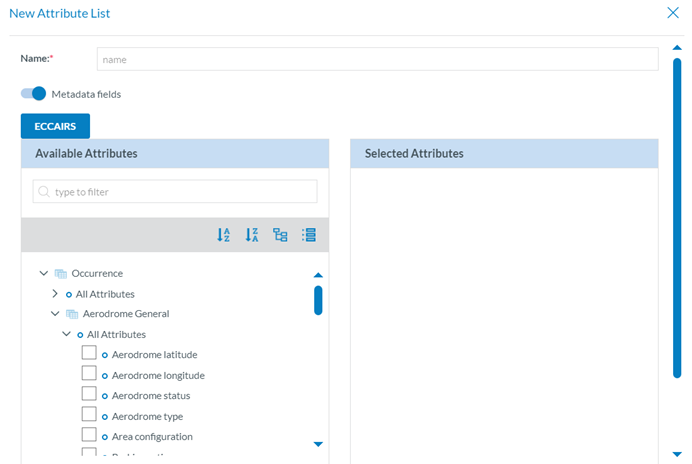
The Officer has to fill in the mandatory ‘Name’ field and deactivate the ‘Metadata fields’ if needed.
Below, the system displays the Taxonomy tree with all the ECCAIRS entities and attributes. The Officer can filter or navigate the tree to select the corresponding attributes. Once selected, they appear on the right-side panel. Attributes under the same entity can be reordered by dragging and dropping them. Then, the Officer has to click on the Save button:

The Officer will select the created Attribute List on the drop-down menu and will click on the ‘Export’ button:
Once the process is completed, the Officer will receive an email with the CSV file, including the results of the executed query.
4.1.5 Management of queries – table of queries
4.1.5.1 Editing a query
The Officer has to double-click on the specific query of the queries list or click on the ‘Edit’ option of the query’s 3-dot menu, and the system will display the editing page of the query:
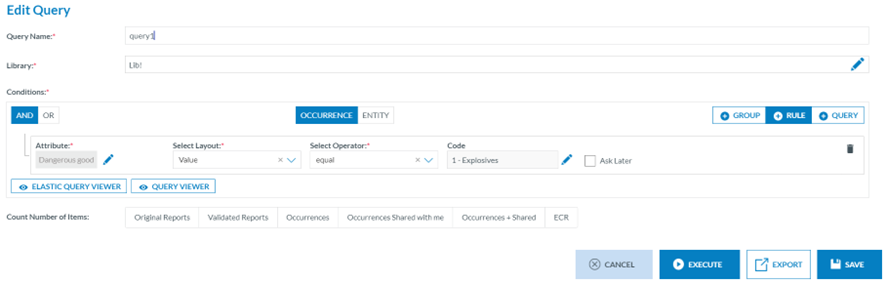
The Officer has to introduce the needed update and click on ‘Save’, ‘Export’ or ‘Execute’, as needed. See the Query action buttons section for further details.
This page also provides:
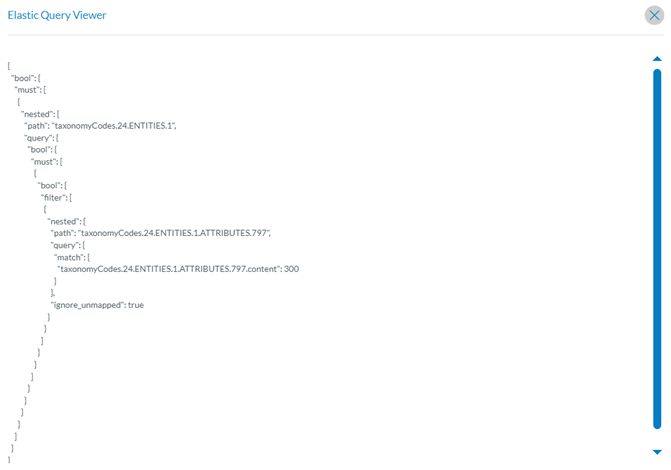
· Elastic Query Viewer button: it accesses the ElasticSearch Query Viewer window as follows:
Query viewer: opens the query viewer window as follows:

4.1.5.2 Duplicating a query
The Officer can make a copy of an existing query and modify it.
The Officer has to click on the copy icon of the 3-dot menu of the specific query of the list of queries, and the system will display the Copy query window:
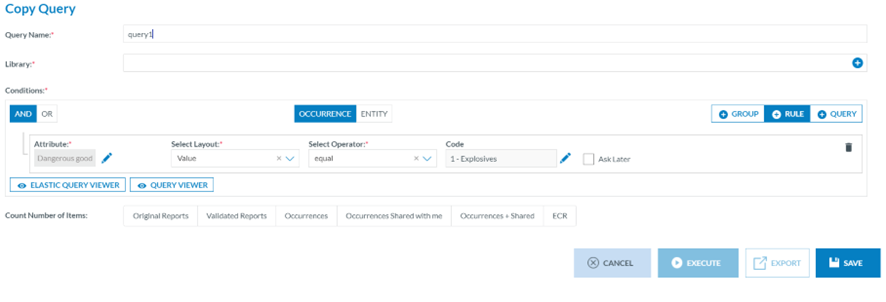
It is like the editing page above but with the mandatory Library field empty. The Officer has to fill in the library field with a library different from the original one, and then the Execute and Export button will be activated. The Save button is not available unless a Library is selected. The Officer has to introduce the needed update and click on ‘Save’, ‘Export’ or ‘Execute’, as needed. See the Query action buttons section for further details.
4.1.5.3 Sharing a query
Officers of the same Authority can exchange queries with each other, resulting in a notification being sent to the receiving Officers.
The Officer has to click on the Sharing option of the 3-dot menu of the specific query of the list of queries, and the system will display the Share query window:

The Officer has to select ‘Share to User’, and then the system will display the ‘Users’ tab below.
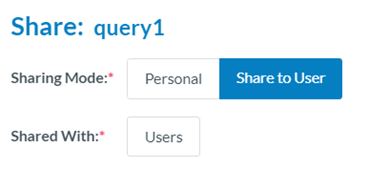
The Officer has to click on ‘Users’, and the system will display the Available Users section:

The Officer has to check the specific Users and click on the ‘ADD’ button, then click the ‘Save’ button. The system will save the updates of the query in the database and return to the list of queries that will have added a Shared icon to the specific query:

The Officer then can click on the ‘Edit share’ option that will be added to the 3-dot menu of that query and add more users or remove some of them.
4.1.5.4 Deleting a query
The Officer has to click on the ‘Delete’ option of the specific query 3-dot menu of the list of queries, and the system will delete it and update the table of queries accordingly. A query cannot be deleted if used in Batch Operations or Query-based Notifications. See the My Account-Query-based notifications section for further details.
4.1.6 Query libraries
All information presented in this section concerning the creation and management of libraries also applies to the section Word templates. The libraries store both queries and word templates.
The system provides the libraries available to the Officer on the left panel of the Queries menu:
4.1.6.1 My Personal Libraries
The queries stored in personal libraries are only available to the owner of the libraries. The owner can decide to share a particular query from the personal libraries or share the complete library with other Authority users. Only users with permission to execute queries will be eligible.
4.1.6.2 Local Common Library
The queries stored in the Local Common Library are available for all Authority users with permissions to queries. Officers cannot create, edit or delete queries in the Local Common Library. They can execute the queries or copy them to their personal libraries.
4.1.6.3 Shared with me libraries
When a library or query owner has shared the library or query with the Officer, it will appear under the ‘Shared with me libraries’. They can execute the queries or copy them to their personal libraries.
4.1.7 Creation of a library
Once in the ‘Data management’ ‘Queries’ menu, the Officer has to click on ‘New Library’, and the system will display a modal window to create the library:

The Officer has to fill in the mandatory Name field, the Description if needed, and the Sharing mode, which can be ‘Personal’ or ‘Share to User’.
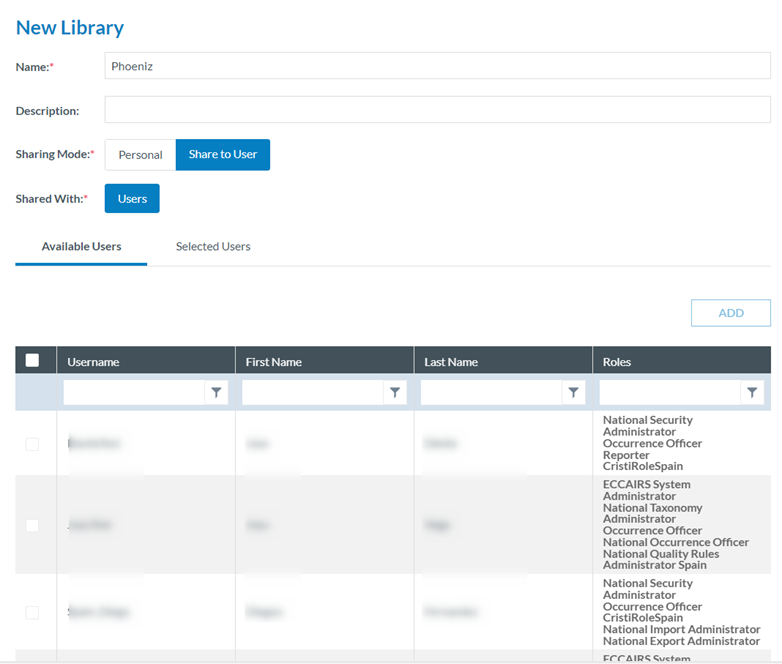
Therein, the Officer has to select the specific users through the check box and click on the ‘ADD’ button, which will be activated. The selected users will be available on the ‘Selected Users’ tab.
The Officer has to click on ‘Save’ for both Personal or Shared to User, and the Library will be saved accordingly and will appear in the left pane under ‘My Personal Libraries’:
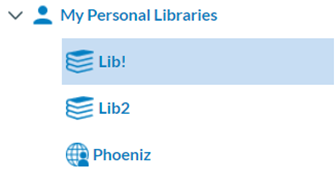
If the created library is ‘Shared to user’, it will show the ‘Shared’ icon  .
.
4.1.7.1 Management of My Personal Libraries
The system provides the deleting, adding category and editing buttons next to each library under My Personal Libraries of the Officer.
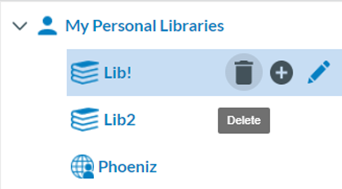
4.1.7.2 Deleting a Library
The Officer has to click on the Delete icon (rubbish) next to the specific Library, and the system will delete the library from the My Personal Libraries tree as long as it has no more queries. Otherwise, the system will display a warning message and not delete the library. The library tree will be updated accordingly.
4.1.7.3 Adding a category or folder to a Library
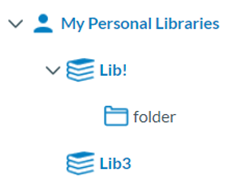
The Officer has to click on the ‘+’ button next to the specific library, and the system will display a folder below the library:
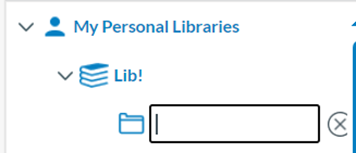
The Officer has to type a Name and click on ‘Intro’. The folder or category will be added to the tree and will be available to store queries of the Officer:

Next to the folder or category, the management buttons will appear as follows:

The category can only be deleted if it does not include queries.
The ‘+’ button is to add subcategories. It works in the same way as adding categories to the library.
The edit button only updates the name, not the location of the category.
4.1.7.4 Editing a Library
The Officer has to click on the editing (pencil) icon next to the specific Library, and the system will display the editing window:

This page is the same as the library creation window of the previous section. The Officer must update the corresponding fields and click ‘Save’. The changes will be saved in the database and Library tree.