7. My account
- 7.1. My account menu
- 7.2. Personal Details
- 7.3. Query-based notifications
- 7.4. Object-based notifications
- 7.5. Favourite Views
- 7.6. Custom Column
- 7.7. Export by Attribute
- 7.8. Default Queries
7.1. My account menu
Users can edit their personal settings through the “My Account” management interface. This menu is accessible once the Officer clicks on their username

7.2. Personal Details
This is the first tab of “My Account” page.
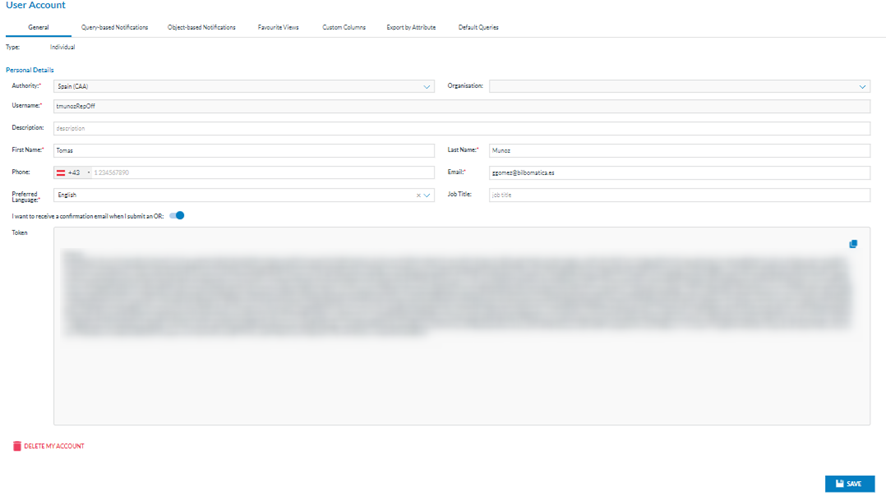
The first tab is ‘General’, indicating the type of account (individual or organisation) and the edit page for the personal details.
The personal details fields are the following:
· Organisation: to which the user belongs
· Username: of the user, it is not editable
· Description: optional field and editable
· First name: of the user, editable mandatory field
· Last name: of the user, editable mandatory field
· Phone: optional and editable
· Email: mandatory and editable
· Preferred language: mandatory and editable; doesn’t affect system behaviour at this stage of development.
· Job title: optional and editable
· ‘I want to receive an email when I submit an ‘OR’ toggle
· Token: it connects the Officer to the API. It is not editable
· Delete my account icon: it sends a request to the Authority administrator to delete the account after a confirmation message
The Officer can update the editable fields by clicking on the ‘Save’ button. The system will save the updates on the Personal details in the database.
7.3. Query-based notifications
E2 can notify selected users of the creation, update, deletion or sharing actions over ORs. VRs and OCs that meet the conditions of a query through query-based notifications.
This is the second tab of ‘My Account’ page:

It displays the table of query-based notifications indicating per notification row the following columns that also work as filters:
· Notification name: unique for each notification
· Source: OR, VR or OC
· Triggering action: create, update, delete or share with my Authority (only available for OCs)
· Query name: unique for each notification
· Created by: the author of the notification
· Email preferences: frequency of notification emails
When the user clicks on the last section of each notification row, the system displays the view and configuration icons for those notifications defined by the Authority administrator.

7.3.1. View the notification:
The Officer clicks on the view (eye) icon in the image above, and the system displays the View notification page:
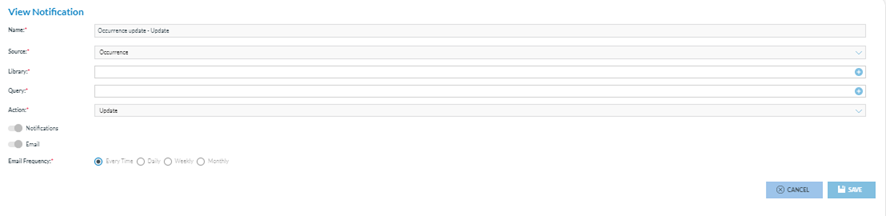
This page is not editable. It shows the following not editable fields:
· Name: unique per notification
· Source: OR, VR or OC
· Library: where the query is stored
· Query: that generates the notification
· Action: create, update, delete or share with my Authority (only available for OCs);
· Notifications toggle: to activate the notifications in the landing page.
· Email frequency toggle can be used every time, daily, weekly, or monthly.
The Configuration icon opens the ‘Set the notification preferences’ window:
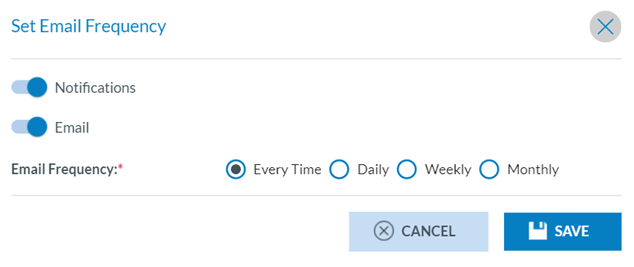
Notifications toggle: refers to the notifications appearing on the landing page of the Officer;
Email toggle: refers to the reception of an email with the notifications (Every Time, Daily, Weekly or Monthly). The Officer can update the fields and click' Save' to store the updates in the database.
7.3.2. Create a notification
Officers can create their own notifications. The Officer has to click on ‘New Notification’ above the table, and the system will display the ‘New Notification’ page:
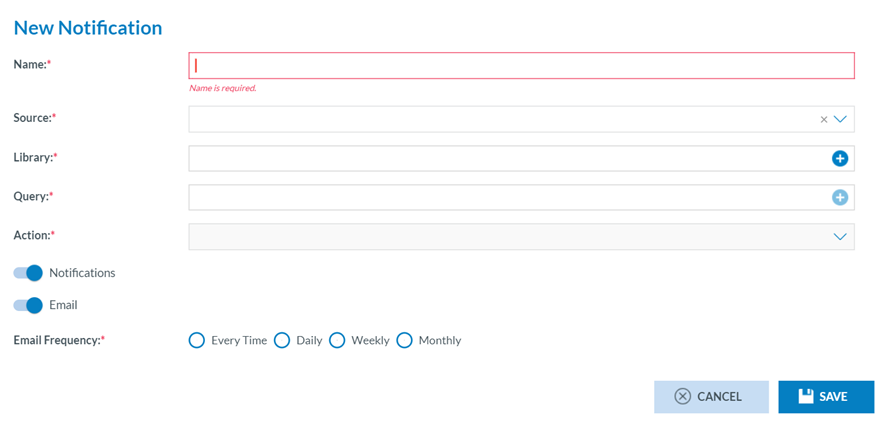
The fields are the same as in the ‘View notification’ of the previous section, but all the fields will be editable except the mandatory ‘Action’, which is only editable as soon as the source is selected in the previous field.
Name, source, library and query are mandatory.
The Officer has to fill in the Name, select a Source, and select a Library through the Library ‘+’ icon that opens the Library selection page:
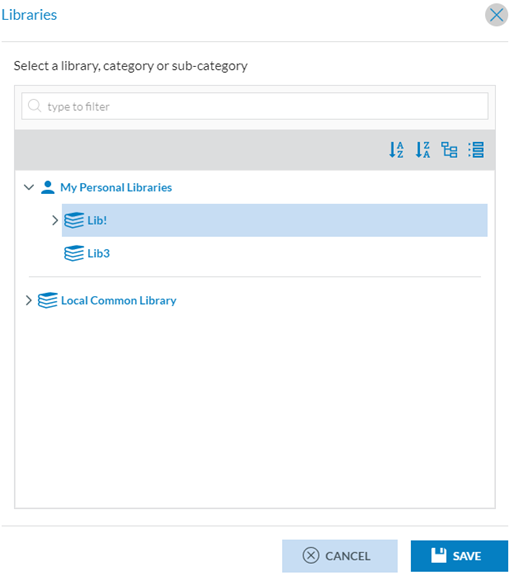
The Officer has to select a Library and click on Save.
Then, the Officer has to click on the ‘+’ icon of the Query field, and the system will display the queries available for the selected library:
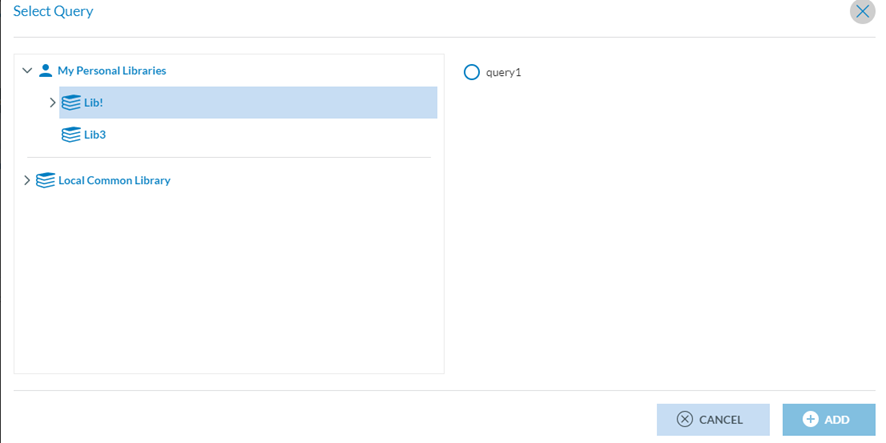
The Officer has to select a query and click on ‘Add’. Then, select the ‘Action’ from the drop-down menu with the following options:

The Officer must check one option and set the Notifications and Email toggles as needed.
By default, both toggles are activated. When the Email toggle is activated, the Officer has to set the Email frequency by checking the corresponding radio button:

And click on the Save button below. The system will save the notification with the selected query in the database and my account's list of query-based notifications.
The Officer can edit and delete the notifications that have been created.
7.4. Object-based notifications
Object-based notifications are manually defined in the different list views on each or multiple records. The Officer clicks on it, and the system displays the Object-based tab:
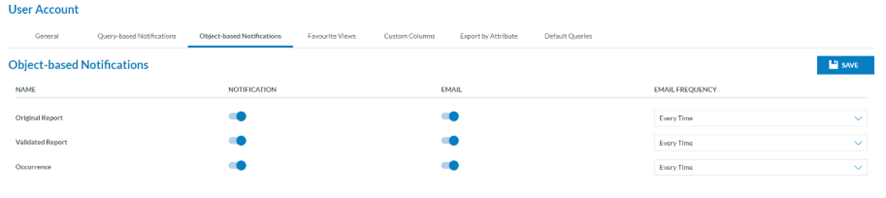
This page is to activate the notifications both on the landing page of the Officer and or in the email on updates on ORs, VR and OCs.
By default, it activates notifications and emails with updates on all the reports with an every-time frequency. It can be updated per type of report.
The Email frequency options are: Every time, daily, weekly and monthly.
The Officer can update the toggles and frequencies as needed by clicking on the ‘Save’ button.
The system will save the database updates and set the landing page notifications and the reports emails as selected.
7.5. Favourite Views
Views are used to display the information contained in a record, featuring varying numbers of attributes/entities, a specific design, and other custom elements. They enable certain users within organisations to concentrate on the elements relevant to their tasks. The fourth tab of the ‘My Account’ menu opens the ‘Favourite Views’:
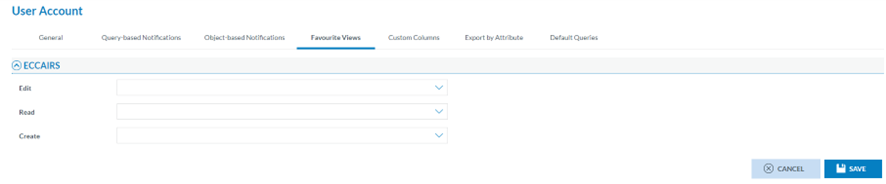
The page displays the following drop-down menus with the available views:
· Edit: favourite view for editing reports
· Read: favourite view for reading reports
· Create: favourite view for creating reports
Thus, the Officer must select a view in the specific drop-down menus and click Save in the image above. The system will save the updates in the database. When later the Officer in the OR, VR and OCs lists clicks on ‘Edit’ or accesses the Read mode or clicks on ‘New’, the system will offer the view of the specific report, the View selected in this menu. i.e. when the Officer accesses the VR menu and clicks on ‘New VR’, the system will open the ‘New VR’ page with the View selected in the ‘My Account’ tab:

7.6. Custom Column
Officers can customise the list view for the different reports available in the system. They can set which columns are available in the lists, reorder, sort, etc. The columns can be attributes or metadata fields.
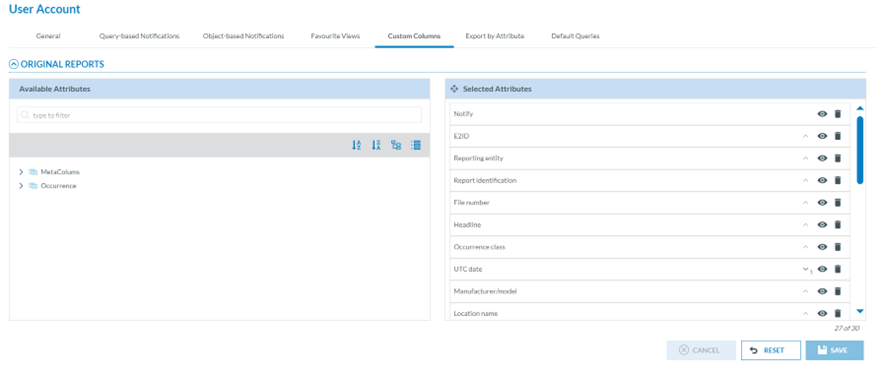
Through this page, the Officer can select the attributes available in the ORs, VRs and OCs lists in the corresponding ‘Safety Data’ menus.
By default, the list of ORs, VRs and OCs in their menus provides a list of attributes, i.e.:
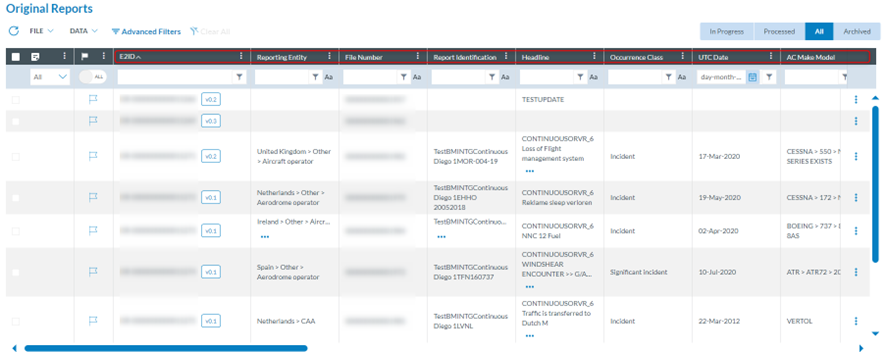
Through this Custom Columns menu, the Officer can decide which attributes appear in each list; the Officer can add and remove the attributes as well as altering their order.
Thus, the left pane includes a search filter and the metaColumns, with all its fields checked by default:
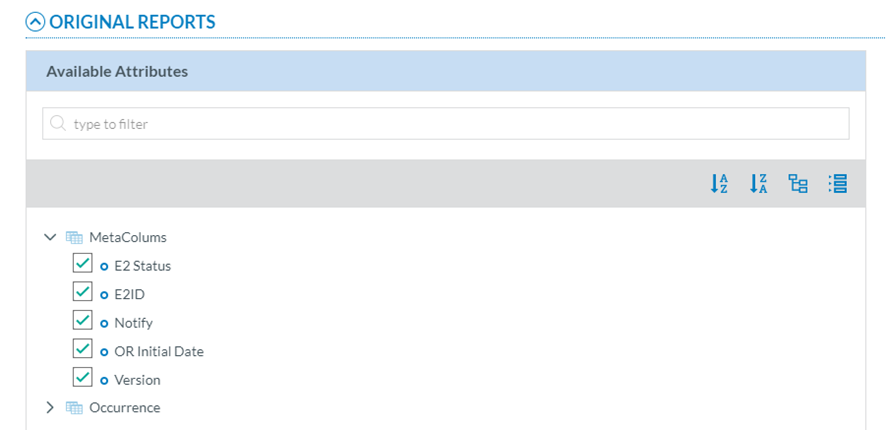
Below is the ECCAIRS taxonomy, which the Officer can navigate to select more attributes. See Taxonomy browser section for further details on its navigation.
The right pane provides the selected metacolumns and attributes. By default, the system provides a list of metacolumns and attributes.
The Officer can hide them through the eye icon next to each one:
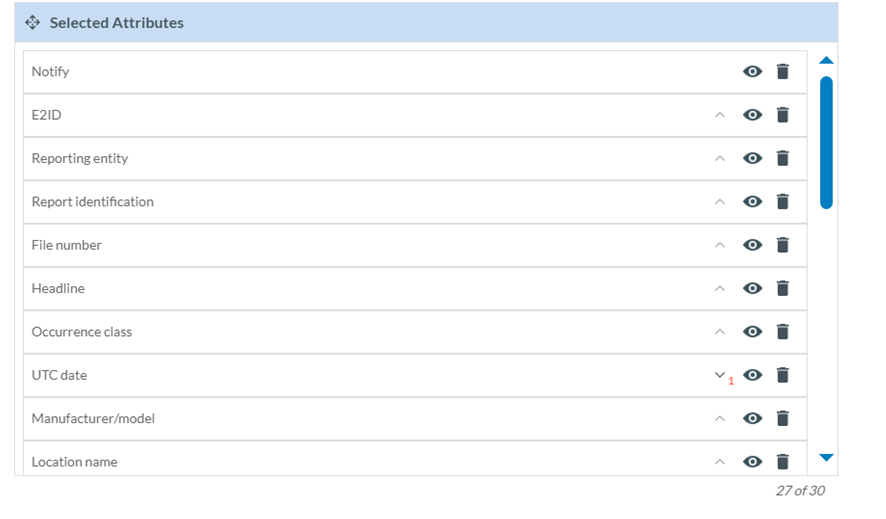
The rubbish icon is to delete the attribute or metacolumn of the list of reports.
The Officer can alter their order by dragging and dropping them or by clicking on each arrow, i.e.: E2ID is number 1, then each time the Officer marks an arrow, it sets the order of the attributes in the list:
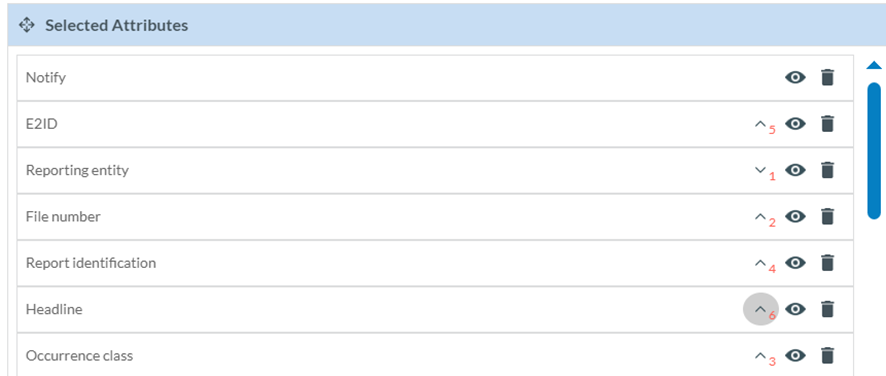
Note: ‘Notify’ does not have an arrow since it always appears at the beginning of each report row:

When the Officer is updating the attributes, before saving the updates, they can always click on the ‘Reset’ button below the list of selected attributes so that the system will set the ‘Selected attributes’ page to the default selection and order.
Note that there is a maximum number of attributes per list; if the Officer does not remove any from the default selection, only two more can be selected from the available list.
Once the Officer has updated the selected attributes and metacolumns, they have to click on the ‘Save’ button, and the tables of reports will be updated accordingly.
7.7. Export by Attribute
Officers can define attribute lists containing attributes and metadata fields. These Attribute Lists will be available to the Officer when exporting ORs, VRs and OCs from the lists.
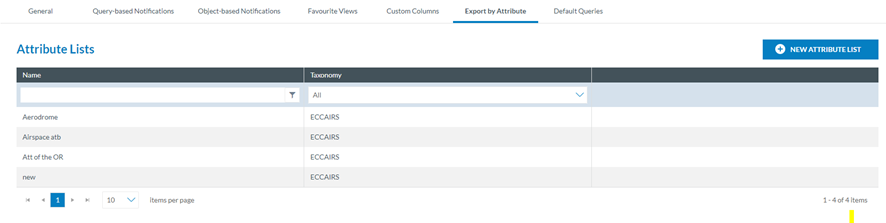
It is the table of Attribute Lists. Each row refers to a list of attributes defined by the Officer concerning the Authority’s ECCAIRS taxonomy, either central or custom.
These lists are available in the Exports options of the ORs, VRs and OCs menus of the Safety Data menu, i.e.:

On the last section of each Attribute List of the table, when the Officer moves the mouse over it, a Delete icon and an Edit icon appear:

The Delete icon deletes the Attribute List directly without asking.
7.7.1 Edit an attribute list
The edit icon opens the editing attributes’ list page:
 The mandatory name field is editable.
A ‘Metadata fields’ toggle exists, so the list can include or hide the metadata fields.
Below, there is a left pane with the taxonomy attributes. See Taxonomy browser for further details on its navigation. The attributes can also be searched by Description or Taxonomy code in the Search field.
The right pane includes the selected attributes.
The Officer can update the Name, Metadata toggle or any of the selected attributes (drag and drop to change the order or remove from the right panel) and click on ‘Save’ and the updates will be saved in the database. The table of Attributes lists will be updated accordingly.
7.7.2 Create an attribute list
The Officer can click on ‘New Attribute List’ above the table of attributes lists, and the system will open the following page:
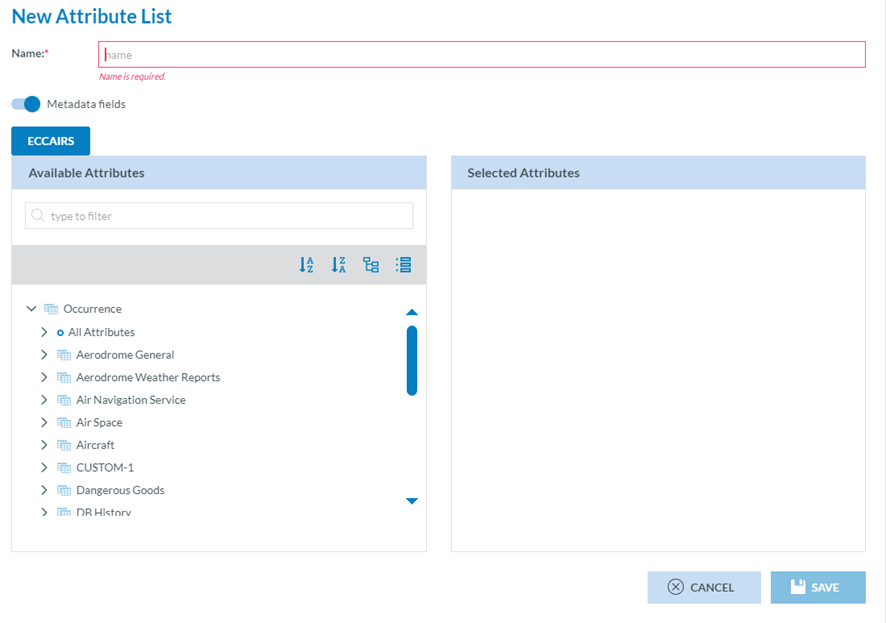
It works as the editing page of the previous section. The Officer has to add a mandatory name, update the metadata fields toggle if needed and add the required attributes to the list through the Taxonomy tree left page. The selected attributes will appear on the right pane. The Officer can click the ‘Save’ button when all the attributes are selected. The system will save the record in the database, and the list of attributes will be updated accordingly.
7.8. Default Queries
Officers can select the queries the system triggers when opening the ORs, the VR or OCs menus from the Safety Data menu.
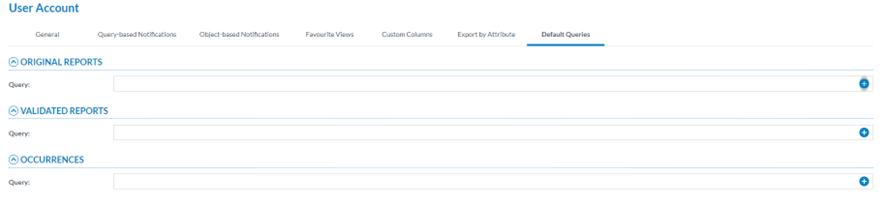
Through this page, the Officer can select the queries the system triggers when opening the ORs, the VR or OCs menus.
The Officer can click on the ‘+’ icon of the query field of the OR, VR or OC, and the system will open the Select Query window:
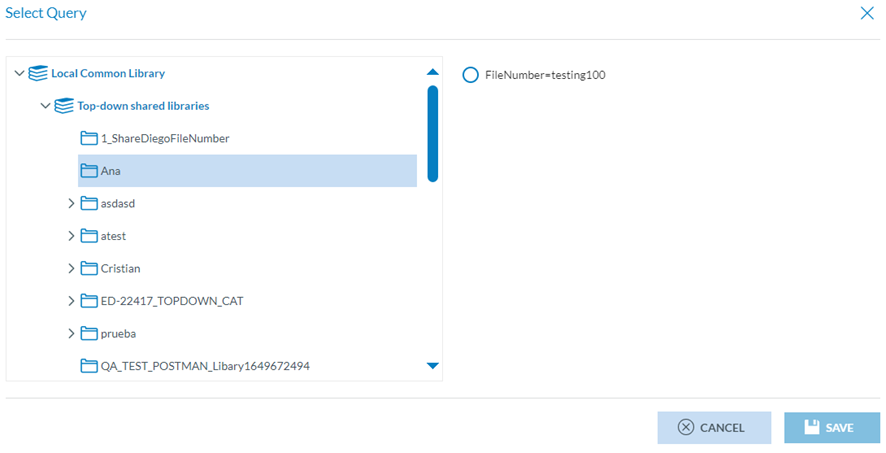
This window will provide on the left the libraries available to the Officer. The Officer can select the corresponding library or category, and the right pane will present the stored queries in the selected location. The Officer can only choose one and click the ‘Save’ button, which will be activated. The updates will be saved in the database.
The Officer can do this operation in each reports section where they want to trigger the queries. When they have saved all the default queries, they will be triggered any time the corresponding reports menu is opened in the ECCAIRS Web Application