Data Viewer Officer/Work in progress
This document describes the tasks a Data Viewer Officer can perform through the E2 Web Application.
- Version History
- Terms and abbreviations
- Table of Contents
- 1. Introduction & Accessing
- 2. Home (Landing page)
- 3. Safety Data
- 4. Data Management
- 5. Taxonomy Browser
- 7. My account
- 7.1. My account menu
- 7.2. Personal Details
- 7.3. Query-based notifications
- 7.4. Object-based notifications
- 7.5. Favourite Views
- 7.6. Custom Column
- 7.7. Export by Attribute
- 7.8. Default Queries
- 8. Metadata fields
Version History
| Version | Date | Document | Description | E2 release |
| 0.2 | 26/06/24 | ECCAIRS2 Glossary.pdf | v2.36 | |
| 0.1 | 21/02/25 | ECCAIRS2 Metadata fields.pdf | Initial draft | v2.44 |
| 0.2 | 27/02/25 | ECCAIRS2 Metadata fields.pdf | Updates in au_creaion_dae,au_modification_date, or_initial_dae,vr_initial_date,oc_initial_date | v2.45 |
| 0.3 | 03/03/25 | ECCAIRS2 Metadata fields.pdf | Revised final visual labels for Query & Columns | v2.45 |
| 0.4 | 07/04/25 | ECCAIRS2 Metadata fields.pdf | Change in the metadata fields names to show in the Query Builder and Column/Export | v2.46 |
| 0.2 | 26/06/24 | ECCAIRS2 Occurrence Officer’s Tasks.pdf - View only sections | v2.36 | |
| 0.5 | 20/11/2025 | Data Viewer Officer (current document) | Consolidated version integrating the listed documents, migrated to BookStack, and featuring structural adaptations for web-native documentation. | v2.36 |
Terms and abbreviations
| Term/Abbreviation | Description |
| API | Application Programming Interface |
| BO | Batch Operation |
| CSV | Comma-separated values |
| ECCAIRS | European Co-ordination Centre for Aircraft Incident Reporting Systems |
| E2 | ECCAIRS 2 |
| ECR | European Central Repository |
| ERCS | European Risk Classification Scheme |
| M2M | Machine-to-Machine, automated exchange of data between systems without human intervention |
| OC | Occurrence |
| OR | Original Report |
| Portable Document Format | |
| SR | Safety Recommendation |
| VR | Validated Report |
| WT | Word Template |
| XLS | Excel Spreadsheet |
| XML | Extensible Markup Language |
| XSD | XML Schema Definition |
For each entity or attribute in the taxonomy, you can find its definition with detailed information, an explanation, and possible values in the Taxonomy Browser.
Table of Contents
Table of Contents
Version History
Terms and abbreviations
1. Introduction & Accessing
1.1 Introduction
1.2 Accessing ECCAIRS2
1.3 Sign in
1.4. Reset Password
2. Home (Landing page)
3. Safety Data
3.1. OR Management
3.2. VR Management
3.3. OC Management
3.4. Features applicable to all reports
4. Data Management
4.1. Queries
4.2. Word Templates
5. Taxonomy Browser
5.1. Taxonomy
5.2. Search
5.3. Taxonomy structure
5.4. List of taxonomies
6. Administration
6.1. Administration menu
6.2. Migration
6.3. Upload E5X files
6.4. Validate E5X files
7. My account
7.2. Personal Details
7.3. Query-based notifications
7.4. Object-base notifications
7.5. Favourite View
7.6 Custom Column
7.7. Export by Atributte
7.8. Default Queries
8. Metadata fields
1. Introduction & Accessing
1.1. Introduction
This section sets the definition of terms and terminology used in the documentation explaining the functioning of the entire ECCAIRS 2 - SRIS 2 through the perspective of different roles.
1.1.1. About ECCAIRS 2 - SRIS 2
ECCAIRS 2 (European Coordination Centre for Accident and Incident Reporting Systems) is the second version of an IT system designed to support a collaborative network of National Aviation Authorities (NAAs) and Safety Investigation Authorities (SIAs) from EU Member States, along with the European Union Aviation Safety Agency (EASA). Its core mission is to facilitate the collection, sharing, and analysis of safety-related information to enhance the safety of public transportation.
Key Objectives:
- Integration of original reports from disparate, currently incompatible sources.
- Providing an occurrence reporting solution for Member States without an automated system.
ECCAIRS 2 (E2 hereafter) implements collection and dissemination requirements for:
- Reports and Occurrences, as well as,
- Safety recommendations from the Safety Investigation Authorities,
Member States' safety data is consolidated in two central databases:
- ECR-ECCAIRS – The European Central Repository for Occurrences (required by Regulation (EU) 376/2014), which aggregates national and European-level reports.
- ECR-SRIS – The European Central Repository for Safety Recommendations (required by Regulation (EU) 996/2010).
System Architecture & Functionality
E2 is an integrated system supported by two distinct but interconnected taxonomies:
- ECCAIRS Taxonomy (previously linked to ADREP) – Facilitates the collection and processing of original occurrence reports.
- SRIS Taxonomy – Enables the recording, tracking, and public dissemination of safety recommendations, including responses.
Occurrence Reporting Process
- Based on the ECCAIRS Taxonomy, which standardizes definitions and classifications.
- Reports are submitted via the E2 Web Application, validated, and converted into occurrences.
- Data can be shared at the European level (ECR) or optionally with other authorized entities within the E2 system.
There are three types of reports in the process:
-
- Original Report (OR): It is a description of the safety event submitted by a Reporter through the E2 Reporting Portal.
- Validated Report (VR): It is a copy of the OR validated by an Occurrence Officer through the E2 Web Application. It is editable, allowing enrichment. The Officer can also create a VR from scratch.
- Occurrence (OC): It is the main enriched report, representing the complete occurrence after integrating all related VRs. It consolidates all relevant information and is finally shared with the European Central Repository (ECR) for further analysis and safety oversight. The Officer can also create and OC from scratch.
In broad terms the reports lifecycle includes receiving an OR, validating it into VR, integrating the VR into an OC, and finally sharing the Occurrences with the European Central Repository (ECR):

In some cases, managing an occurrence can be more complex, as a single event (such as an accident or incident) may generate multiple OR from different reporters. Each OR is validated into a VR, and all VRs are eventually merged into a single OC to be shared with the ECR or forwarded to another authority. Furthermore, if changes are made to an OR or VR after processing has begun, they may conflict with existing data—therefore, the process includes mechanisms to identify and resolve such conflicts:
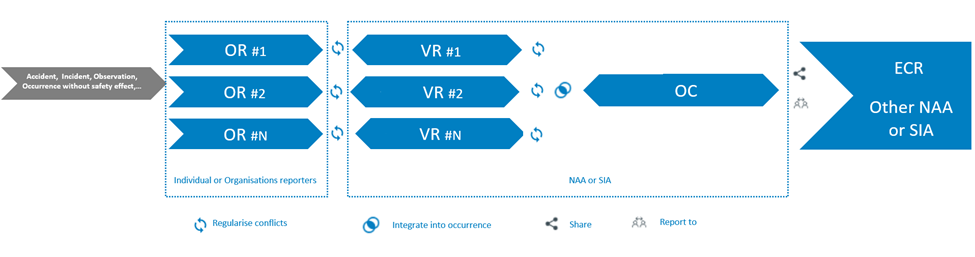
If an OR is sent to a non-competent authority, it may be transferred to the appropriate one.

The following picture shows the status workflow of the Original Reports, Validated Reports, Occurrences; and how they are related to each other.
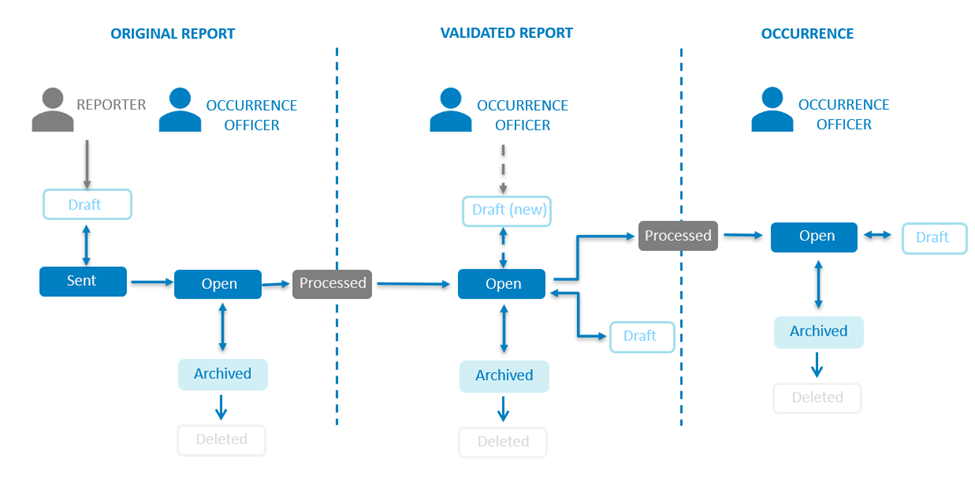
The roles involved are ‘Reporters’ and ‘Occurrence Officers’:
- Reporters, include individual and organisation Reporters, as well as those users that choose to report an Occurrence without registration.
- Occurrence Officers, include all the users that are part of an Authority, and have permissions to view, create and edit documents.
Safety Recommendations Process
- Powered by the SRIS Taxonomy to support Safety Investigation Authorities (SIAs).
- Enables the recording, tracking, and publication of safety recommendations, along with response monitoring, on a dedicated public portal.
The system process:
-
- Safety Recommendation (SR): It is the proposal of a Safety Investigation Authority based on information derived from an investigation made with the intention of preventing accidents or incidents and which in no case has the purpose of creating a presumption of blame or liability for an Occurrence. In addition to Safety Recommendations arising from Occurrence investigations, Safety Recommendations may result from diverse sources, including safety studies. It is finally shared with the European Central Repository of Safety Recommendations (ECR-SRIS) for further analysis and dissemination.

The following picture describes the lifecycle of the SR’s life from its creation to its publication, or archive and deletion.
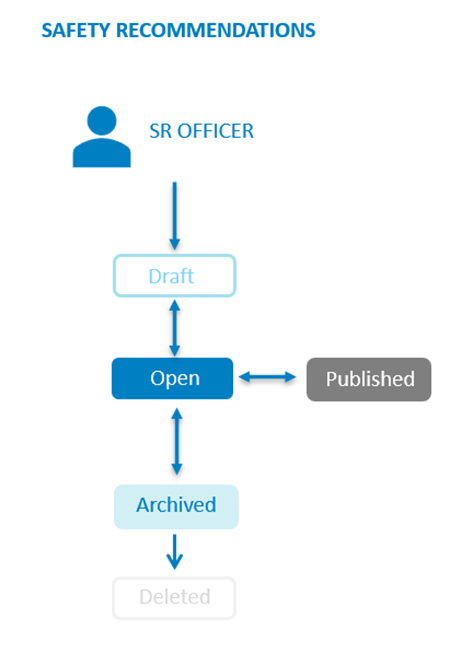
SR Officers, include all the users that are part of the accident investigation Authority, and have permissions to view, create and edit Safety Recommendations.
Original Reports, Validated Reports, Occurrences and Safety Recommendations Records exist in two type of versions: major versions that are shared and minor versions that only available for the Authority. There are also draft versions that are visible to the user only.
1.1.2. ERCS
Regulation (EU) 376/2014 on Occurrence Reporting, requires that member states risk classify all Occurrences using the European Risk Classification Scheme (ERCS). The goal of this risk classification is to enable a harmonised assessment of aviation safety risks across Europe and across the different technical domains, such as commercial air transport operations, leisure flying, ATM/ANS, or aerodromes and ground handling.
The European Risk Classification Service (ERCS) wizard is a tool to help users fill in the information. It is based on what is captured in the Support Master Tables. Each table defines the restrictions and dependencies between the Value List values of the Attributes involved in the ERCS calculation.
There exist 3 Support Master Tables:
· ERCS KRALevel1/Severity
· ERCS Barriers
· ERCS Matrix
1.1.3. Taxonomy
Background:
The E2 portal collects information on incidents concerning civil aviation. This information comes from people from different origin, technical and not technical. Bringing together data that has used different definitions makes it very difficult to analyse and draw meaningful conclusions. That is why a specific classification to unify the terms concerning the aviation reporting was needed and introduced in the portal. First a group of forward-thinking people got together at global level under the guidance of ICAO to develop a common aviation Taxonomy. This was called the Accident/ Incident Data Reporting System (or ADREP). After some time, the management of this Taxonomy at a detailed level has passed to EASA forming the basis of the ECCAIRS system. Today, it is known as the ECCAIRS Taxonomy and it is a vital building block for sharing data at European Level and beyond.
Definition:
The Taxonomy of ECCAIRS is the catalogue of structured and hierarchised information describing what information can be stored in the ECCAIRS Repository and how this information is (possibly) encoded in the data fields of the aviation Reports. There is an ECCAIRS Taxonomy for ORs, VRs and OCs and a SRIS Taxonomy for SRs. Each Authority can create custom Taxonomies based on the standard ECCAIRS or SRIS Taxonomy.
The Taxonomy is organised in Parent Entities, Entities and Attributes.
- Entity: It is an item to which a set of Attributes can be associated. Entities are used to represent items to which a set of Attributes can be associated. An Entity can be, for instance, the "aircraft", "ship", etc. involved in the Occurrence, or the related "events" description. There may be multiple instances of Entities since more than one of these items can be involved. Entities can have Parent Entities and Child Entities.
- Attribute: It is the smallest item that gives information about an aviation incident or an accident or safety event. A safety event can be described through a list of Attributes.
- Value Lists: The list of values an Attribute can have is defined in a Value List. The Value List can have multiple level where values are organised in a tree mode. Value Lists can have Alias.
- Support Tables: They contain information that helps other processes of the ECCAIRS 2 platform. Support Tables are used at Taxonomy level to amplify the Attributes information. The Support Tables are:
· Alias
· Attribute Groups
· Conversion Factors
· Domains
· Measurement Units
· Measurement Unit Classes
1.1.4. View and Sections
Sections: A section is a cohesive set of Attributes of the ECCAIRS2 or SRIS central or custom Taxonomy depicting a sub-domain of a safety event that is registered in an E2 Report.
Topics: A topic is a specific group of Attributes, linked to an Occurrence that can be viewed by a user role. For navigation purposes, Sections can be grouped together in Topics.
Views: A View is a visual representation of ordered data (Attributes) concerning a safety event (accident or incident) to facilitate human analysis and its collection and introduction in a Report. Views are grouping of Topics placed in a particular sequence (hierarchical tree).
Webforms: The Webforms are used by the Reporters when using the E2 Reporting Portal to report an Occurrence (Original Report). A Webform is associated to a released View available at Authority level.
1.1.5. Batch Operations
Batch Operations (BO): With Batch Operations it is possible to execute actions over Original Reports, Validated Reports or Occurrences that meet the conditions expressed in the Query on which they are based on.
Manual Batch Operations: are executed by an administrator with the proper permissions and the action defined in the Batch Operation will be applied over the documents that meet the conditions expressed in the Query of that manual Batch Operation.
Continuous Batch Operations: are executed automatically every time a document is saved and meets the conditions expressed in the Query of the continuous Batch Operation. One or more continuous Batch Operations can be triggered when the document being saved meets the conditions of each of the Queries of these Batch Operations. In that case, they are executed in alphabetic order.
1.1.6. Queries
The Query Builder allows Authority users build Queries to search Original Reports, Validated Reports, Occurrences and Safety Recommendations with Attributes or metadata fields that meet the given conditions.
The Queries are executed against the documents indexed in Elastic Search.
1.1.7. Data Viewer Officer
The following sections describe all the functionalities and tasks that Data Viewer Officers can perform using the E2 Web Application. They can only access information—such as reports, queries, and views—that is owned by their respective Authority.
Occurrence Officers can find essential information in the following sections:
- Safety Data – outlines all tools for viewing reports.
- Data Management – includes Queries to filter and export reports (OR, VR, OC), plus Word Templates.
- Taxonomy Browser – helps locate entities and attributes with clear definitions.
1.2. Accessing ECCAIRS2
Follow these steps to access the Reporting Portal to Report an Occurrence:
- Go to E2 Central Hub homepage.
- Click on the 'Report an Occurrence' banner.

You will be redirected to the Reporting Portal homepage.
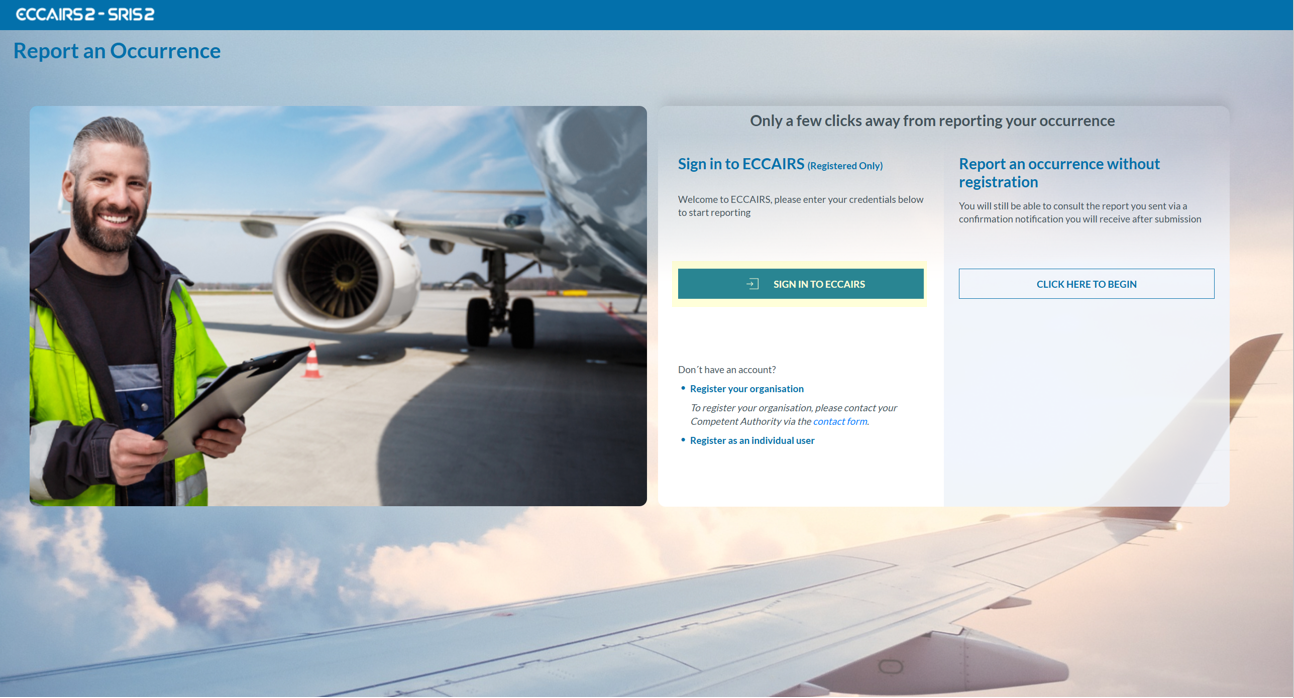
You can access the ECCAIRS 2 Web Application the by clicking on 'SIGN IN TO ECCAIRS'.
If you do not yet have an account, contact your Authority administrator to create a new one.
1.3. Sign in
Important notes
Correct Access URL
If you have created a shortcut to the URL https://api.aviationreporting.eu/idp/login, please be aware that this address points to the dedicated login server only. When accessed directly, the system does not know where to redirect the user after authentication, resulting in a failed or incomplete login process.
To ensure proper access and functionality, always use the official entry point:
Valid URL: https://e2.aviationreporting.eu
This address initiates the login flow correctly and allows the system to return you to the appropriate reporting environment after authentication.
Automatic Time Zone Configuration
For the time being it’s essential that your device’s time zone is set to automatic. If your local time doesn’t match the server time, the system may interpret your authentication token as expired—even if it was just generated.
How to ensure your time zone is set automatically:
- On Windows: Go to Settings → Time & Language → Date & Time Enable:
- “Set time automatically”
- “Set time zone automatically”
- On macOS: Go to System Preferences → Date & Time Check the box: “Set time zone automatically using current location”
- On mobile devices (Android/iOS): Make sure “Automatic date & time” is enabled in your system settings.
This configuration ensures your access token remains valid and prevents login issues related to time synchronization.
Sign in
To sign in, please follow these steps:
-
Visit the E2 Reporting Portal at https://e2.aviationreporting.eu/.
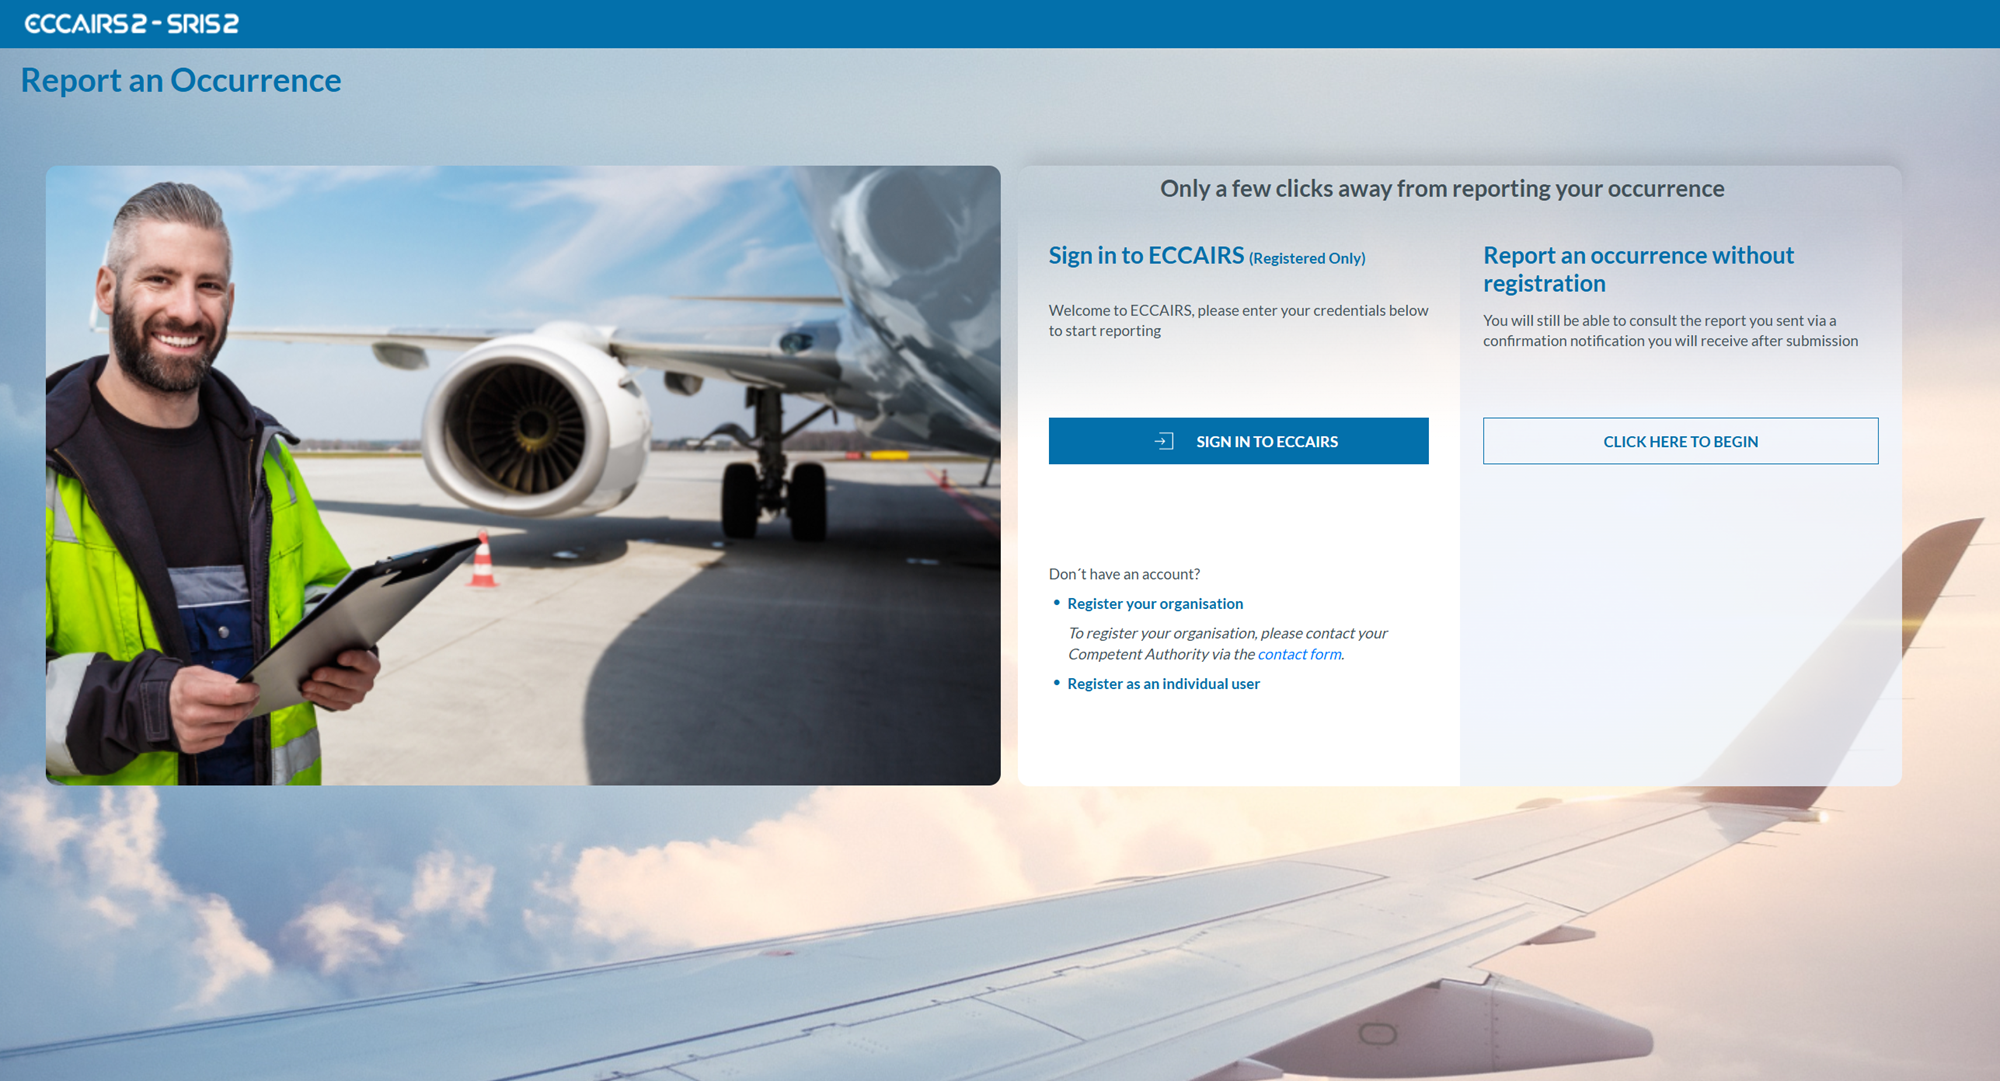
- Click on 'SIGN IN TO ECCAIRS'. You will be redirected to the following page:
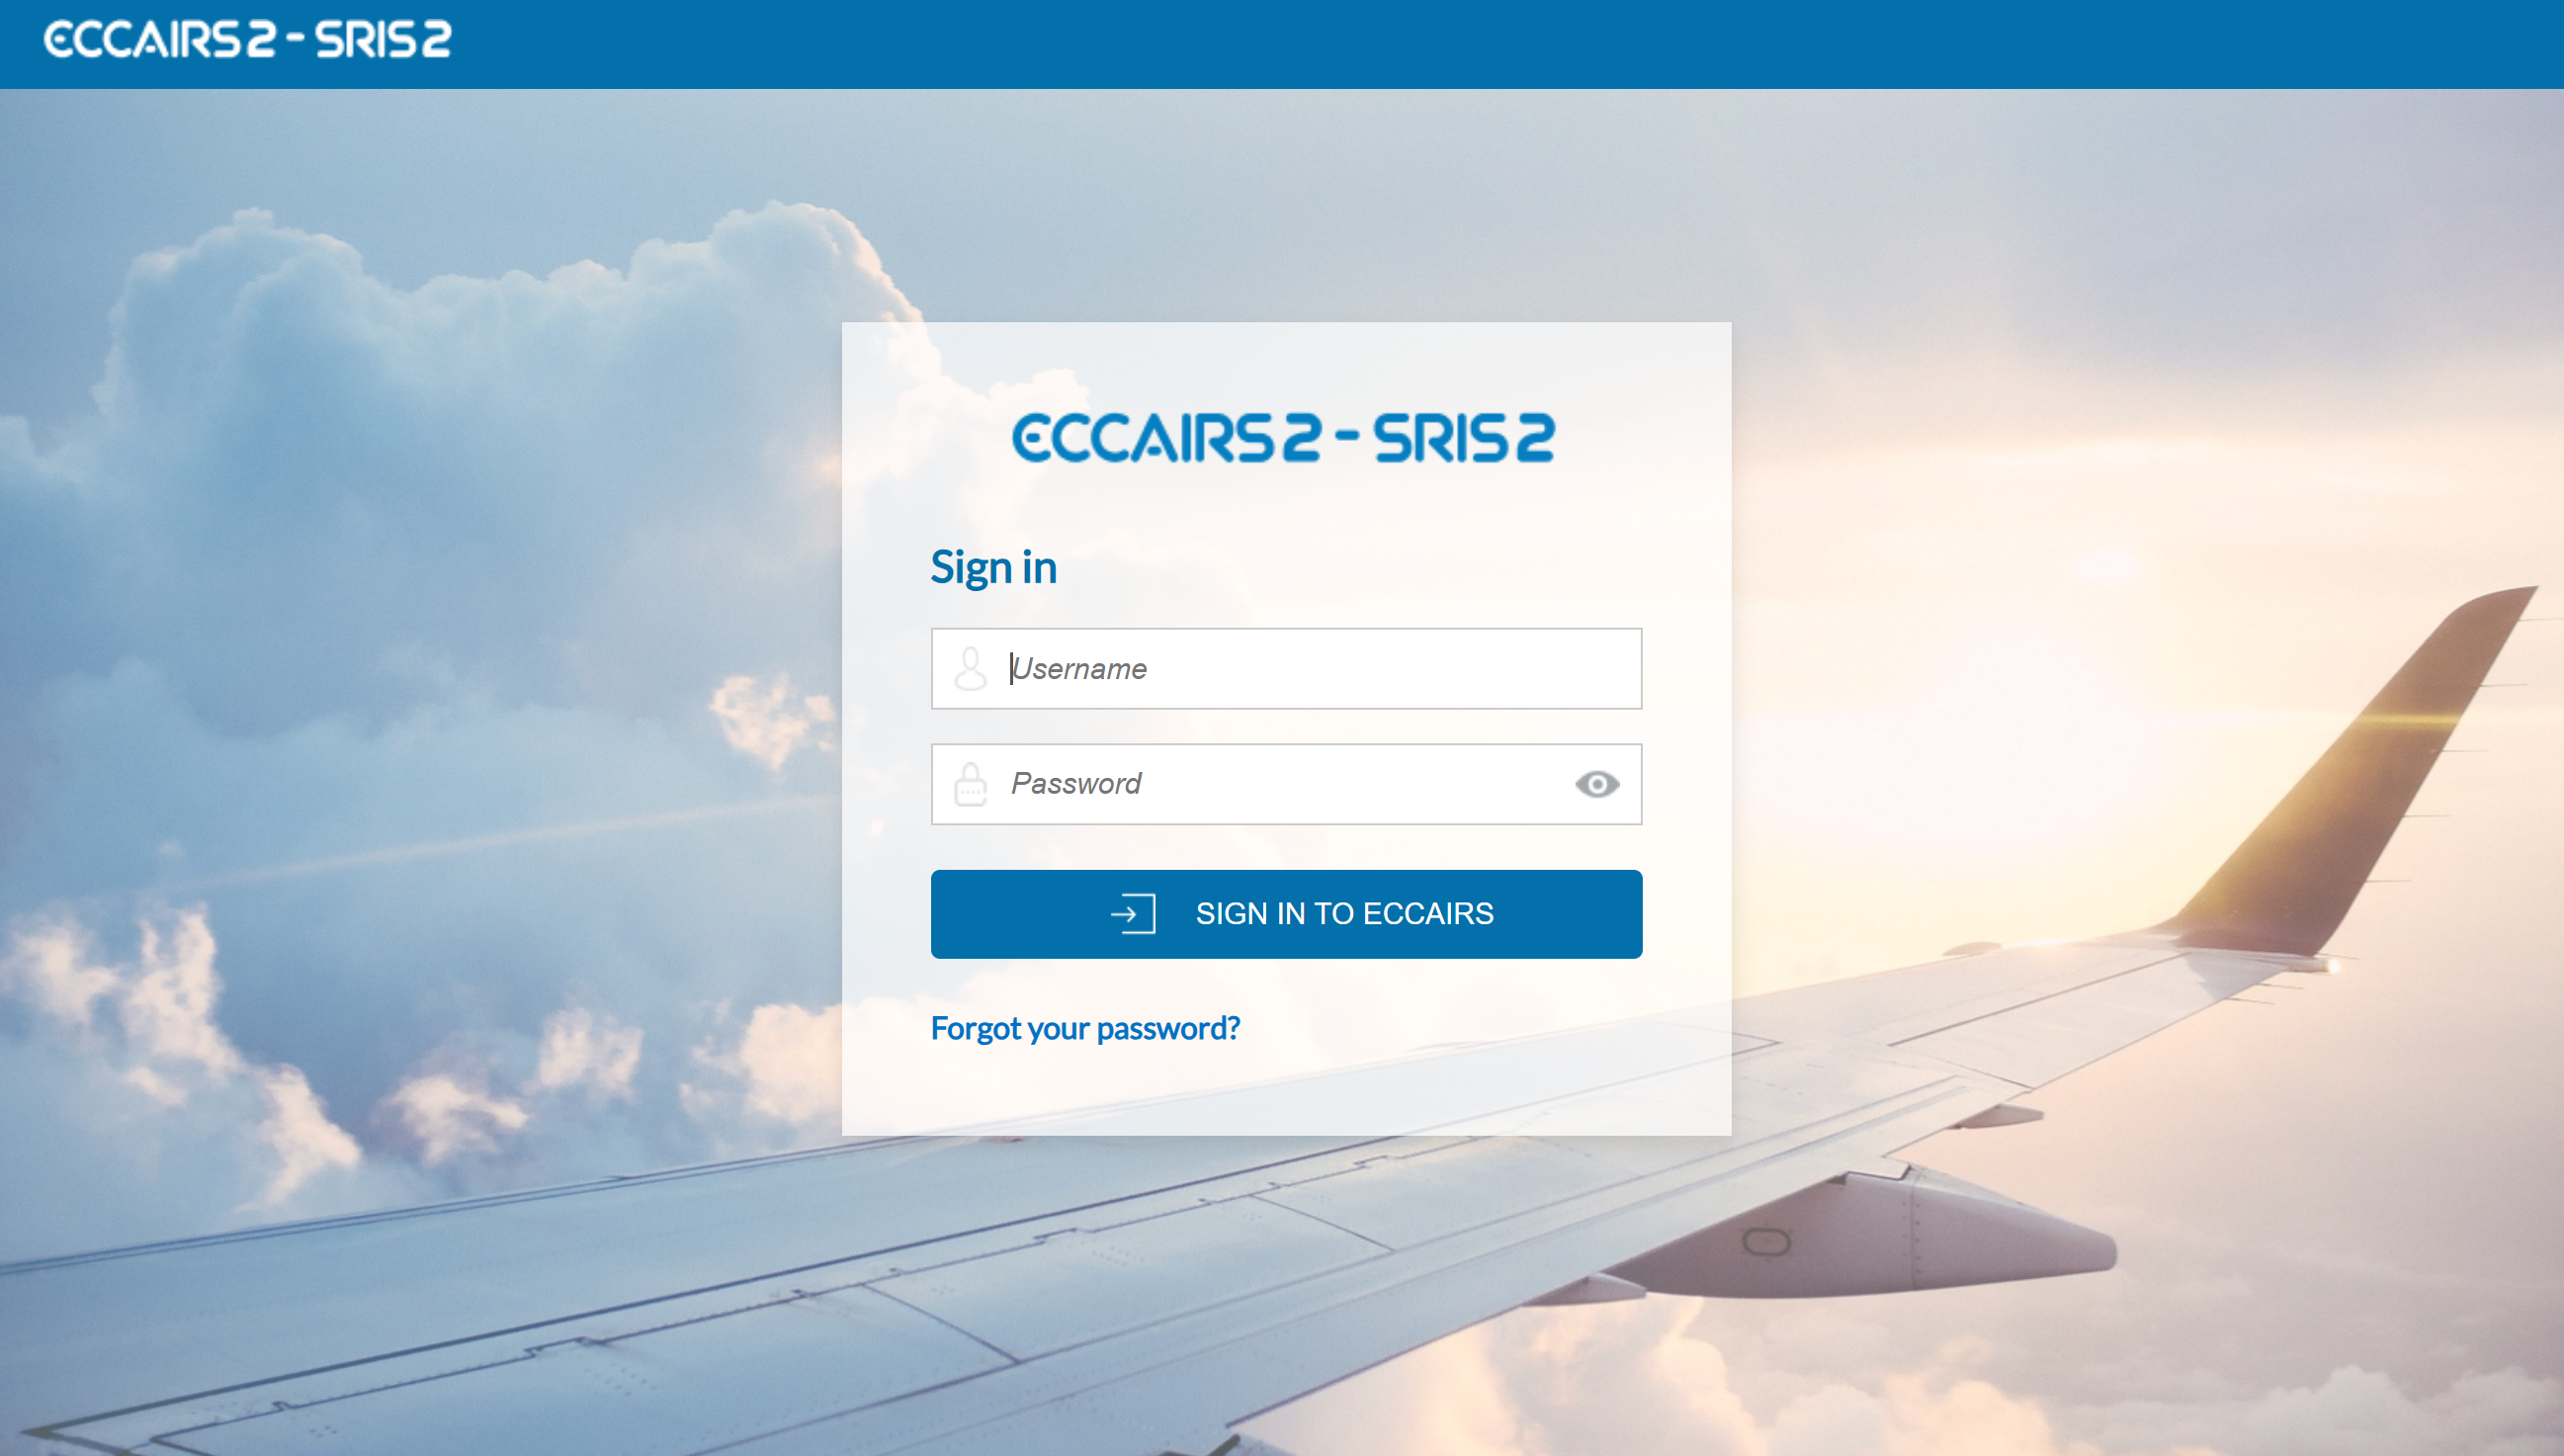
- Fill out your Username and Password.
-
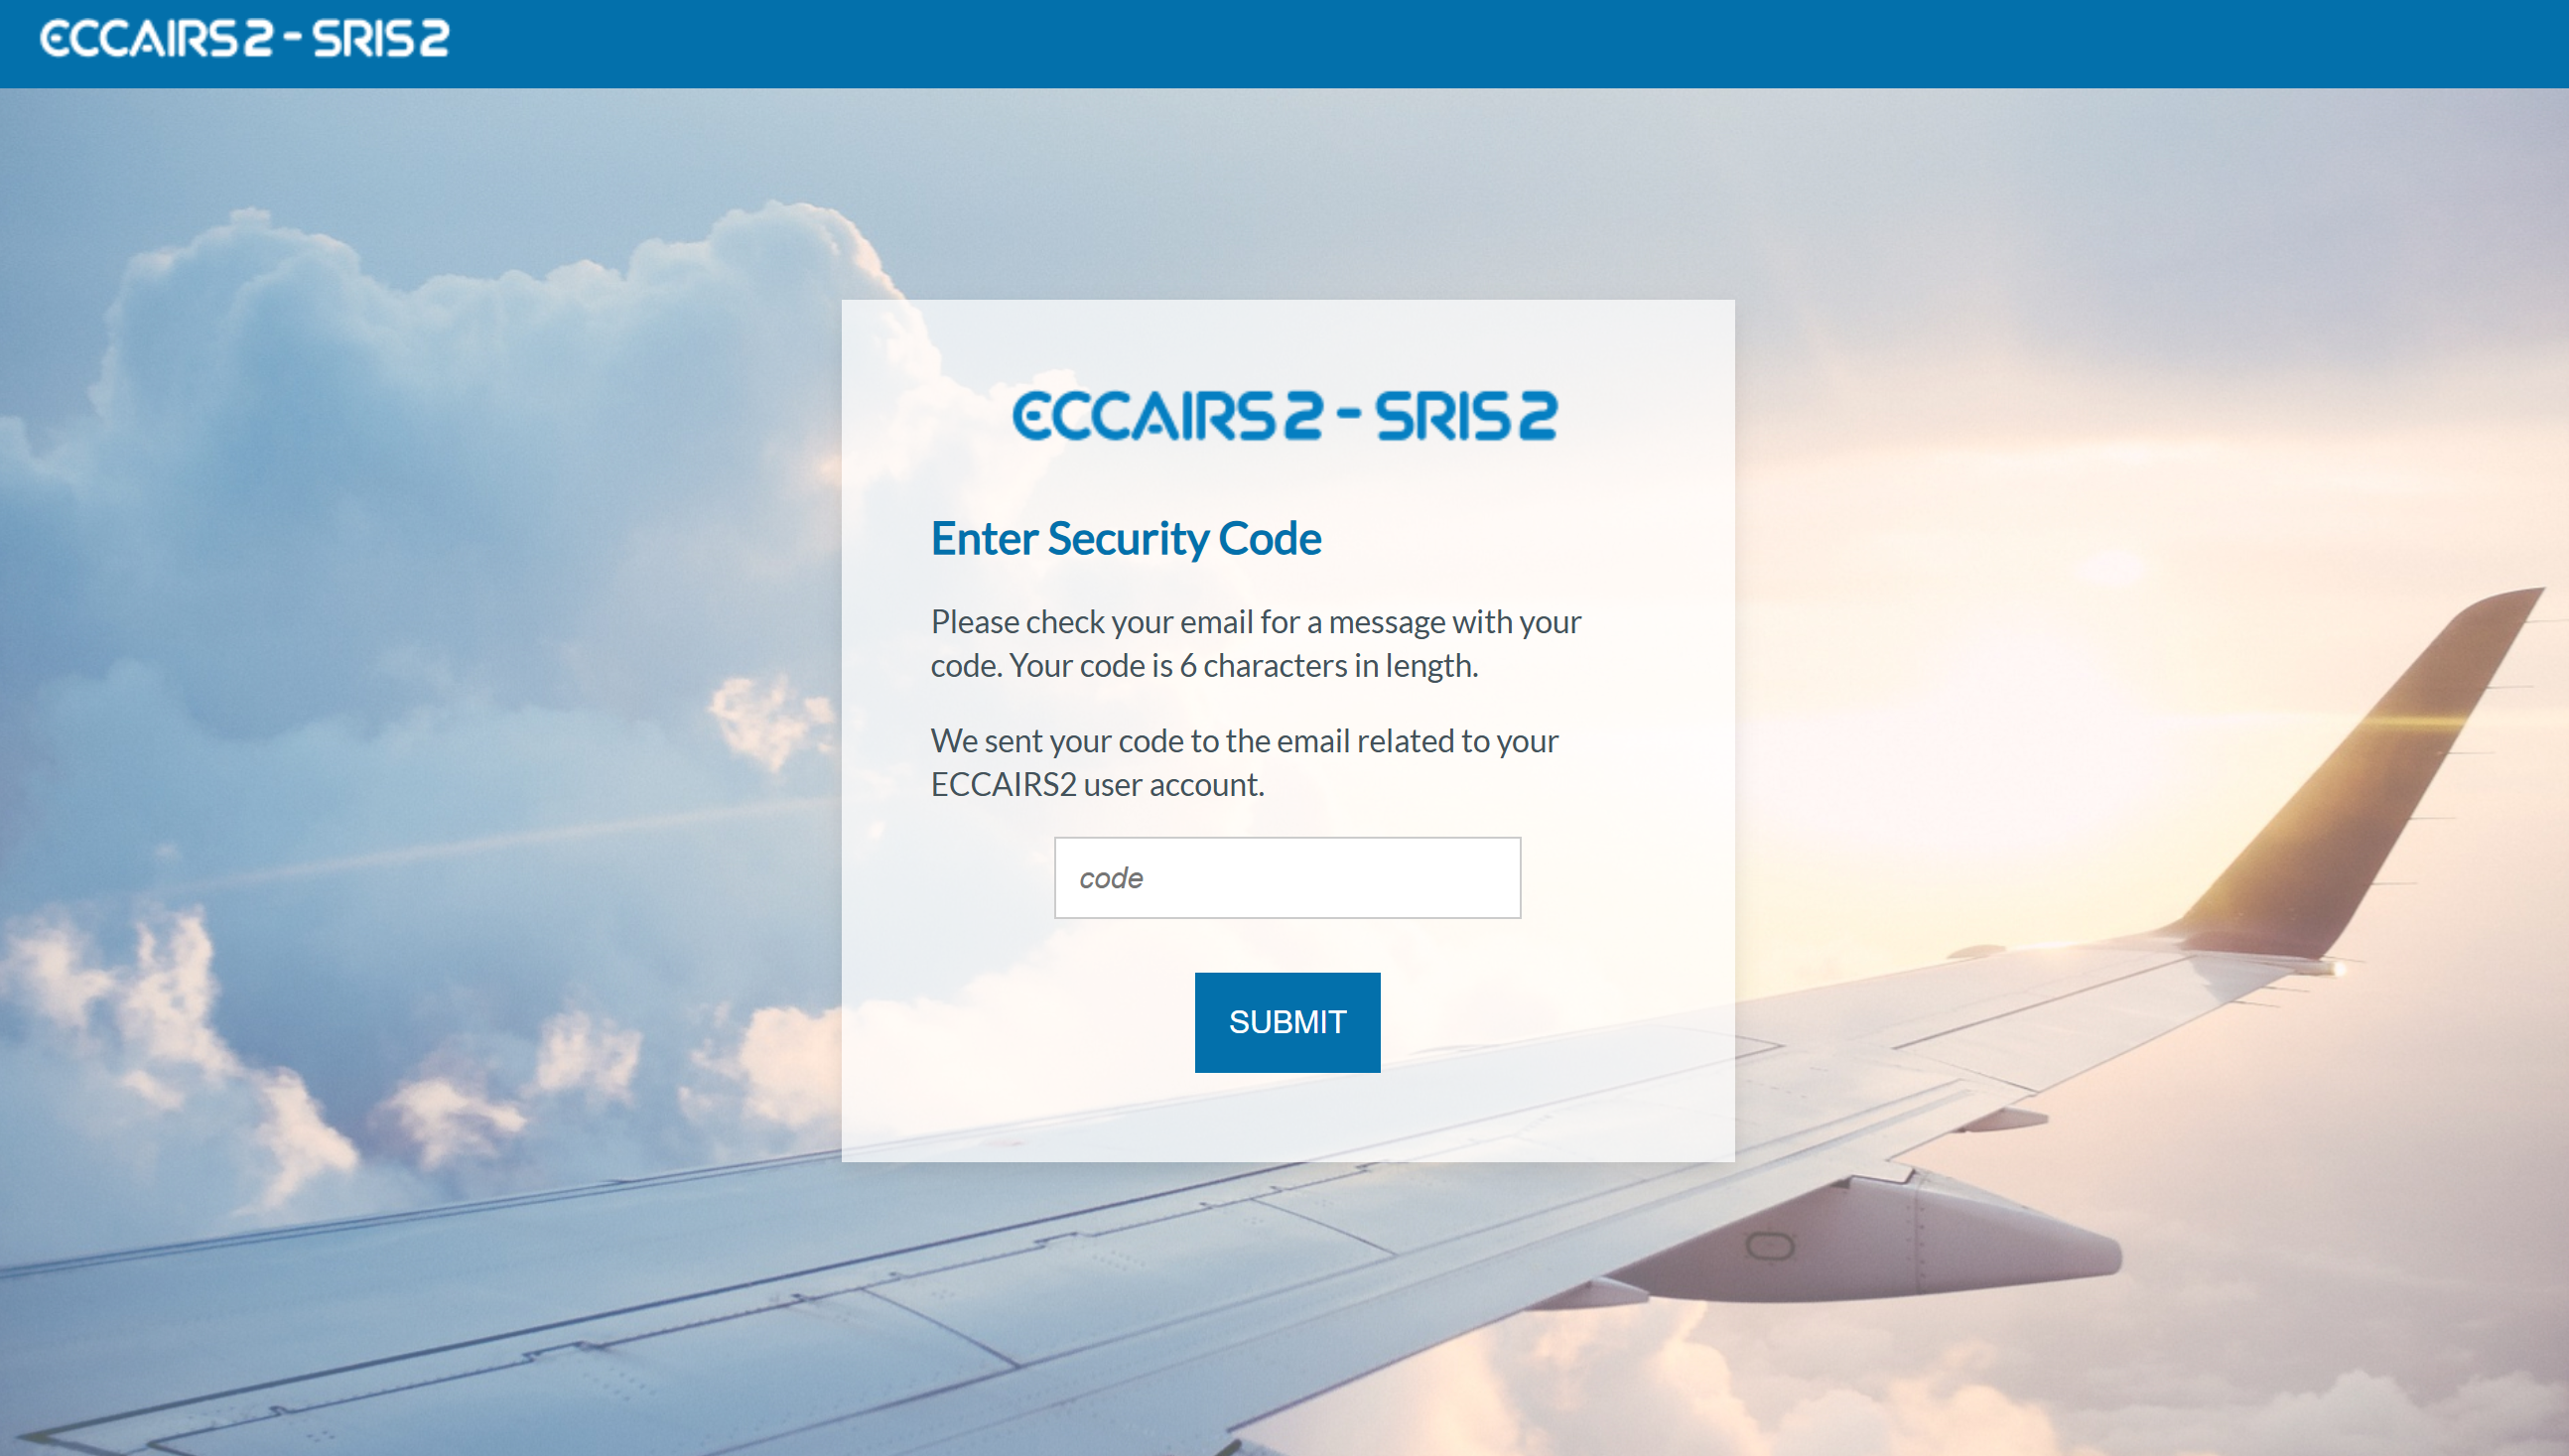
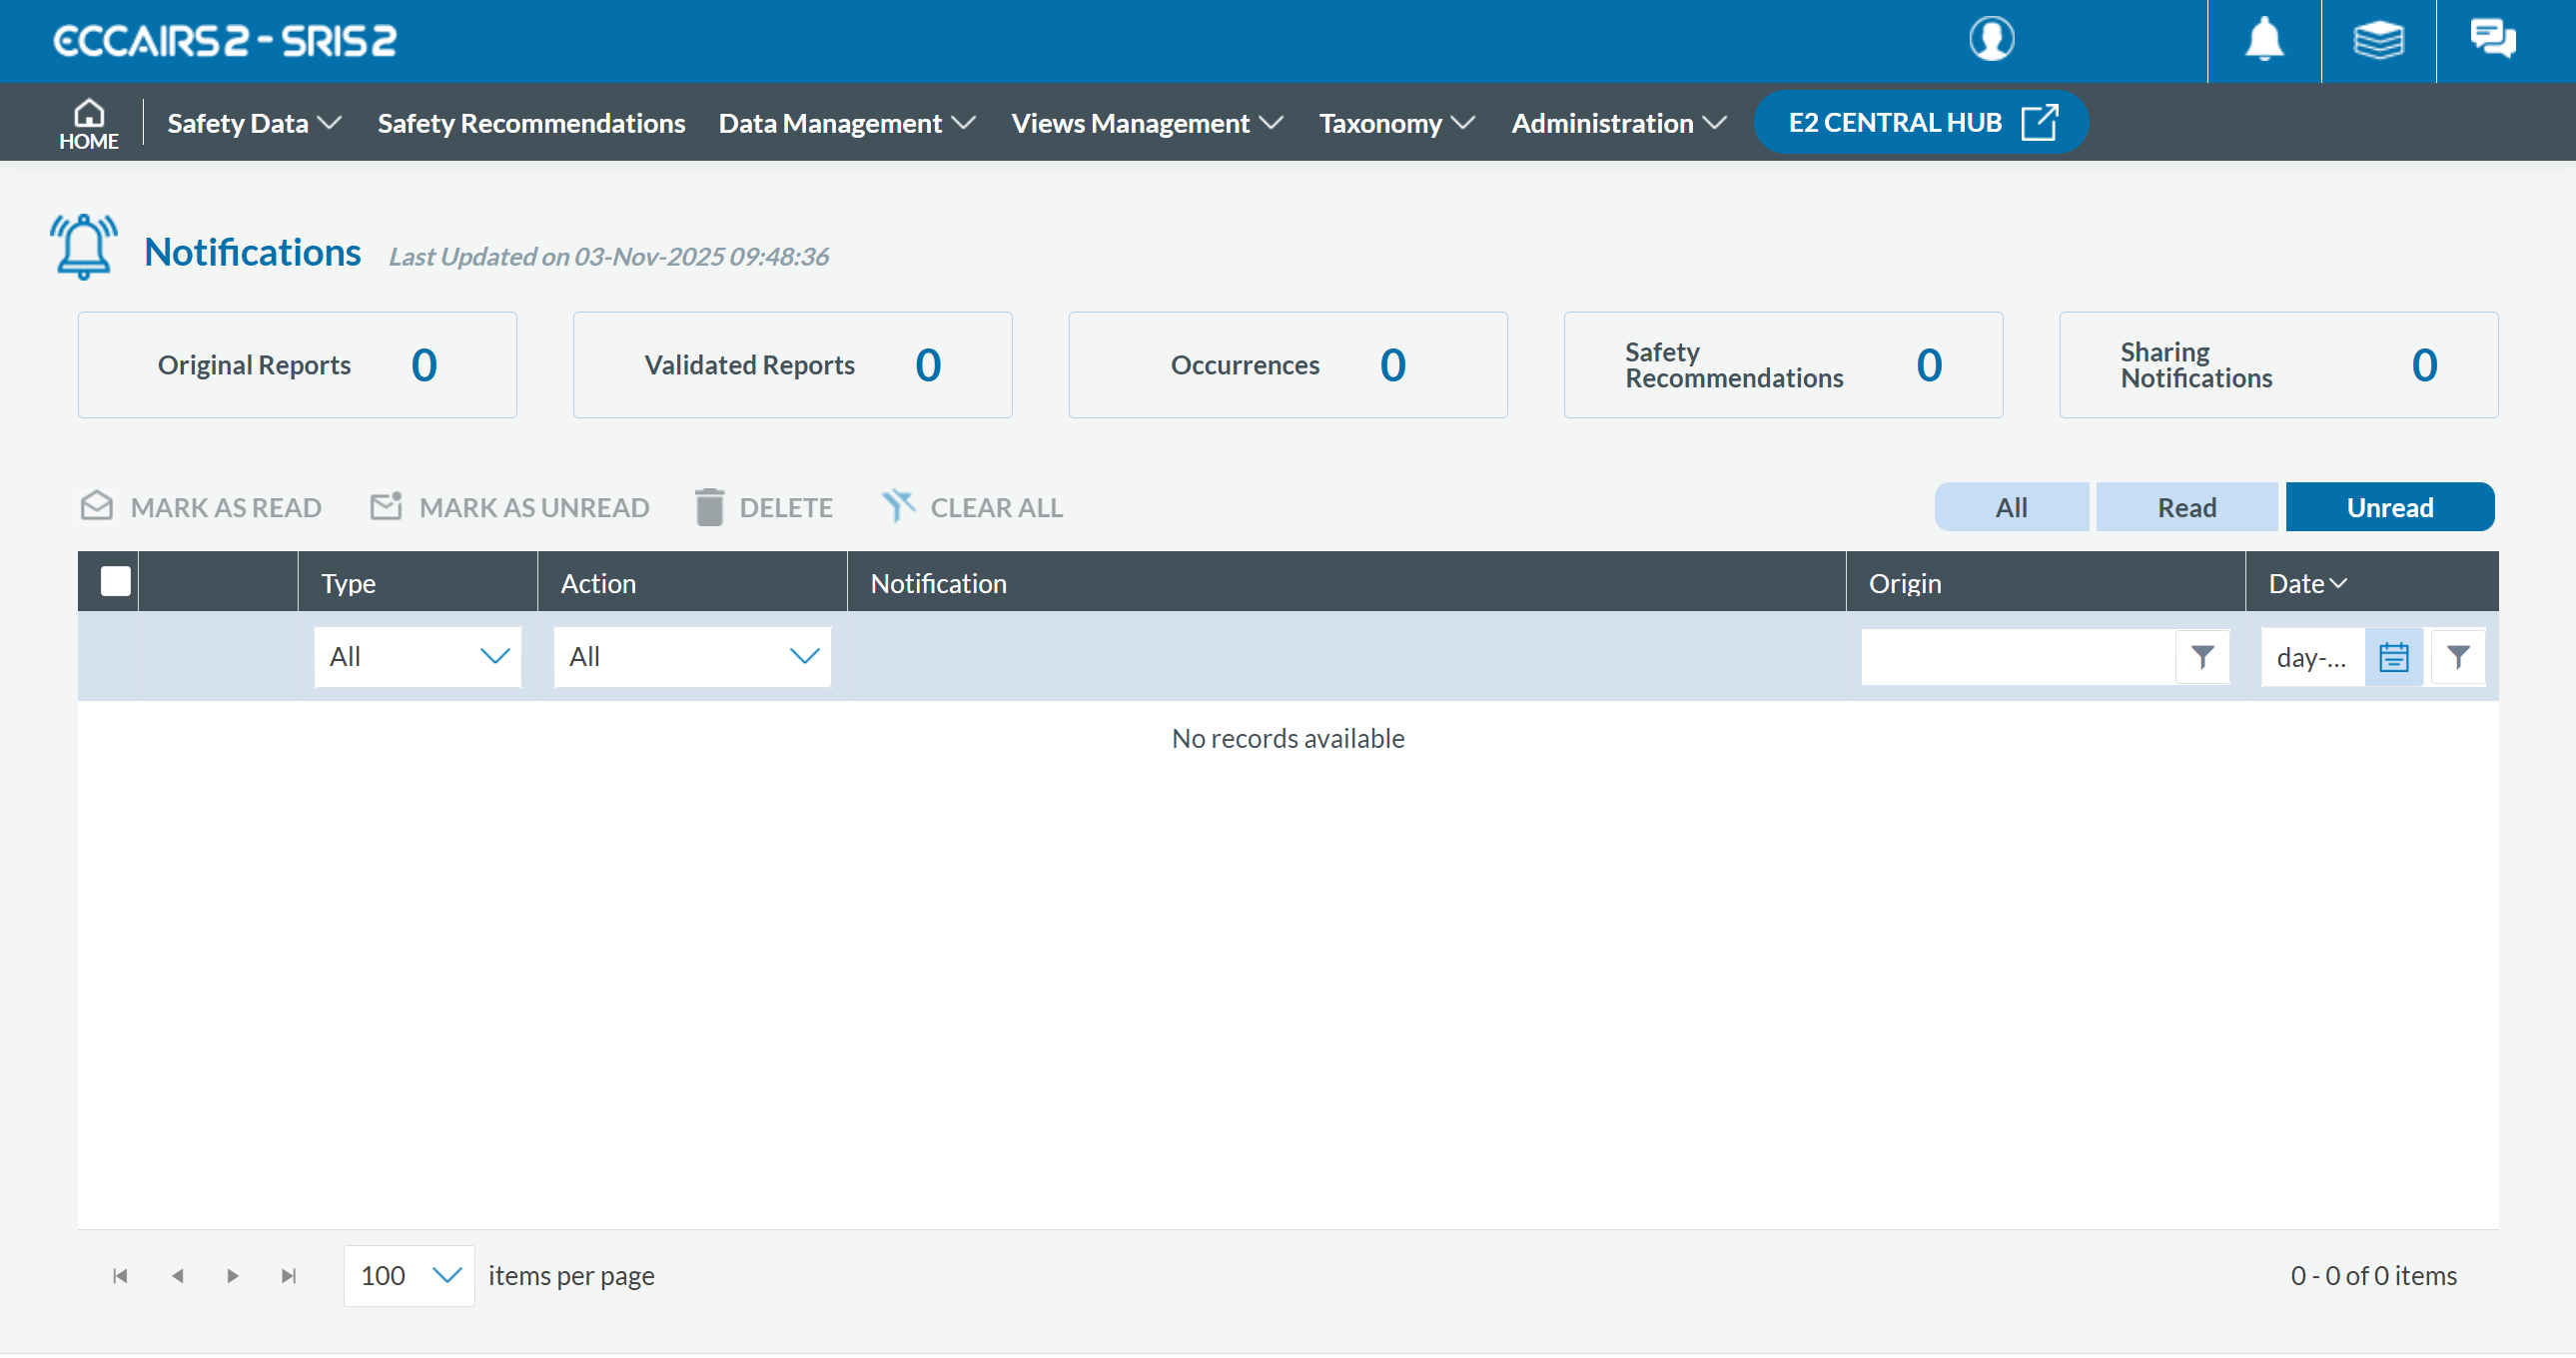
Click on 'SIGN IN TO ECCAIRS'. The system will display the following page:

- Please check your email. The system will send a one-time security code to the email address linked to your user account. The message will be sent from the address 'do-not-reply@aviationreporting.eu'.
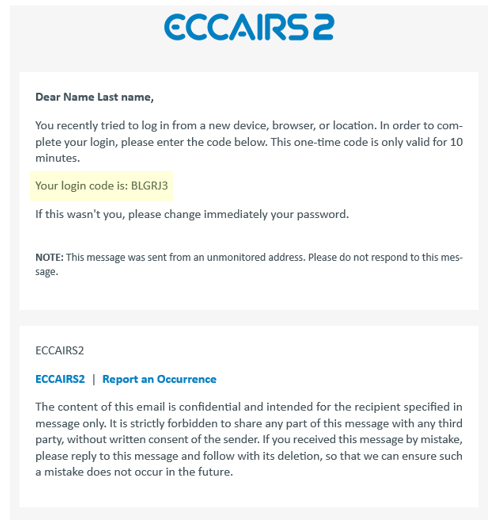
-
Enter your security code and click 'SUBMIT'. You will be redirected to the 'Home' page.
1.4. Reset Password
To reset your password if you've forgotten it, please follow these steps:
- Visit the E2 Reporting Portal at https://e2.aviationreporting.eu/.
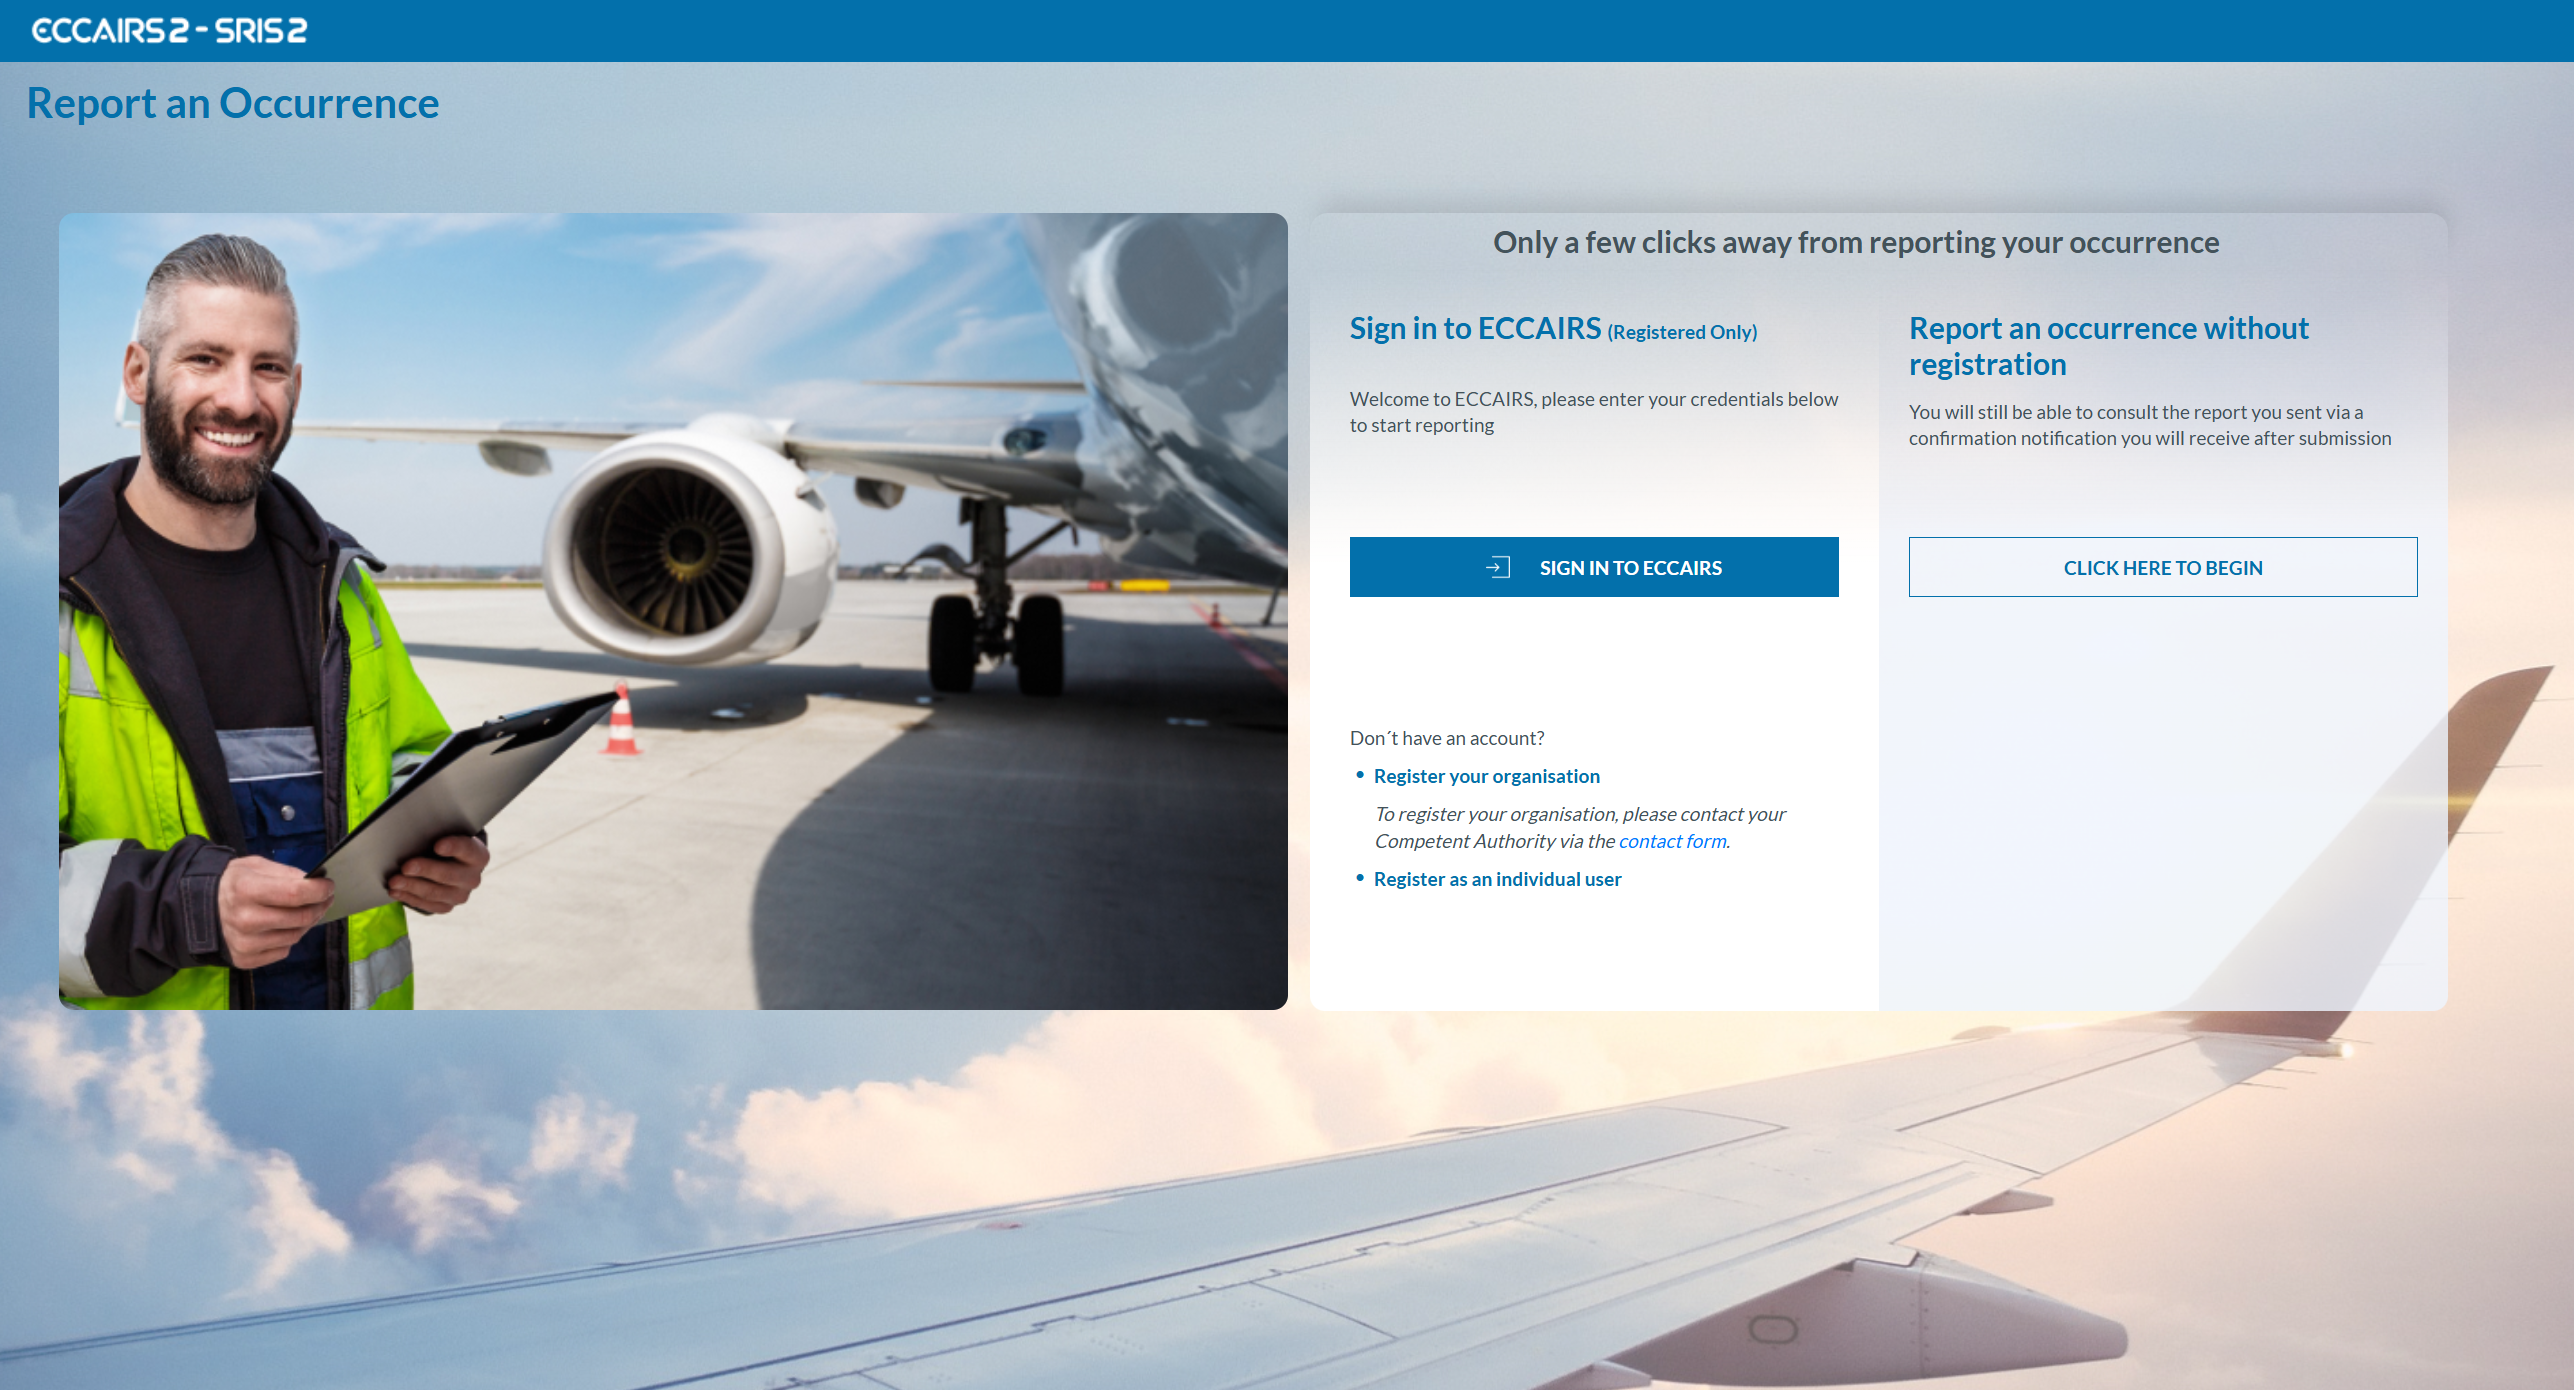
- Click on 'SIGN IN TO ECCAIRS'. You will be redirected to the following page:
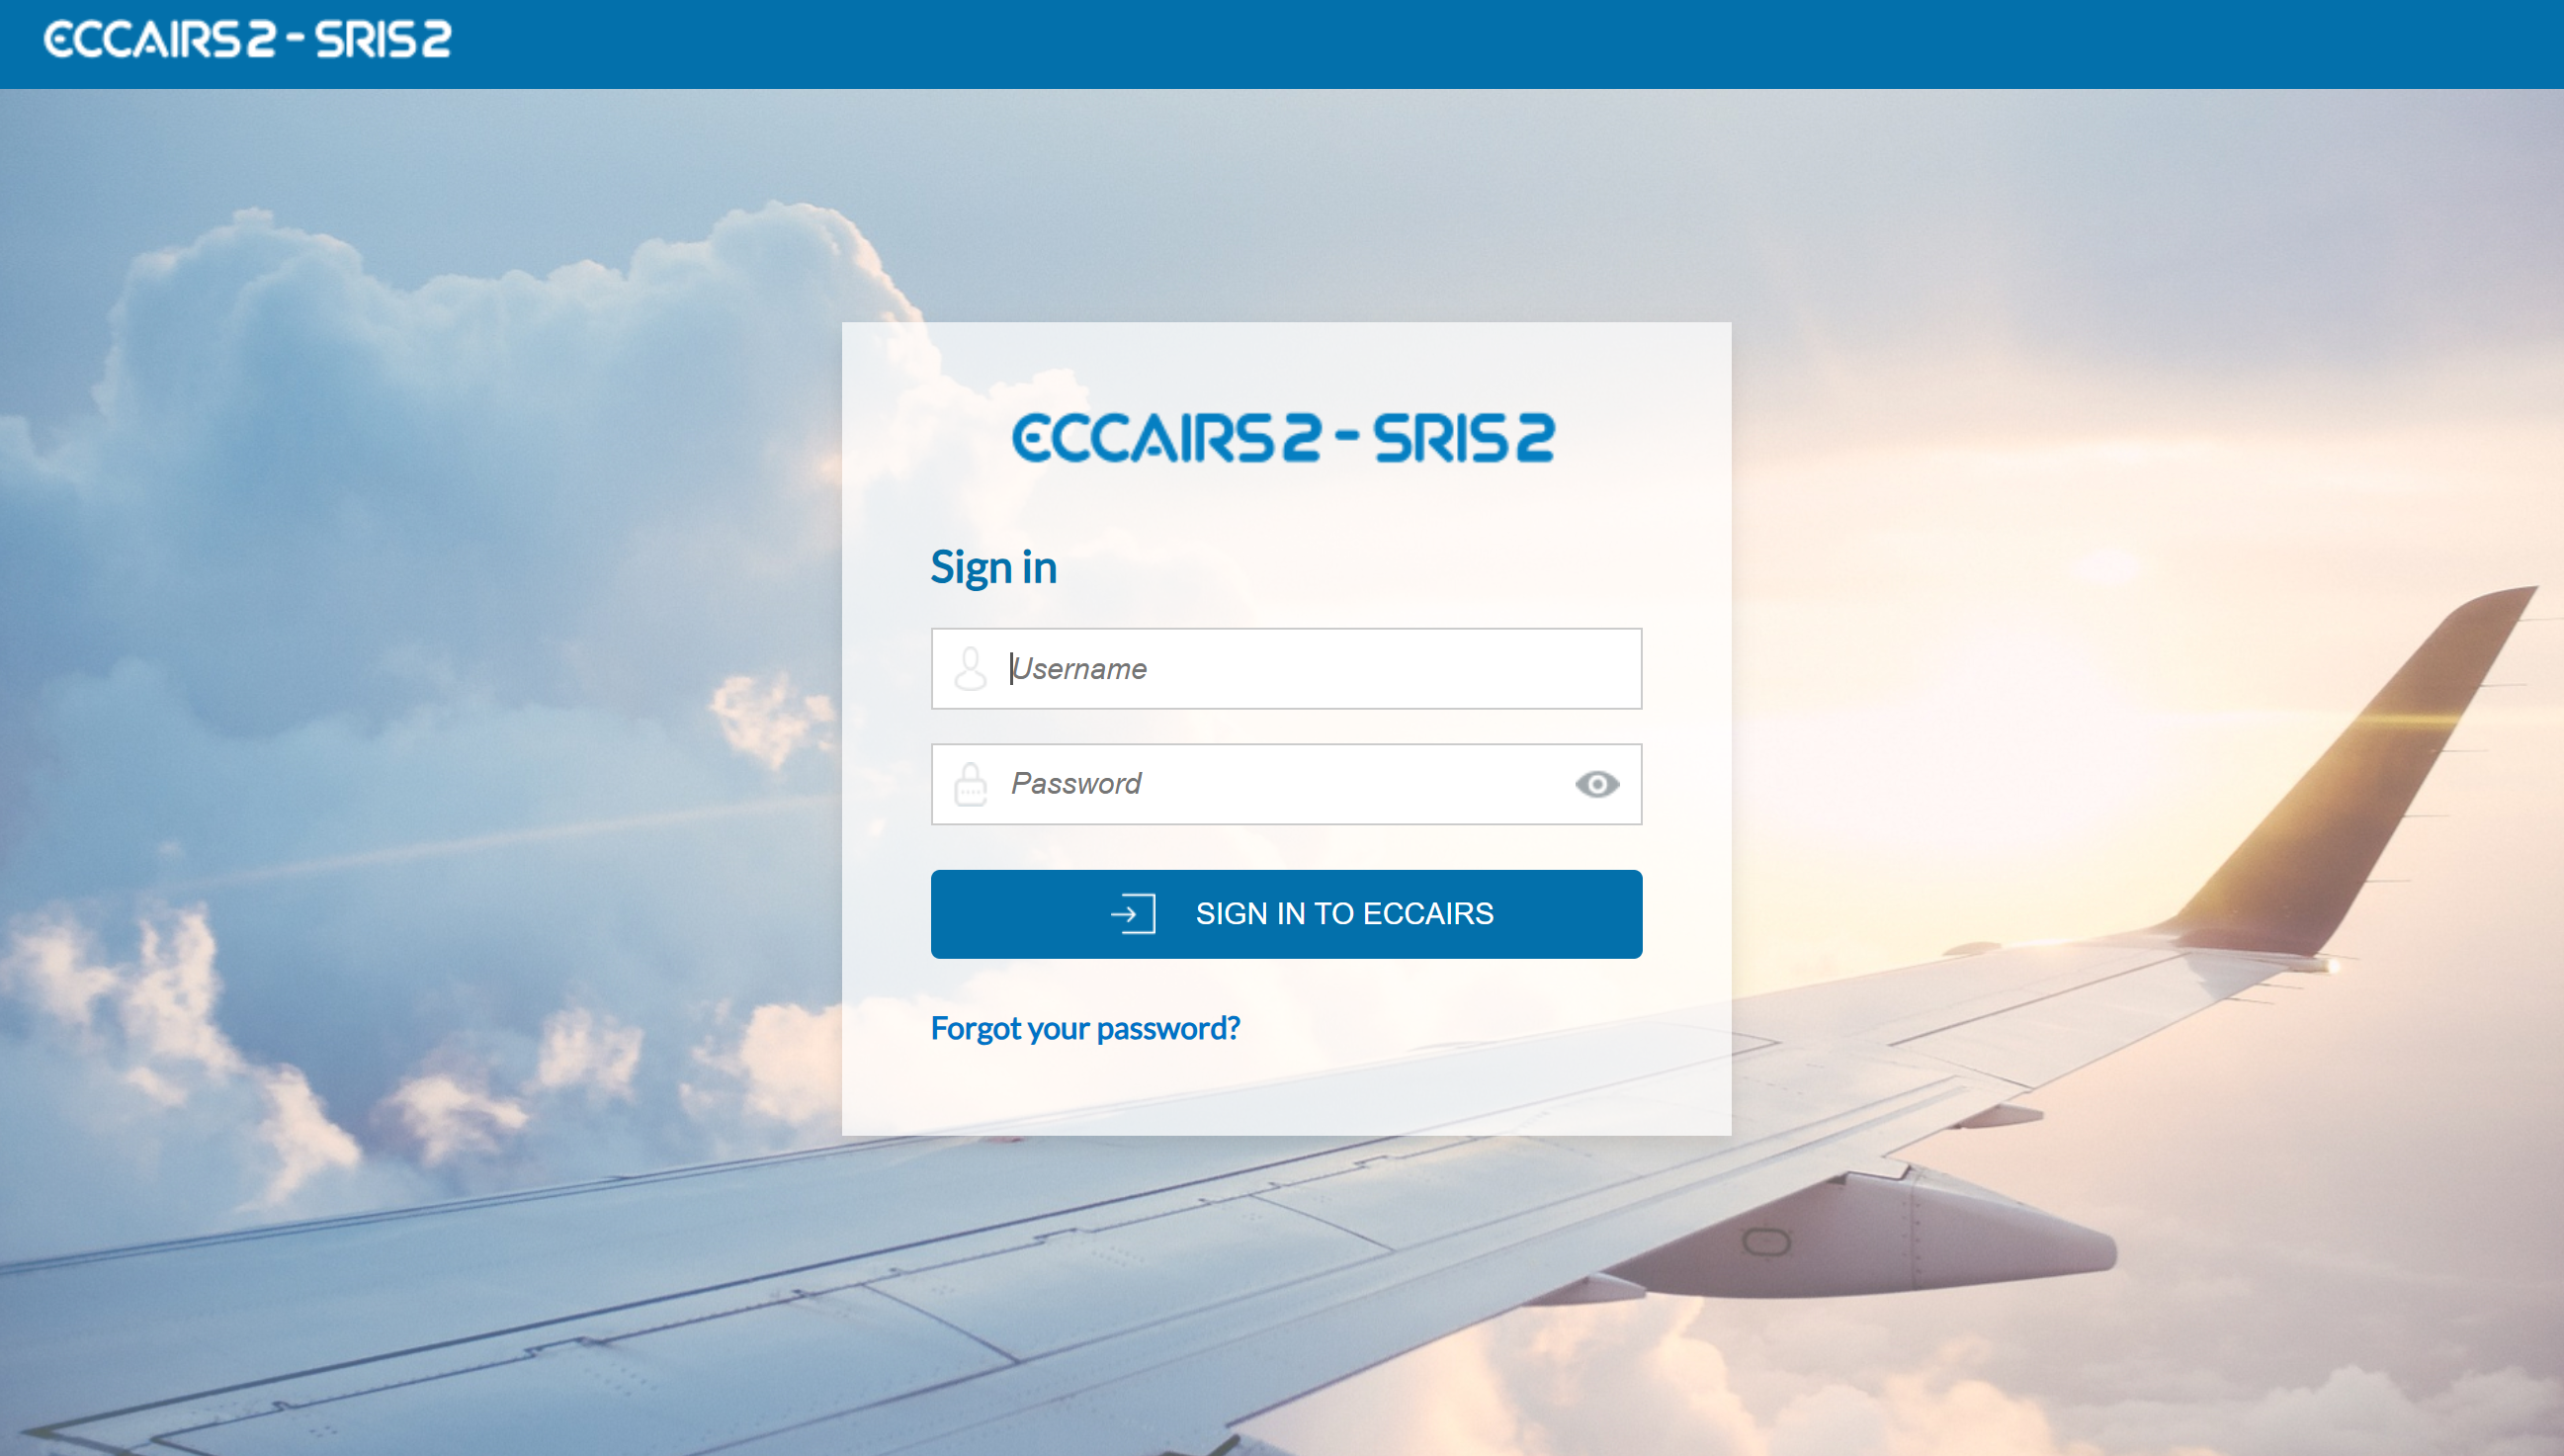
-
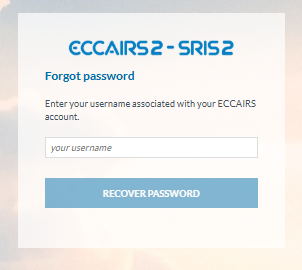
Click on the 'Forgot your password?' link and fill out your username (not your email):

- Click 'RECOVER PASSWORD'. You will receive an email with instructions on how to recover the password.
If you're already signed in, you can reset your password via your user icon:
- Click 'Reset password' The system will display:
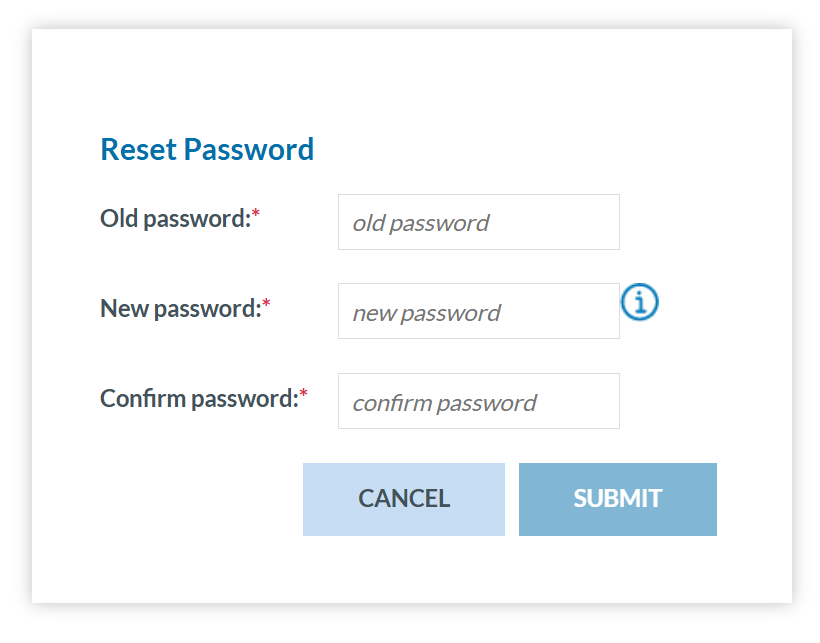
- Fill-in the formular and click 'SUBMIT'.
2. Home (Landing page)
When the Officer accesses the E2 Web Application or when navigating its sections and clicks on ‘Home’, the system displays the landing page:
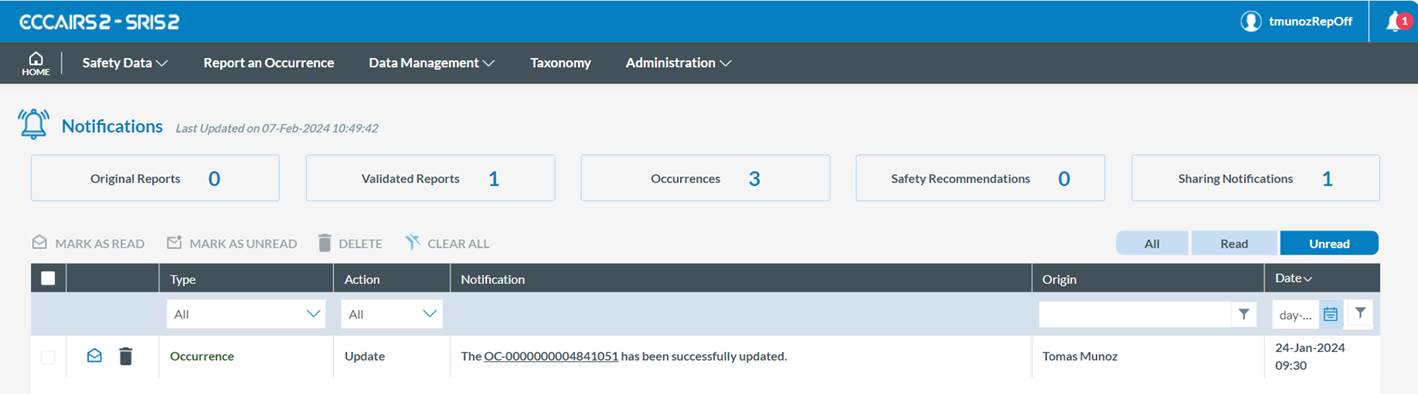
On top of the page, in the right-side corner, the system displays the Officer’s username and a bell with the number of unread notifications:

· Original Reports: all ORs related notifications
· Validated Reports: all VRs related notifications
· Occurrences: all OCs related notifications
· Safety Recommendations: all SRs related notifications (N/A for Occurrence Officers)
· Sharing Notifications: all notifications related to elements (queries, libraries or word templates) shared with the Officer

By default, the list only includes the unread notifications, including:
· The notifications generated based on the query-based notification settings created by the Authority administrator for the Officer
· The query-based notifications defined by the Officer himself through ‘My account’. See Query-based notifications section for further details
· The object-based notifications are set by the Officer through the notification alerts of the lists of ORs, VRs, and OCs together with ‘My Account’ object-based notification settings. See Object-based notifications section, which apply to all kinds of reports, for further detail
The Officer can filter notifications based on the ‘All’, ‘Read’ and ‘Unread’ tabs above the list.
The Officer can also restrict the results through the filter buttons mentioned above.
Each notification of the list is divided into columns:
· A check box: to select the specific notification.
· Mail and delete icon: if the mail is open, it is read so the icon can mark it as ‘unread’; if closed, it is unread, so the icon can mark it as ‘read’. The delete icon deletes the notification.
· Type: All, OR, VR, OC, Safety Recommendations (SR), Query, Library or Word Template. The type drop-down menu can filter it.
· Action: All, Creation, Update, Deletion, Shared. The action drop-down menu can filter it.
· Notification: it summarises the notified action, i.e. The OC-0000000004890000 has been successfully updated.
· Origin: it provides the author of the notified action.
· Date: apart from the date of the notified action, it includes a filter to search based on the date.
Above the list of notifications, the system displays the following tabs:

After selecting the specific notification, the Officer can click it to mark it as read, mark it as unread or delete the notification.
The Officer can access the content of the specific notified action by double-clicking on any section of its row.
3. Safety Data
3.1. OR Management
An Original Report refers to an aviation safety event submitted via the ECCAIRS 2 Reporting Portal. Both unregistered reporters and registered users—whether individuals or organisations—can submit ORs using web forms, PDF files, or E5X files directed to a specific authority. Additionally, ORs may be generated through APIs, by uploading E5X files, or via Machine-to-Machine (M2M) processes by registered organisational users.
To manage them, the Officer accesses the E2 Web Application and unfolds the Safety Data menu on the upper left side, and selects Original Reports.

The primary purpose of this menu is for Officers to validate or archive ORs. The system will display the list of ORs the reporters submit to the Authority’s Officer.
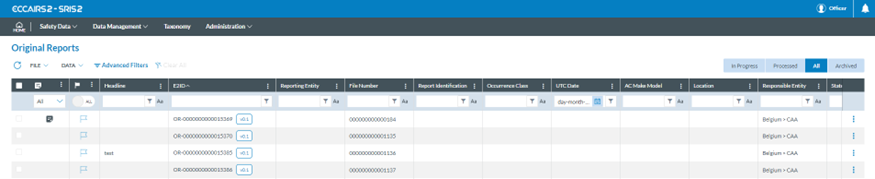
Officers can customise the OR list as explained in the section Reports Lists.
3.1.1. Status filters and status
Above the list of ORs, on the right side, the system displays the filter tabs:

The list of results will restrict the ORs based on the selected tab.
· In Progress refers to ‘Open’ or unvalidated ORs. The list of ORs will show ‘Open’ on the ‘E2 Status’ column, and if the OR is edited by its reporter, it will show a ‘padlock’ icon.
· Processed: refers to validated ORs. The E2 Status column of the list of results displays ‘Processed’ for validated ORs.
· All: refers to all the ORs belonging to the Officer’s Authority regardless of status.
· Archived: ORs sent to the archive. The E2 Status column of the list of results displays ‘Archived’ for ORs.
The status of the ORs can be the following:
· Open: This means the OR has not been validated by any officer.
· Processed means the OR has been validated and has become a VR Validated report (a copy of the OR linked to it).
· Archived: Officers can archive the ORs in the list. Once archived, they can be restored to the “open” status, or deleted.
3.1.2. 3-dot menu of the list of ORs – OR features
On the last column of the right side of each row in the OR list, there is a 3-dot menu.
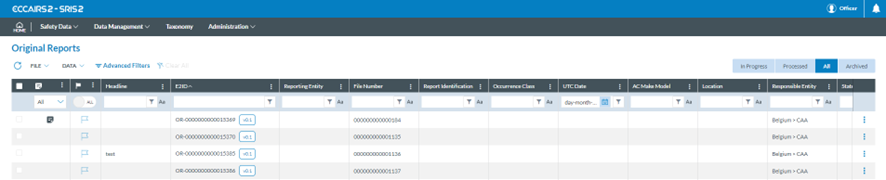
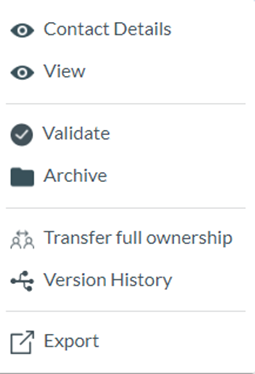
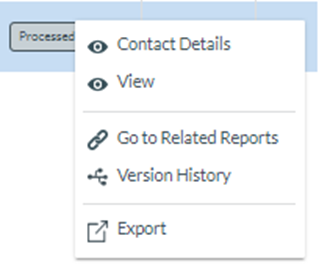
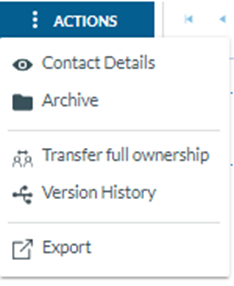
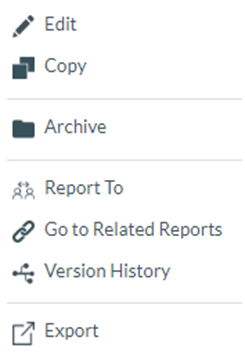
If the Officer clicks on it, the system will display a menu. The options available in this menu depend on the status of the OR:
For Open ORs:
For Processed ORs:
For Archived ORs:

The next sections explain what each option in those menus does.
3.1.3. Contact details

First name and surname, telephone, email address and organisation name (for organisational registered reporters) are displayed in the contact details.
3.1.4. View
When clicking on View in the 3-dot menu (or double-clicking in the list view on any cell of the row), the system will display the content of the OR with the view the Officer has saved in ‘My account’. See Views on ‘My account’ for further details.
If the Officer has no view settled by default, the system displays a blank page where the Officer has to select the specific view for the OR:

The Officer can validate the OR through the ‘Validate’ button above the view, next to the ‘Select the view’ drop-down menu:

When the Officer confirms the action, they can go back to the list of ORs or the list of validated reports (VRs).
3.1.5. Validate
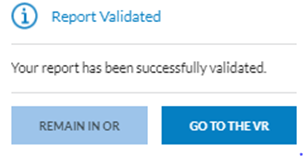
Once the OR is validated, it will turn from ‘Open’ to ‘Processed’ in the E2 Status column and will be moved from the ‘In progress’ to the ‘Processed’ tab of the ORs list:

Moreover, the copy of the OR will be displayed as a VR in the Validated Reports menu.
3.1.6. Archive
This option is to archive ORs. See details in the Features applicable to all reports-Archive section.
3.1.7. Transfer full ownership
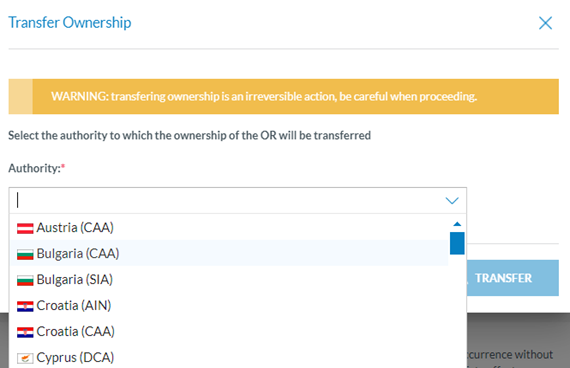
This feature is only available for ORs with an ‘Open’ status (E2 Status) and, therefore, are not linked to a VR. It allows Authority Officers to transfer an OR that was initially reported to them to another Authority.
It is used in cases where the OR was reported to the wrong Authority. As a result, it will disappear from the first Authority’s radar and appear to the new receiving Authority as a regular OR. The Reporter will continue having the OR in their list of ORs, and the receiving Authority will see any future update made to the transferred OR.
· It can only be transferred to another Competent Authority. Therefore, only Competent Authorities are shown in the pick list.
· This option is only available for those ORs that are 'Open' (E2 status) and, therefore, not associated with a VR.
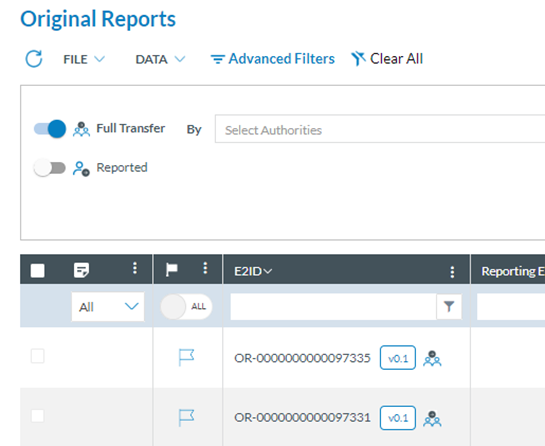
Officers from the receiving Authority can identify the ORs that have been transferred to them by selecting them in the advanced filters and/or with the icon shown by the e2id.
3.1.8. Go to related reports
This option is only available for the ORs that have been validated in the ‘Processed’ tab and have a processed status under the attribute E2 Status column.
A modal view shows the related VR and, if applicable, the Occurrence to which the OR and VR are related.
· The Officer can navigate the reports by clicking the ‘Go to the report’ icon.
· Additionally, they can remove the link between the OR and the VR by clicking on the ‘remove the link’ icon.
ü By doing so, the status of the OR is changed from ‘Processed’ to ‘Open’ as there is no more validated report related to it.
ü Note that while it removes the link between the OR in the VR, the link between VR and Occurrence, if existing, is maintained.

3.1.9. Restore
For the Archived ORs, the status of the OR is changed back to Open.
3.1.10. Delete
For the Archived ORs, the status of the OR is changed to Deleted. The Deleted OR will no longer be visible in the system, but the record will be kept in the Database.
3.1.11. Version History
This option of the 3-dot menu shows all the changes the OR has been through, including modification dates and users and the changes in the attributes, if edited. See more details in the Version History section.
3.1.12. Export
This option exports the specific ORs of the list to different file formats. See details in the Export section.
3.1.13. Advanced filters
Apart from the filters of the list of ORs and the queries, the system provides these Advanced filters Next to the File and the Data menus above the list of ORs:

When the Officer clicks on it, the system displays the following filters above the list of results:

The Officer can activate any of the filters or both at the same time:

The Full transfer filter can restrict the results of the list of ORs:
· By the Authority(ies) who transferred ORs
· From a date
· To another (later) date
The Reported filter refers to reports from other authorities. See section Report to for details on this. This filter can restrict the results:
· By the Authority(ies) who submitted the reports
· From a date
· To another (later) date
The Officer completes the necessary filters and clicks ‘Apply’.
The system will display the list of ORs based on the introduced parameters.
3.2. VR Management
A Validated report (VR) refers to a copy of an original report that the Authority Officer has validated. It is editable by the Officer and can enrich the report with additional information not available in the initial report. The VR is never shared outside the Authority. An Authority Officer can also create a VR from scratch through the E2 Web Application.
The Validated reports can be converted into a new occurrence or integrated into existing occurrences through an integration process.
To manage VRs, the Authority Officer accesses the E2 Web Application home page and selects the Safety Data menu on the left:

They then click ‘Validated Reports’. The system displays the list of VRs with the reports for the specific Authority to which the identified Officer belongs:

Officers can customise the VRs list as explained in the section Reports Lists.
3.2.1. Status and status filters
Above the list of VRs, on the right side, the system displays the filter tabs:

The list of results will restrict the VRs based on the selected tab.
· My Drafts: refers to VRs the Officer is editing. The list of VRs will show ‘Draft’ on the ‘E2 Status’ column and cannot be edited by another Authority Officer.
· In Progress: refers to ‘Open’ VRs. The list of VRs will show ‘Open’ on the ‘E2 Status’ column, and if an Officer is currently editing the VR, it will show a ‘padlock’ icon.
· Processed: refers to VRs integrated into an OC. The E2 Status column of the list of results displays ‘Processed’ for the VRs integrated in OCs.
· All: refers to all the VRs belonging to the Officer’s Authority regardless of status.
· Archived: VRs sent to the archive. The E2 Status column of the list of results displays ‘Archived’ for VRs.
The status of VRs can be the following:
· Draft: Draft status refers to a VR created or edited by an Officer and saved with the changes but not as a new document version. As with any other Draft in the application, the drafts can only be viewed by the user who creates it.
· Open: they are the VRs that are not integrated into an OC. The Officer can edit open VRs.
· Processed: VRs which have been integrated into an OC and cannot be edited by the Officer.
· Archived: VRs stored in the archive.
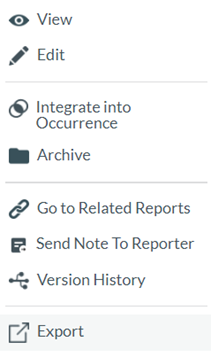
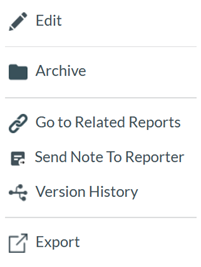
3.2.2. 3-dot menu of the list of VRs – VR features
On the extreme on the right side of each VR row of the VR table or list, there is a 3-dot menu.

If the Officer clicks on it, the system will display the following window:
For Open VRs:
For Processed VRs:

3.2.3. View
When clicking on View in the 3-dot menu (or double-clicking in the list view on any row), the system will display the content of the VR with the view the Officer has saved in ‘My account’. See Views of My Account for further details.
Otherwise, the system displays a page where the Officer has to select the specific view for the VR:


The Officer can integrate the VR into an OC by clicking on the ‘Integrate’ button, as explained in the next section, Integrate into Occurrence.
3.2.4. Integrate into occurrence
Only VRs in ‘Open’ status can be integrated into an OC. The integration is the process of converting a VR into an OC; it can be integrated as a new occurrence or into an existing one. The VR will be changed to ‘Processed’ status in the list of VRs.
A new Occurrence will be created, or an existing one will be updated. Either way, the OC will be linked to the related VR and OR.
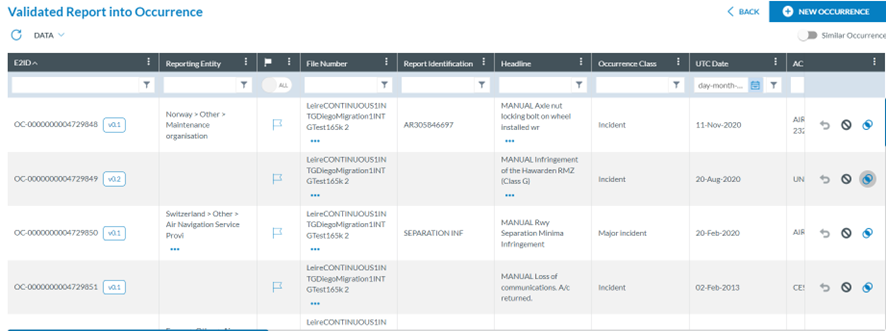
The Officer clicks ‘Integrate into Occurrence’ on the 3-dot menu of the specific open VR in the list of VRs, and the system will display the list of ‘Validated Report into occurrence’ with all OCs available in the Authority’s database:
3.2.4.1. Integrate into a new occurrence
When the Officer has clicked on the ‘Integrate into occurrence’ of the 3-dot menu of the VR of the list, above the list of VRs and the Similar Occurrences toggle, the system displays a ‘New Occurrence’ button. The Officer can click on it, and the system will display a confirmation message. The Officer will confirm it, and the VR will be integrated into a new OC, and its status will turn to ‘Processed’ in the list of VRs.
3.2.4.2. Integration into existing occurrence
If the Officer knows the OC where to integrate the VR, a search can be done through the E2ID filter, file number or other available columns, as shown in the image above.
When potential similar OCs are unknown, or their data are unknown to the Officer, the Officer can select the ‘Similar Occurrences’ toggle. By clicking it, the system verifies if similar occurrences exist and provides the Officer with a list of these similar Occurrences.

Searching for similar occurrences is based on an attribute-weight base algorithm configured at the system level. The algorithm uses the following attributes:
|
Attribute |
Description |
|
5 |
Location indicator |
|
54 |
Call sign |
|
120 |
Flight number |
|
167 |
Last departure point |
|
215 |
Operator |
|
228 |
Planned destination |
|
244 |
Aircraft registration |
|
254 |
Aircraft serial number |
|
433 |
Local date |
|
438 |
Report identification |
|
447 |
Reporting entity |
|
477 |
UTC date |
|
881 |
Engine serial number |
|
21 |
Aircraft manufacturer model (in this attribute the validation is made with the second level value of the Value List) |
The attributes mentioned above of a VR will be checked for equality against the same attributes of all occurrences in the Authority’s database.
Some considerations:
· The algorithm is divided into 4 blocks, and each block is given a certain weight
· Block 1 and block 4 are mutually exclusive; therefore, the total is a maximum 100%
· As the similarity algorithm scans the full database, only the OCs with Attributes 433 (local date) and/or 477 (UTC date) filled out are checked for performance reasons.
All 4 blocks are executed, giving the found occurrence a similarity score. The occurrences with a score > 50% will be shown in a sorted list.
· Block 1 (50%): The Aircraft flight details. If one of the following conditions is met, the weight will be 50%.
ü (UTC date or Local date) and Aircraft Registration.
ü (UTC date or Local date) and Aircraft serial number.
ü (UTC date or Local date) and Engine serial number.
ü (UTC date or Local date) and Call sign.
ü (UTC date or Local date) and Flight number.
ü (UTC date or Local date) and Report Identification.
· Block 2 (25%): The geographical details. If one of the following conditions is met, the weight will be 25%.
ü (UTC date or Local date) and Last departure point and Planned destination.
ü (UTC date or Local date) and Location indicator.
ü (UTC date or Local date) and Operator.
ü (Report identification or Reporting entity).
· Block 3 (25%): The Aircraft's physical details. If one of the following conditions is met, the weight will be 25%.
ü Aircraft master model and Aircraft Registration.
ü Aircraft master model and Aircraft serial number.
ü Aircraft master mode and Call sign.
ü Aircraft master mode and Flight number.
ü Aircraft registration and Call sign.
ü Aircraft registration and Flight number.
· Block 4 (25%): The same as block 1, except a variance for the UTC/Local dates of +/- 1 days is considered. If one of the following conditions is met, the weight will be 25%.
ü (UTC date +/- 1 day or Local date +/- 1 day) and Aircraft registration
ü (UTC date +/- 1 day or Local date +/- 1 day) and Aircraft serial number
ü (UTC date +/- 1 day or Local date +/- 1 day) and Engine serial number
ü (UTC date +/- 1 day or Local date +/- 1 day) and Call sign
ü (UTC date +/- 1 day or Local date +/- 1 day) and Flight number
ü (UTC date +/- 1 day or Local date +/- 1 day) and Report identification
On the right of the list, there are three icons per row:
 Integrate icon: It will be activated when the report is not blocked (OC has a Draft version or a batch operation is being executed over the OC). The Officer clicks on it, and the system will display a confirmation message. The Officer confirms the action, and the system will display the integration page (explained later in Section 2.2.6.1)
 Discard icon: This icon discards the OC, so the VR cannot be integrated into that OC. If clicked, the Integrate icon is disabled, but the OC remains on the list.
 Restore icon: This icon is only active for the OCs that have been discarded. It reactivates the Integrate icon for that OC.
2.2.4.3. Integration screen
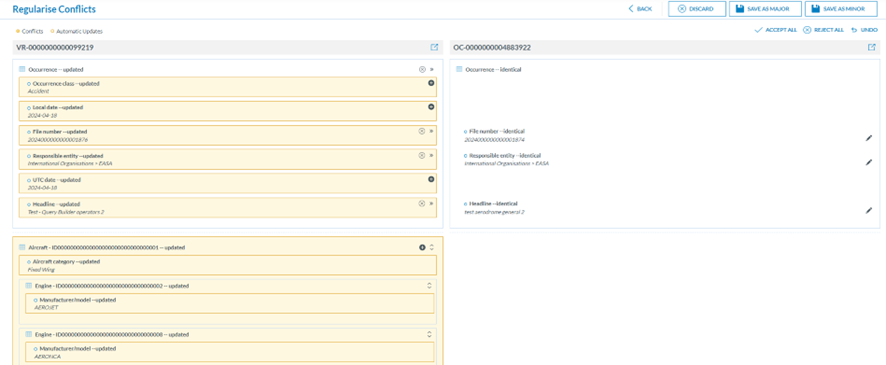
When the VR is integrated into an existing OC, the same screen as in the Conflict Resolution is displayed to the Officer. This screen allows the Officer to validate the information from the VR and the OC.
The identifying process of the entities is explained in Section 2.2.15, Automatic Updates and Conflicting Reports.
We have to explain what an Attribute Owner is. When more than one VR integrates an OC, each VR can update each attribute. However, as a principal, a Reporter cannot contradict what the Officer or other Reporter had said. So, when integrating the VR into the OC, the Officer can select the attributes of that VR that will be the owners of those same OC attributes. This is done by replacing the OC attribute with the VR one. Note that even if the information of the attribute is the same, the attribute is marked as “conflicting”. The reason for this is that it might be the case the Officer wants to make that VR owner of that Attribute, an in order to do so the information must be displayed even if it is the same in the VR as in the OC.
Being the owner of an attribute means that any update on that OR will automatically be updated at the OC level. If any other VR tries to change the attribute, the system will create a Conflict. The owner of the attribute is the last one selected on the integration screen.
When the Officer integrates the VR into an OC, the system displays all the information on the two documents. The officer can then select which attributes/instances they want to copy into the OC and make them owners of those attributes/instances.
3.2.5. Edit
This option is only available for ‘Open’ and not blocked VRs. When the Officer clicks on the ‘Edit’ option of the 3-dot menu of the specific VR of the list of VRs, the system will display the content of the VR with the view the Officer has saved in ‘My account’. See Views
of My Account for further details.
Otherwise, the system displays a page where the Officer has to select the specific view to edit the VR:

The Officer selects the view in the drop-down menu, and the system displays the specific VR in Draft:

Through the left panel, the Officer can access the different topics of the view.
The Officer can discard the changes made to the VR, save them as a Draft or Minor version, return them to the VRs list, or save the changes on the current page. See Saving Options for further details.
3.2.6. Archive
This option is to archive VRs. See details in the Features applicable to all reports - Archive section.
3.2.7. Regularise conflicts
The regularisation of conflicts is explained in detail in the section Automatic updates and Only Conflicting Reports.
3.2.8. Go to related reports
This option is only available for those VRs that:
· are in Open status and come from an OR; and/or
· are in Processed status. That is, they have been integrated into an OC.
A modal view shows the reports on which VR is related.

· The user can navigate to the reports by clicking on the ‘Go to the report’ icon.
· Additionally, by clicking on the corresponding ‘remove the link’ icons, they can remove the:
ü OR-VR link
o By doing so, the status of the OR is changed from Processed to Open.
o Note that while it removes the link between the OR in the VR, the link between VR and OC is maintained if it exists.
ü VR-OC link
o By doing so, the status of the VR is changed from Processed to Open.
o Note that while it removes the link between the VR in the OC, the link between OR and VR is maintained.
3.2.9. Send note to reporter
The VRs that have come from an OR, provide this option under the 3-dot menu. It allows the Authority Officer to contact the Reporter within the system if additional information or clarification is required.
The Officer has to click on this option of the 3-dot menu for the specific VR and the system will display a modal window:
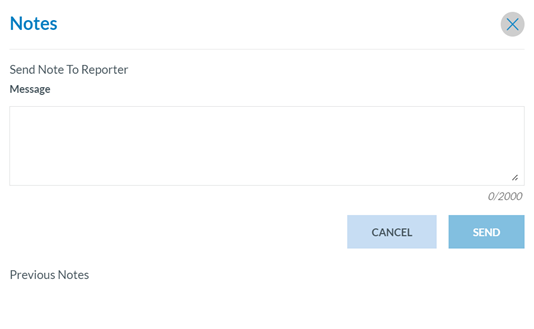
The note will be sent by email to the registered reporter.
Additionally, a Note icon  will appear by the OR in the list on the landing page of the registered reporter. As a result, the Reporter can send an updated report with the additional information or changes sent by the Officer.
3.2.10. Creation of a Validated Record from scratch
The Officer can create a new VR from scratch without having to validate an OR.
As the VR is saved, the system validates if it already exists in the Authority by checking the following attributes of the ECCAIRS Central Taxonomy:
· Report Identification (438)
· Reporting Entity (447)
· UTC Date (477)
If there is a match, the system informs the user that the VR already exists.
The Officer has to access the VR management option under the Safety Data drop-down menu, and the system will display the VRs list. Above the list of VRs and the filters, there is the ‘New Validated Report’ button:

The Officer clicks on it, and the system displays the New VR page, based on the default view the Officer has previously set through ‘My account’. See Views of My Account for further details.
If no view has been previously set, the system will display the Views drop-down menu:

The Officer selects a View on this menu for the system to display:

The Officer can move between topics through the navigation tree on the left page.
The Officer can discard the VR, save it as a Draft or Minor version, return to the VRs list or save the changes on the current page. See Saving Options for further details.
3.2.11. Export
This option exports the specific VRs of the list to different file formats. See details in the Export section.
3.2.12. Other VR features
The Officer clicks on the Advanced Filters menu, and the system displays below the ‘Only conflicting Reports’ and the ‘Automatic Updates’ toggles:

3.2.13. Automatic updates
Once the OR is validated, the reporter can update the information on the report. If the OR is saved as a minor version and has related reports (VR or VR and OC), the application tries to copy the new information into the related reports of the OR. This process is called Automatic Update.
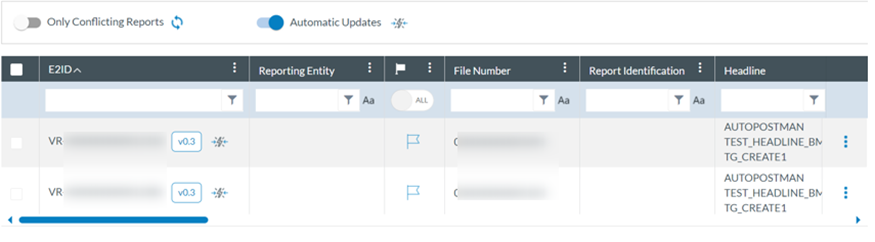
If there is new information updated, the application shows it in the view screen of the VR/OC with the fields updated highlighted as in the screenshot
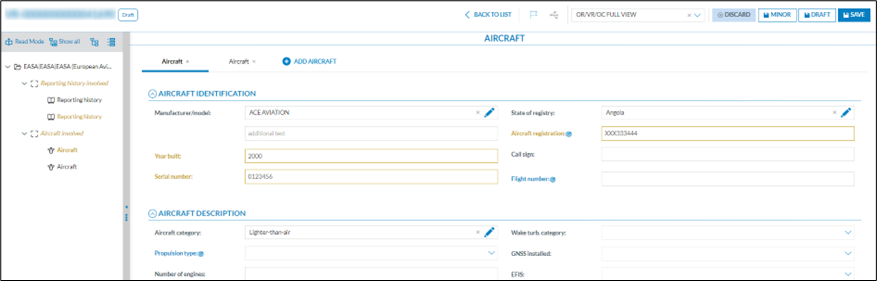
Automatic updates are carried out on the related reports (VR and OC). Documents that have been automatically updated are marked with an icon in the list and have an Advanced Filter to display only those documents.
3.2.14. Conflicting Reports
Before getting to what a Conflict is, we first must explain how the system identifies the Entities and Instances. When a report is created, its entities and instances are assigned an ID. That ID is unique and is used to identify the Entity or Instance. If the Report is created Online, through a PDF or the API, the application creates the ID, but if the Report is submitted through an E5X file, it could be that it has an ID included in the E5X file (from now on referred to as E5X ID or External ID) or not provided. If the E5X ID is provided, the system will use that to identify the Entity/Instance.
If there is no ID in the E5X, the system then will try to identify the Entities or Instances through the Key Attributes. Key Attributes (referred to from now on as KA) are unique attributes settled by EASA at the central level to identify instances. There can only be one Key Attribute per instance, and currently, the following ones are available:
· Aircraft: Aircraft Registration Number
· Aerodrome: Location Indicator
· Airspace: FIR/UIR Name
· Narrative: Narrative Language
· Events: Event Type
· Reporting History: Report Identification
If those attributes are present in each instance, the system identifies them and tries to match them with the existing ones in the Documents. If there is a match, the instance is updated. If there is no KA match, a new instance is created.
A Conflict is created every time the Reporter makes an OR update. The system will automatically make the Automatic Update on the related reports. If, by doing so, the updated attributes try to modify information the Officer has updated or the system does not know with which instance (no E5X ID or KA) it is related, it will create a Conflict.
Conflicts can exist between the OR and VR, and between the VR and OC. The Officer must first resolve the conflict between the OR and VR before solving any conflict between the VR and OC.
With that information explained, when a Conflict is created, no other update is carried on until the Conflict is solved. The VR is blocked until the Officer solves the conflicts. The Officer must go to the Regularise Conflicts option in the three dots menu to do so. The VR with an existing Conflict is marked with the icon . It is also an advanced filter, so only the conflicting VR are displayed.
When the Officer enters this screen, a VR Draft is automatically created, blocking VR for the rest of the Authority Users. For all the Conflicts, the header is the same with the following buttons and actions:

· Back: returns to the table with all the VR. Before returning to the VR table, a modal requesting the Officer to discard unsaved changes is displayed.
· Discard: it deletes the Draft, and all the work done is lost. There is a modal requesting confirmation for this action. The conflict is not solved, and VR is still blocked.
· Save as Minor: Save the VR information displayed on the screen as a minor version. The Conflicts not approved will be automatically discarded, and the automatic updates will be accepted.
· Accept All: accepts all the conflicts and copies all the information from the OR to the VR. The system will show a modal advising that the instances replaced in the VR will lose all the information contained as it is fully replaced by the Instance's OR. The Officer must confirm this action for each instance that has a conflict.
· Reject All: Reject all the conflicts simultaneously, including the Automatic Updates.
· Undo: returns the VR to the starting point when the Officer opens the Conflict Resolution Screen.
Talking about the OR-VR information, the Officer can see on the left side the OR information and on the left side the VR information. It is important to remark that only the information that has been modified (either by an Automatic Update or is in Conflict) is displayed on this screen.
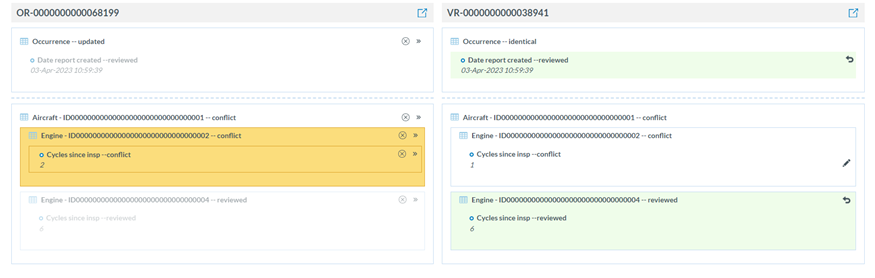
On the VR side, the Automatic Updates are marked in light green. The Officer can undo them by clicking the arrow icon (/) at attribute or instance levels.
The Conflicts pending to be solved are on the OR side, in dark yellow. The Officer can add the attribute or instance by clicking the double arrow icon ( ) or reject the Conflict by clicking the X icon (
 ).
).
If the attribute is moved to the VR, the information is updated at the VR level with the latest Reporter’s update. If the instance is moved, all the Instance’s VR information is replaced by what the Instance’s OR has, even the information not shown on this screen. If this is the case, a new screen is presented to the Officer to confirm this action.
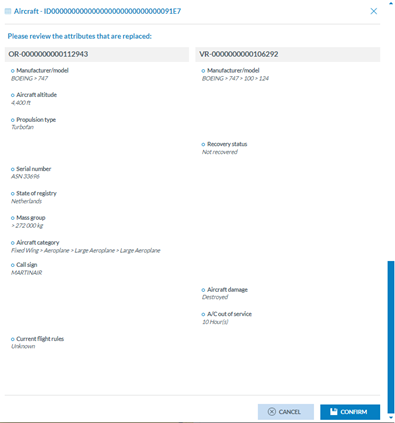
When the Officer has finished reviewing the conflicts, they have three options on the top right side of the screen:
· Back: returns to the VR listed screen. It does not save the changes made but keeps a Draft of the VR. Conflicts are still pending to be resolved.
· Discard: this option closes the Conflict Resolution screen without any change saved and deletes the draft. Conflicts are still pending to be resolved.
· Save as Minor: the Conflict Resolution screen is closed and all the changes (if any) madre by the Officer are saved in the VR as a new minor version. Conflicts are solved.
Note that the ‘Regularise conflicts’ option will only appear in the 3-dot button of the VR when the Open VR is not blocked.
3.3. OC Management
An occurrence (OC) can be constituted by one or multiple VRs from different reporters reporting the same safety event. The Authority Officers can share occurrences. An OC is a report of a safety event reported by one or multiple reporters through the E2 Reporting portal.
They can come from ORs validated by Officers and transformed into VRs.
They can come from VRs directly created by Officers
The Officers can directly create them in the system.
To manage them, the Officer accesses the E2 Web Application and unfolds the Safety Data menu on the left:
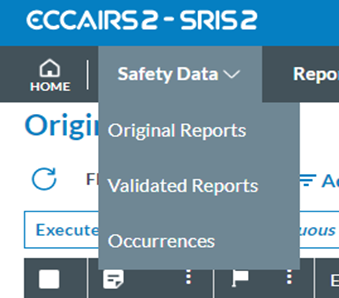
They then select ‘Occurrences’, also known as OCs. The system displays the list of OCs:

Officers can customise the OCs list as explained in the section Reports Lists.
3.3.1. Status and status filters
Above the list of OCs, on the right side, the system displays the filter tabs:

The list of results will restrict the OCs based on the selected tab.
· My Drafts: refers to OCs the Officer is editing. The list of OCs will show ‘Draft’ on the ‘E2 Status’ column and cannot be edited by another Authority Officer.
· In Progress: refers to ‘Open’ OCs. The list of OCs will show ‘Open’ on the ‘E2 Status’ column, and if the OC is edited by its reporter, it will show a ‘padlock’ icon.
· All: refers to all the OCs belonging to the Officer’s Authority regardless of status.
· ECR: refers to all OCs shared with the ECR from all the Authorities belonging to the ECR
The status of the OCs can be the following:
· Draft: The officer creates or edits an OC and they save it as a draft. All the OCs the Officer saves as a draft through the creation or edition of an OC process are saved in ‘Draft’ status. They can only be accessed by the Officer who is currently editing the report.
· Open: This means the OC has not been archived and can be edited by the officer.
· Archived: Officers can archive the OCs of the list. Once archived, they can be restored to “open” status or deleted.
3.3.2. 3-dot menu of the OCs – OCs features
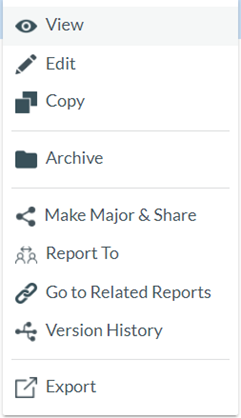
The system displays a 3-dot menu on the right side of each OC row of the list of OCs. If the Officer clicks on it, the system displays the following for ‘Open’ and not blocked OCs:
3.3.3. View
When clicking on View in the 3-dot menu (or double-clicking in the list view on any row), the system will display the content of the OC with the view the Officer has saved in ‘My account’. See Views of My Account for further details.
Otherwise, the system displays a page where the Officer has to select the specific view for the OC:

Once a view is selected, the OC is opened in view mode.

The Officer can make a major version and share the OC by clicking the ‘Make Major & Share’ button as explained in the section Make major and share.
3.3.4. Edit
This option is only available for ‘Open’ OCs belonging to the Officer’s Authority and is not blocked. It is not available for those OCs shared with the Officer’s Authorities by other Authorities or the ECR.
When the Officer clicks on the ‘Edit’ option of the 3-dot menu of the specific OC of the list of OCs, the system will display the content of the OC with the view the Officer has saved in ‘My account’. See Views of My Account for further details.
Otherwise, the system displays a page where the Officer has to select the specific view to edit the OC:

The Officer selects the view in the drop-down menu, and the system displays the specific OC in Draft:

Through the left panel, the Officer can access the different topics of the view.
The Officer can discard the changes made to the OC, save them as a Draft, Minor or Major version, and return them to the OCs list or save the changes on the current page. See Saving Options for further details.
3.3.5. Copy
This option displays the editing page with the content of the copied OC in the view previously set through ‘My account’. See the Views section of My Account for further details. The editing page is as follows:

The Officer can update the necessary fields and click on one of the saving options. See the previous sections for further details.
Although the Officer does not update any field when saving the updates, the system will assign a different E2ID and a different file number.
The Officer can discard the draft version of the new OC, save it as a Draft, Minor or Major version, and return it to the OCs list or save the changes on the current page. See Saving Options for further details.
3.3.6. Archive
This option is to archive VRs. See details in the Archive section.
3.3.7. Regularise conflicts
When this option appears in the 3-dot menu of the OC, the ‘Make major and share’ option will not appear. It can only appear when the OC is open and not blocked.
The Regularise conflicts option already depicted for VRs is also applicable for OCs since the changes made in the OR can conflict with the Officer updates in the VR and the OC updates. The functioning of the regularisation of conflicts is explained in detail in section Conflicting Reports
3.3.8. Create a major version and share
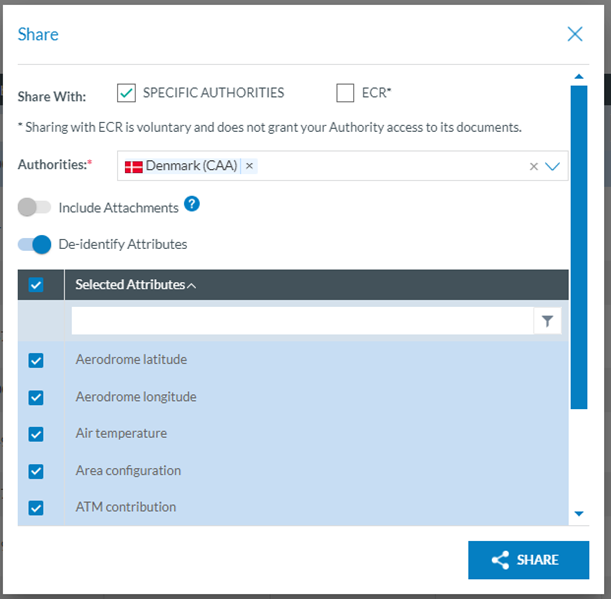
The Officer has to click on the ‘Make major and share’ option of the 3-dot menu of the specific OC in the list of OCs. The system will display the following modal window:
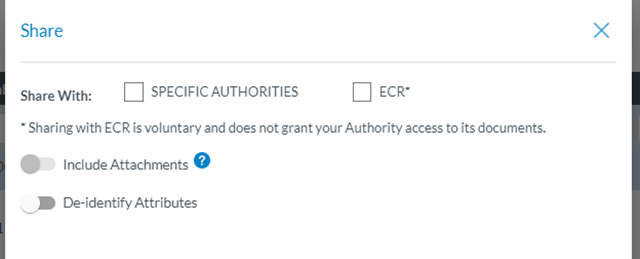
The Officer can select the specific Authorities through the Authorities drop-down menu.
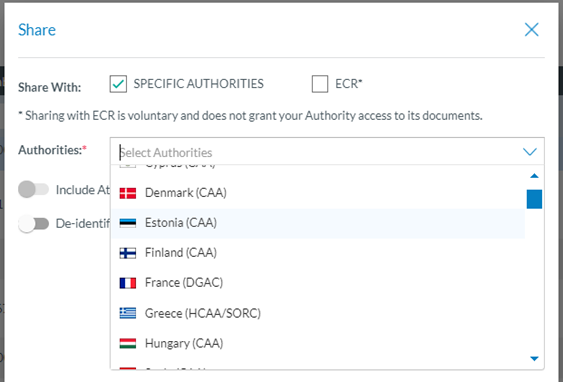
The information shared with other Authorities can be limited by selecting deidentified attributes. When the OC is shared with other Authorities, the value of the deidentified attributes is not shown when the other Authorities view the OC.
· The attributes that can be selected are defined at the Authority admin level.
· The Officer can choose which ones they want to deidentify, if any, by clicking on the option.
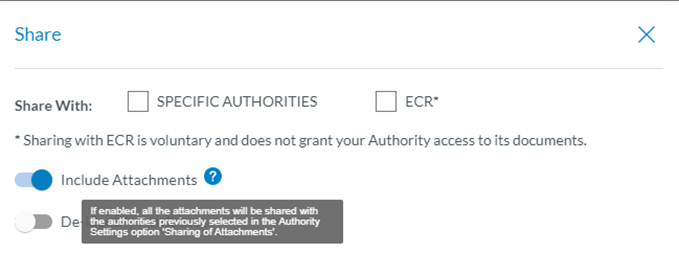
· The administrator defines the Authorities with which all the attachments can be shared at the Authority level.
· The Officer can choose whether they want to share the attachments by enabling the toggle.
ü If enabled, all the attachments will be shared with the Authorities previously selected in the Authority Settings option ‘Sharing of Attachments.’
If the Officer clicks the ‘Make major and share’ option of an OC previously shared, the system will add a ‘stop sharing’ option to the modal window:
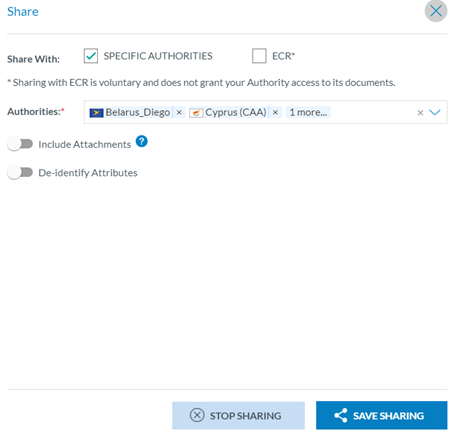
The report will no longer be shared if the Officer clicks on it.
This option can unshare OCs shared via Batch Operations (BOs) from the OC list individually.
3.3.8.1. Shared tab
The quick filter for shared elements allows the Officer to filter on Occurrences shared by the Officer’s Authority to other specific Authorities and to filter on Occurrences shared by specific other Authorities to the Officer’s Authority.
In the Advance Filter, the Officer can filter the OC Shared with specific Authorities. There are two fields (Shared From and Shared With) by Authorities. In order to see OC from the Officer's Authority shared with other Authorities, the Officer must pick its Authority in the Shared From field (by default this option is marked), and in the Shared With field the Officer can select Authorities they want to see OCs that have been shared with.
If the Officer's Authority is selected in the Shared With, that would display the OCs shared from other Authorities (selected in the Shared From field) with its Authority.
The system will display the list of results according to the specific search

It is important to advise that the filter is saved for future consults.
3.3.8.2. ECR TAB
The quick filter on ECR allows the officer to directly consult the whole ECR database, constituted by all Occurrences shared by all Authorities (including the Officer’s Authority) to the European Common Repository.
3.3.9. Report to
This feature allows an Authority to report an Occurrence to another Authority. One of the main advantages is that it will land in the receiving Authority as an OR and can, therefore, be processed as any OR by the receiving Authority.
Updates made on the Occurrence, as long as the OC is saved as a major version, will result in updates of the OR at the receiving Authority level. If the OR has been previously validated and/or integrated into an OC, automatic updates will be applied unless any conflicts need to be resolved.
The Officer clicks on the ‘Report to’ option of the 3-dot menu, and the system will display a modal window:
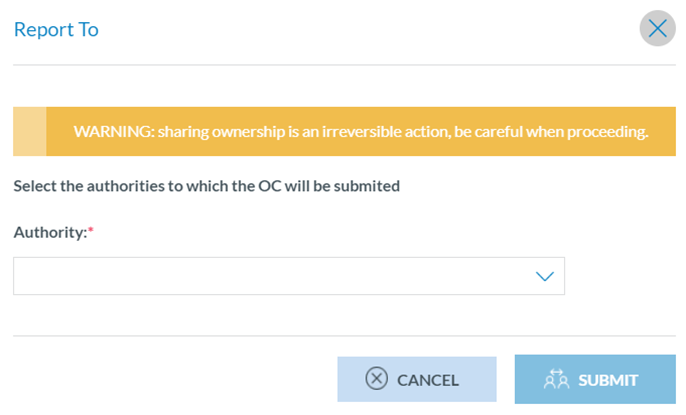
This window displays a warning: ‘Sharing ownership is an irreversible action; be careful when proceeding.’
The Officer has to select as many Authorities as needed on the ‘Authority’ drop-down menu and click ‘Submit’. The report will be submitted to the chosen Authorities as an OR, and both the OC and the OR(s) will be linked, so when there is an update in the OC it will be propagated to the OR(s).
The system will mark with a report icon the reported OC in the list of OCs:
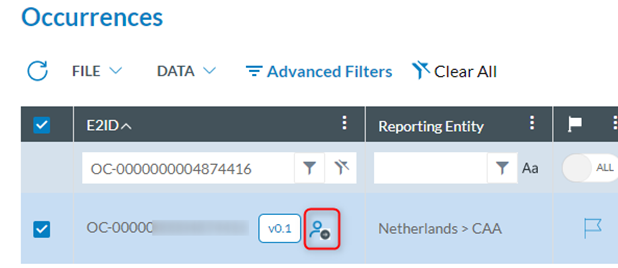
Likewise, this icon will appear in the list of ORs for the reported ORs of the corresponding Authority. A specific filter is available to filter on ORs reported by other authorities. See Advanced filters in OR features.
3.3.10. Creation of an OC from scratch
The Officer can create a new OC from scratch.
As the OC is saved, the system validates if it already exists in the Authority by checking the following attributes of the ECCAIRS Central Taxonomy:
· Responsible Entity (453)
· File Number (452)
If there is a match, the system informs the user that the OC already exists.
The Officer has to access the Occurrences option under the Safety Data drop-down menu and the system will display the OCs list. Above the list of OCs and the filters, there is the ‘New Occurrence’’ button:

The Officer clicks on it, and the system displays the New OC page. Based on the default view, the Officer previously set it to ‘My account’. See Views of My Account for further details.
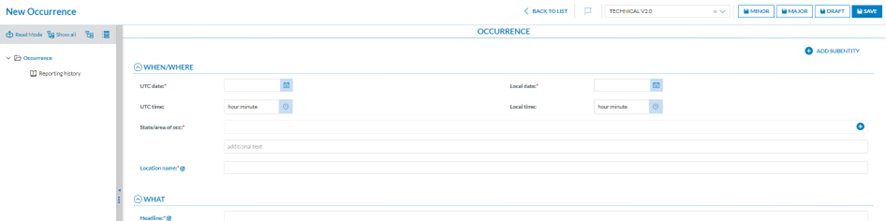
The Officer can move between topics through the navigation tree on the left page.
The Officer can discard the OC, save it as a Draft, Minor or Major version, and return to the OC list or save the changes on the current page. See Saving Options for further details.
3.3.11. Advanced Filters
The filters provided by the system vary depending on the selected tab. When the Officer selects ‘My Drafts’ or ‘In Progress’, the system shows the following filters:

3.3.12. Automatic updates and Only Conflicting Reports
Section Automatic updates and Only Conflicting Reports for VRs is also applicable for OCs.
3.3.13. Reported toggle
It appears after clicking on ‘Advanced Filters’ in the OC menu.
It restricts the results to the OCs that have been reported to other Authorities. When the Officer activates it, the system displays the following additional filters:

The Officer can select the Authority/ies to which the OC has been reported over a certain period and click the ‘Apply’ button.
The system will display the list of OCs based on the introduced parameters:

In the list view, next to the E2ID, the system will display a ‘Report to’ Icon. If the Officer moves the mouse over the icon, the system will display the Authority/ies to which the OC was reported.
2.3.14. Shared filters
When the Officer clicks on the ‘Shared’ tab above the list of OCs and then on ‘Advanced filters’, the system displays the ‘Shared From’ and ‘Shared With’ tabs to restrict the results accordingly in the list of OCs.

When the Officer clicks on the ‘ECR’ tab and then on ‘Advanced filters’, the system displays the "Shared From" filter.

3.4. Features applicable to all reports
The following sections include general information applicable to OR, VR and OC levels.
3.4.1. Reports Lists
ORs, VRs, and OCs are listed in columns. Each column refers to an attribute/metadata field of the OR, VR or OC. The columns are set by default. Each row of the OR list is clickable.

The Officer can alter the position of each column by dragging and dropping them.
Next to the title of each column, there is 3 points link through which the Officer can filter the columns to be displayed:

Below each column, there is a drop-down menu through which the Officer can filter the data for the specific column:

This drop-down menu will display operators according to the attribute or field type. Additionally, for text or alphanumeric columns, the filtering can be case-sensitive  .
.
The appearing attributes and their order can also be updated through the My Account-Custom columns. See the section on Custom columns for further details.
3.4.2. Views
The view selection menu is used to see the OR or any other reports under a specific view template, showing a preselection of entities and attributes relevant to a particular perspective.
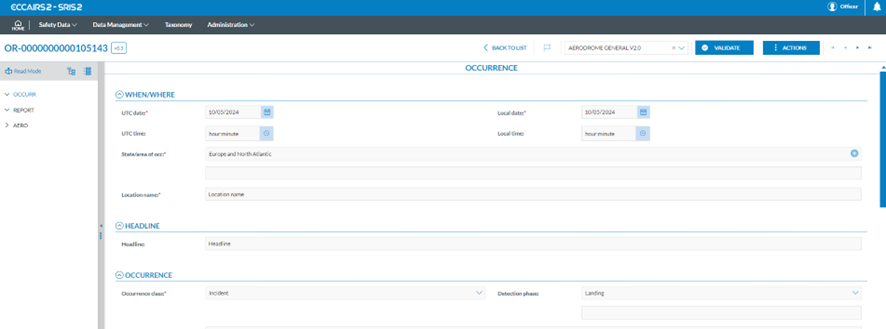
When the Officer selects a topic, the attributes under the different sections of the topic will be displayed in the right panel.

When the ‘Read Mode’ is selected, a ‘Print’ button is provided to print the report.
To recover the left pane with the topics, the Officer has to click on ‘Edit mode’ above the form.
Below the Read Mode icon of the left pane, the system displays the topics defined for the selected view. i.e.:
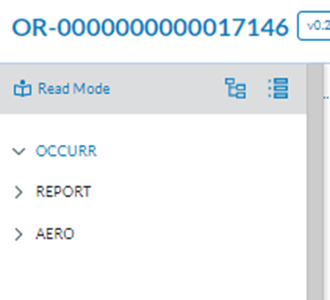
The Officer can click on a specific topic, and the system will display that topic:

3.4.3. Archive
Only available to ‘Open’ reports (E2 Status) it applies to ORs, VRs and OCs. The system displays a confirmation message when the Officer clicks on ‘Archive’ on the 3-dot menu.
If the Officer confirms the action, the report is archived and is stored as an archived report. Its status will turn from ‘Open’ to ‘Archived’.
The Officer can click on the ‘Restore’ option of the 3-dot menu of the archived report. The officer confirms the action to unarchive a report, changing the status from ‘Archived’ to ‘Open’ (E2 Status) and moving the report to the ‘In progress’ tab.
3.4.4. Saving options
The ORs are not editable for the Authority Officers. The save options are only available for VRs and OCs:
Saving options for VRs:
· Back to list button: it directly returns to the list of VRs.
· Discard button: it displays a confirmation message. If the Officer clicks on it, the system will return to the list of VRs, and the updates will be lost.
· Minor button: It saves the VR as a minor version and closes the action.
· Draft button: It will save a draft version of the VR and will close the action.
Saving options for VRs:
· Back to list button: it directly returns to the list of OCs.
· Discard button: it displays a confirmation message. If the Officer clicks on it, the system will return to the list of OCs, and the updates will be lost.
· Minor button: It saves the OC as a minor version and closes the action.
· Major button: It saves the OC as a major version and closes the action.
· Draft button: It will save a draft version of the OC and will close the action.
3.4.5. Notifications
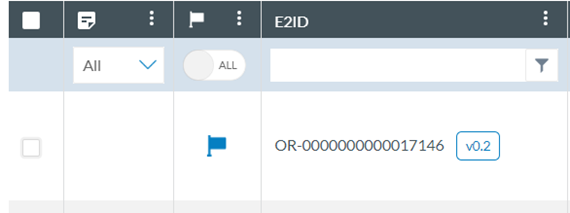
The Officer can directly flag a report in the ORs, VRs, or OCs list to be alerted of any future updates through notifications in the E2 Web Application landing page with optional email notification of any update. See details in the Object-based notifications section.
Directly by clicking the flag of the specific report of the list:
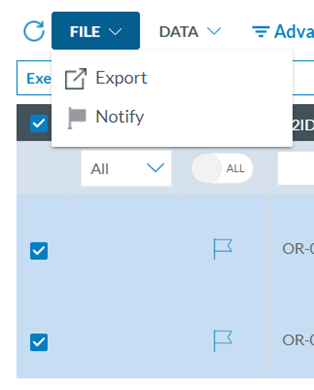
Or by checking the specific reports of the list, clicking on the File menu above the list of ORs, VRs or OCs and then clicking on ‘Notify’:
The system will display the following window:
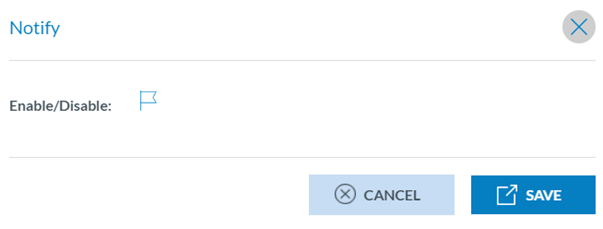
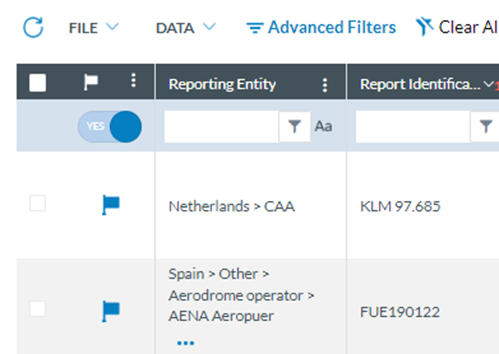
The Officer will check the flag to activate or deactivate the notifications on updates on the selected reports and will click on ‘Save’. Future updates on those reports will be sent to the specific officer if the flag was enabled. The list of flagged reports can be filtered using the filter at the top of the column.
3.4.6. Version History
This option of the 3-dot menu of each OR, VR and OC shows a modal view with all the changes the report has been through, including modification dates and users and the changes in the attributes, if edited.
The Version History can be filtered by:
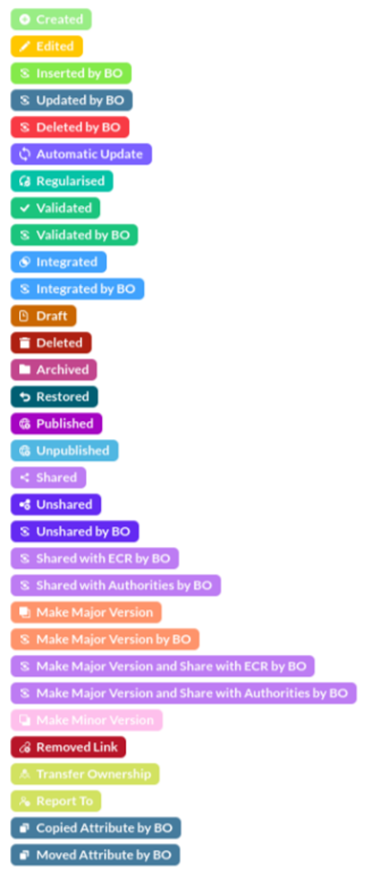
Actions: All the Actions a report can go through are registered in the Version History with a different colour:
Reports: all the reports related to the report being consulted in the Version History.
The user can select the related reports, if any, and see the changes in them in chronological order.
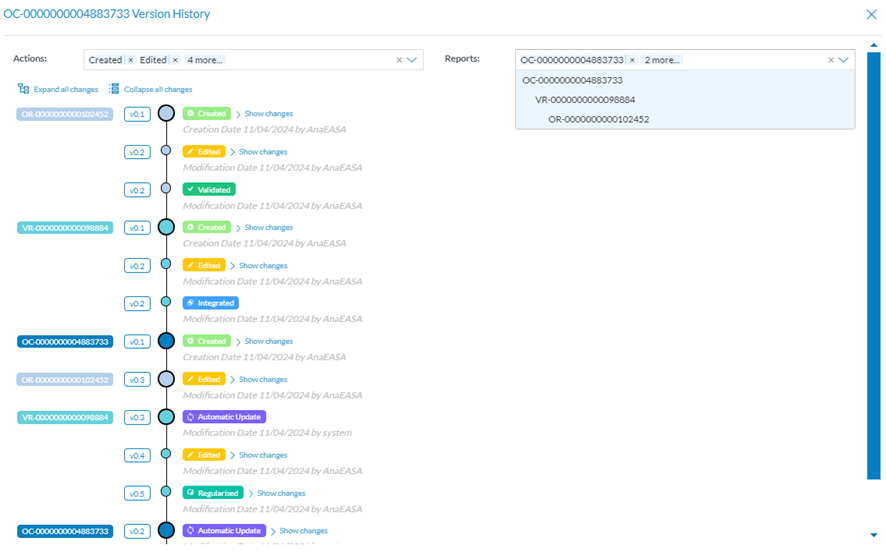
Together with each action, the Modification Date and the user account of the user who made the action are included. For some of the actions, for example, ‘Edit’, a ‘Show Changes’ section is included, which shows the attributes that were added, changed, or deleted.

3.4.7. Export
The Officer can export one or more ORs, VRs and OCs in different file formats.
· To export one report: This 3-dot menu option works for each listed report.
· Export in bulk: The export option can be performed by selecting multiple reports on the list and clicking the File drop-down menu above the list of reports.
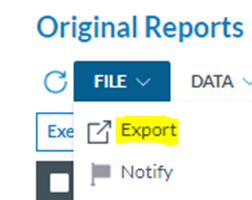
The Officer checks the specific reports to be exported at the list and clicks on ‘Export’ under the ‘File’ menu. The system will display the following pop-up window that works the same for individual exports:
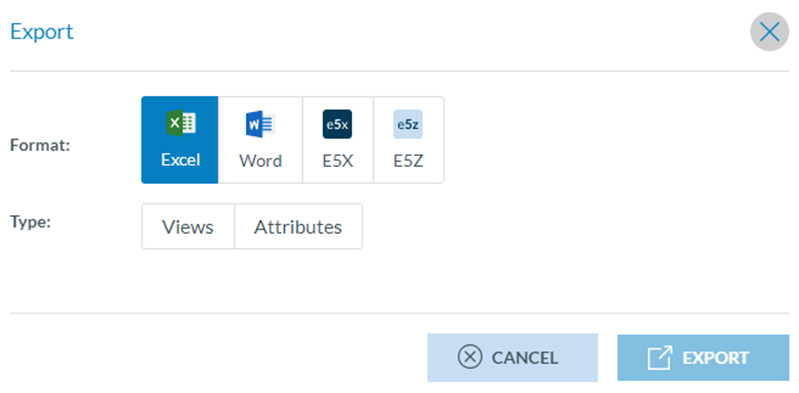 The Officer can select the format (Excel, Word, E5X, E5Z).
3.4.7.1. Excel Format
When it is selected, the system will display:
· View: A view is a template used to view the data; this export will take the same attribute selection in the same order as displayed in the view. The system displays the views menu with all the views available for the Officer and must select the specific view to export the file, i.e.:
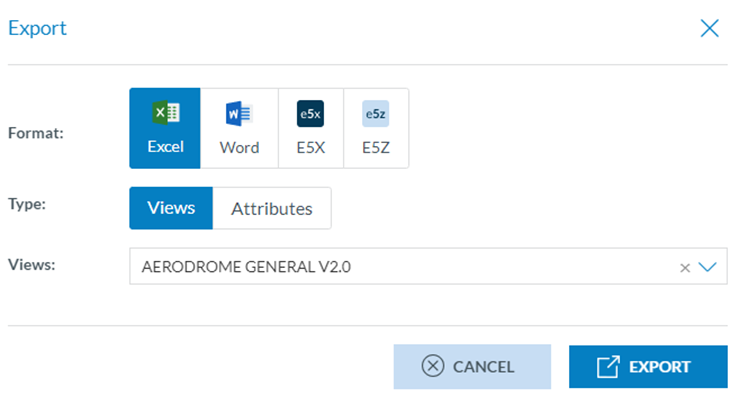
Then, click on the ‘Export’ button. The system will send an email notification to the Officer with a link to the export file.
· Attributes: When the Officer selects ‘Attributes’ the system will display the Attributes List drop-down menu and the ‘New attribute list’ button:
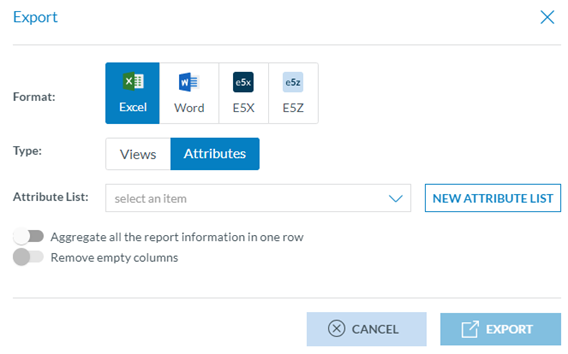
An Attribute List is an export profile available for the Officer, where they can save their export preferences. They can create one on the fly if no Attribute List item is available.
The Attribute Lists can also be created through the ‘My Account’ menu and the ‘Attribute List’ tab. See the Export by Attribute section for more details.
When the Officer clicks on ‘New attribute list’, the system will display the Attributes List pop-up window:
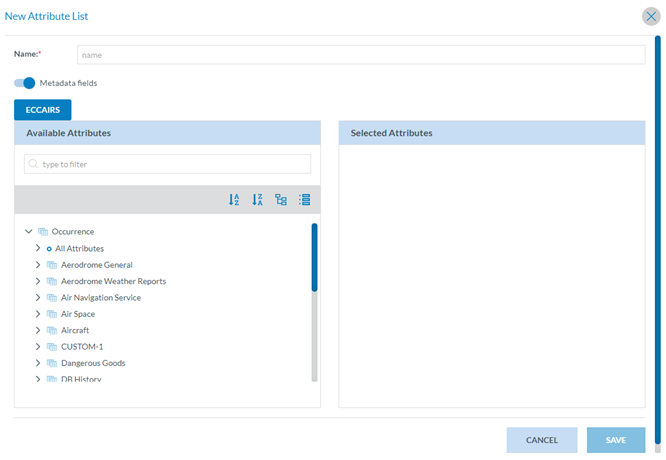
The Officer has to fill in the Name field that is unique to each Attribute List export profile. The metadata fields check is activated by default. The Officer can deactivate it so the metadata attributes of the selected reports will not be exported.
Below, the system displays the taxonomy tree, through which the officer can navigate and select the specific attributes they want to be exported.
The arrows unfold the items contained under each entity. See the Taxonomy Browser section for further detail on its navigation. The Officer can also write in the Filter field to find the specific attribute. The Officer has to check the specific one/s, and they will appear under the ‘Selected Attributes’ title, i.e.:
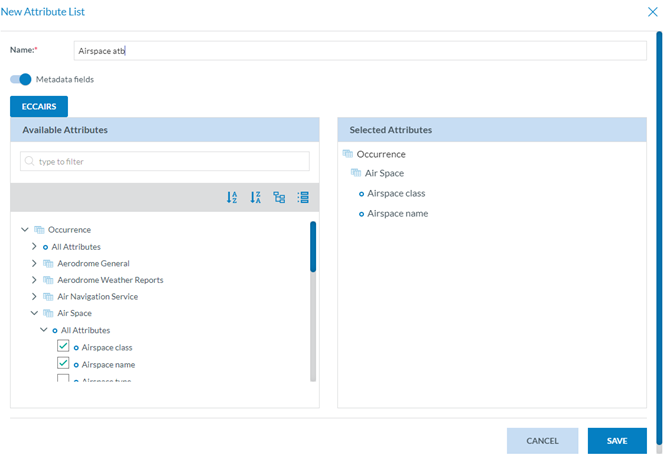
The Officer has to click on ‘Save’, and the system will return to the Attributes List selection window:
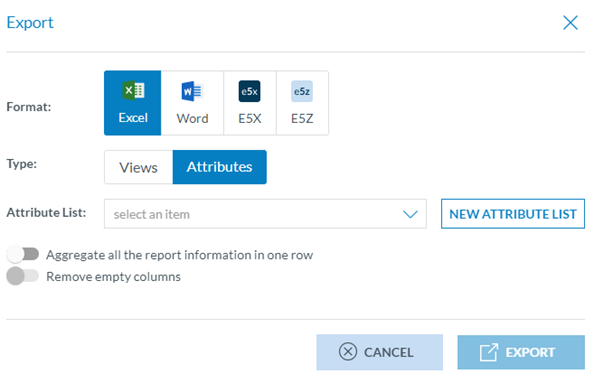
Here, the Officer has to select the corresponding created ‘Attribute List’ from the drop-down menu and decide if they want to ‘aggregate all the report information in one row’, and whether they want to ‘Remove empty columns’. Then, the actor clicks on ‘Export’, and the system will email the Officer’s address to send the Excel file with the OR/s.
3.4.7.2. Word format
When exporting reports to a Word format, the system picks the data in the reports. It is put into a Word Template to facilitate the generation of ready-to-distribute documents.
When it is selected, the system will display:
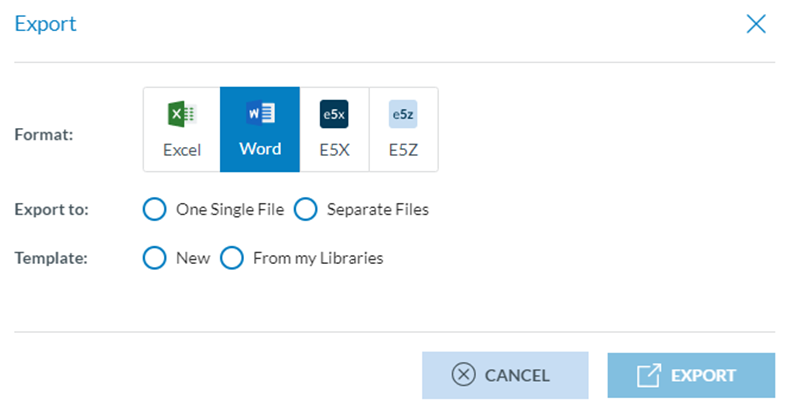
· Export to radio button:
ü This presents two options, either ‘One Single File’, if the Officer wants a compressed file containing one word document for all the reports or ‘Separate Files’, if the Officer wants a compressed file containing one document per report.
· Template radio button:
ü When the Officer selects ‘New’, the system will display a files section where the template can be uploaded through the ‘Select files’ button. The Officer can also drag the file/s and drop them in this section.
ü Officers can select ‘From my Libraries’ if a template is already available in the libraries available to the Officer.

The Officer must upload the template file and click ‘Export’. The system will email the Officer a download link when the report is ready.
From my Libraries: when the Officer clicks on this option, the system will display the Libraries pop-up window:
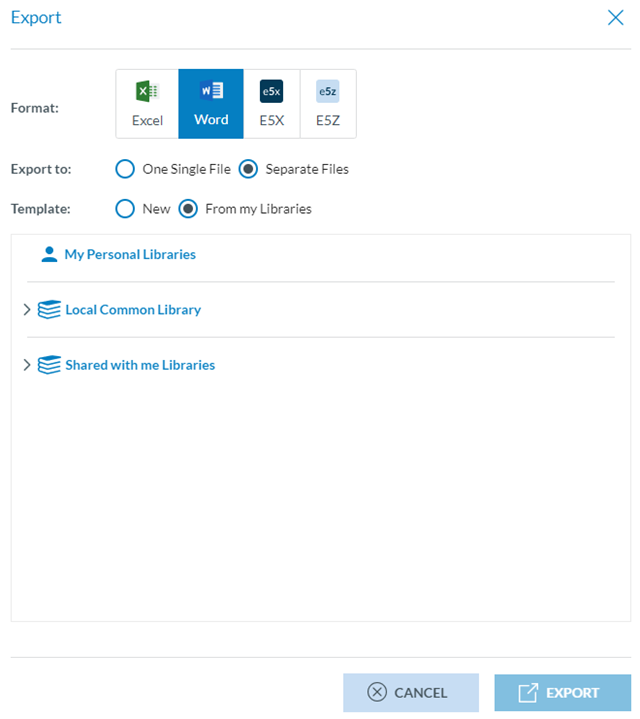
The system will display below ‘My Personal Libraries’ with the tree of Libraries available to the Officer.
The Officer will unfold the libraries through the arrows, select the specific template, and click on ‘Export’. Then, the system will email the officer’s address to send the Word file with the reports.
Nonetheless, the creation of word templates is also managed through the Data Management menu, ‘Word Templates’. See section Word Templates for further detail.
3.4.7.3. E5X and E5Z format:
When the Officer selects one of these options, the system displays the ‘Views’ drop-down menu below. The Officer can select a view on the menu and click on ‘Export’:
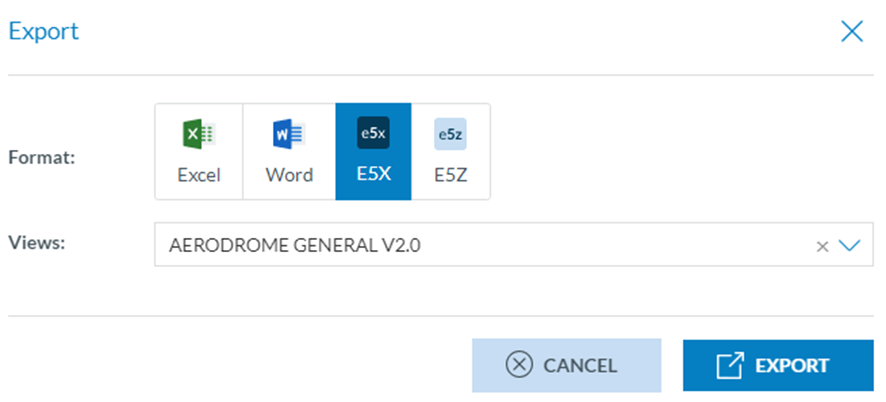
The system will email the Officer when the E5X file(s) will be ready to be downloaded with a download link.
3.4.8. File number
File Number is an attribute of the ECCAIRS taxonomy (452) that identifies the report (OR, VR or OC) the Officer is saving. It is unique per type of object and Authority. The pattern used to define the file number is determined at the Authority level.
3.4.9. Data menu - Refresh Queries
Next to the File menu, above the list of ORs, VRs or OCs, the system displays the Data menu:
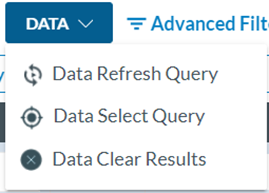
Data Refresh Query: When the Officer has selected queries through the ‘Data Select Query’, as explained above, the system will show them in the Data Refresh Query window where the Officer will select a specific query and will click on ‘Execute’:

The system will execute the query, and the system will update the list of results based on the selected query:

Data select Query: This button displays a modal window with the libraries available to the Officer to select a query:

The Officer has to navigate the available libraries, select a query, and click ‘Execute’.
The system will update the list of ORs based on the query's conditions.
The last 10 queries executed through this button will be available through the ‘Data Refresh Query’ option.
Data Clear Results: This button deletes the application of the queries in the list of results. When the Officer clicks on it, the system updates the list of ORs, removing all the filters and presenting all the results.
 Refresh icon: to refresh the page.
3.4.10. Reference table values to fill in the form
RefX, Reference Tables simplify data entry for reporters and Officers. The purpose is to centrally store look-up tables that will be used based on a trigger value to automatically retrieve the associated values. For instance, the aircraft registration reference table stores the aircraft registration number (used as a trigger). It already includes key information related to this aircraft registration number, such as make, model, aircraft category, state of registry, propulsion type, year built, etc.
The values are used to allocate data that will help reporters fill in the OR web form, and Officers fill in the VR/OC forms. There can be multiple RefX, linked to different attributes, meaning an attribute can only trigger one RefX.
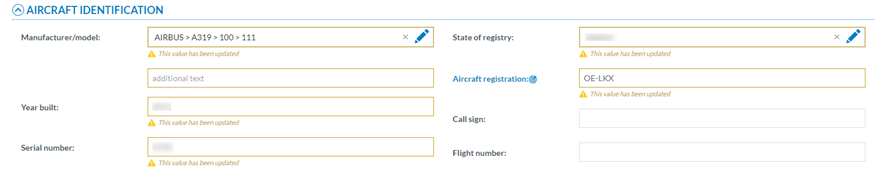
All triggering attributes are identified in the view with a Triggering attribute icon  and are presented in blue:

The Officer has to type a value in the attribute field and click on the triggering attribute icon to open all the possible values registered in the Reference Database to help the Officer fill in the view.

The Officer selects a set of values from the list and clicks the 'Update' button.
The attributes in the list are automatically filled in the view with the selected values. The automatically updated attributes are highlighted in the view to help its revision, as follows:
3.4.11. European Risk Classification Scheme (ERCS)
The European Risk Classification Scheme (ERCS) is a methodology used to assess the risk posed by occurrences in civil aviation. It provides a safety risk score based on various factors. The ERCS addresses the safety risk of an occurrence and not its actual outcome. The assessment of each occurrence determines the worst likely accident outcome that might have happened and how close to that accident outcome the occurrence was.
The ERCS score is composed of two variables:
· Severity: the worst likely outcome in case the occurrence had escalated into an accident
· Probability: the likelihood of the occurrence escalating into that outcome
An out-of-the-box role, defined for officers, already exists, with the proper permissions assigned.
The Officer has to click on the ERCS button located in the view, next to the 'Risk Management' topic, i.e.:
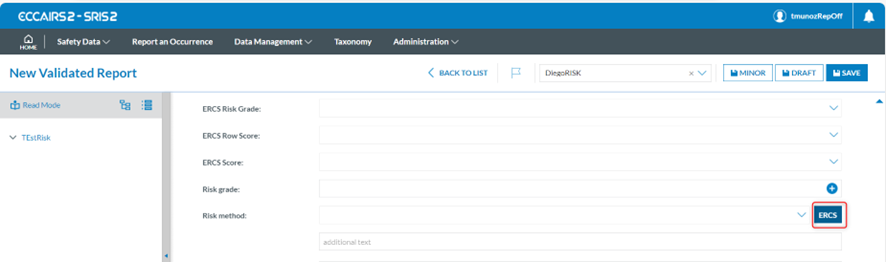
The system will display a modal window with the ERCS wizard:

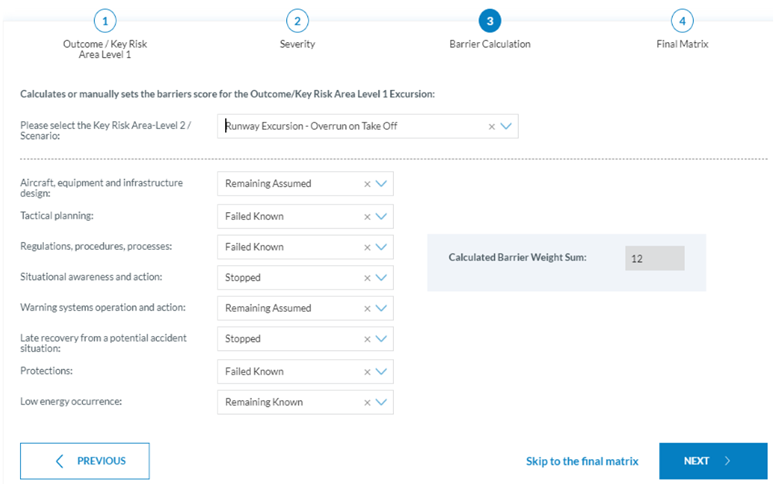
It is formed by 4 simple steps:
1. Outcome / Key Risk Area Level 1: where the officer has to select the most likely type of accident (key risk area) and click on Next.

2. Severity: where the Officer has to select how many possible fatalities would have been involved in an accident in case there was one and click on ‘Next’.

3. Barrier calculation: The officer has to select the values for the barriers list. The Barrier Weight Sum is calculated according to the Officer's selection. The Officer has to click on ‘Next’.
4. Final Matrix: The calculated risk grade is highlighted in the matrix with a tick icon and blue border. The Officer can change this value by clicking in another cell, and the system will add a field to make mandatory comments.
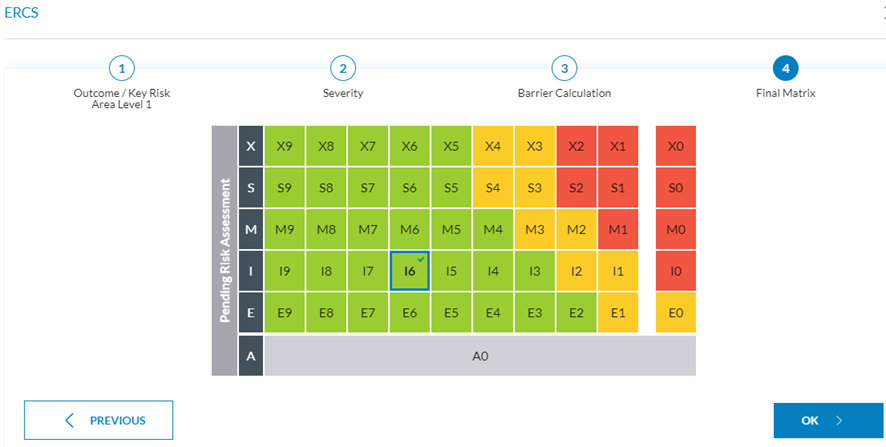
The Officer can click 'Skip to the final matrix' at any step. By doing so, the system redirects to the final step so that the Officer manually selects the risk grade. The Officer will be asked to explain that choice.
The Officer can return to any previous wizard question by clicking the ‘Previous’ button or the step number.
Once the Officer completes the process, click the OK button, and all the selections will be transferred to the edited view.
4. Data Management
4.1. Queries
Queries are a powerful tool the officer can use to filter occurrences, validated reports, and original reports through various stages on the platform. The Officer can:
· Filter the number of reports displayed based on the Officer’s selected parameters.
· Export the result of a query to JSON or CSV formats.
4.1.1. Create a query
The Officer can access the Query Builder through the 'Data Management’ menu at the top of the page, then click on the 'Queries' option (Data Management > Queries).
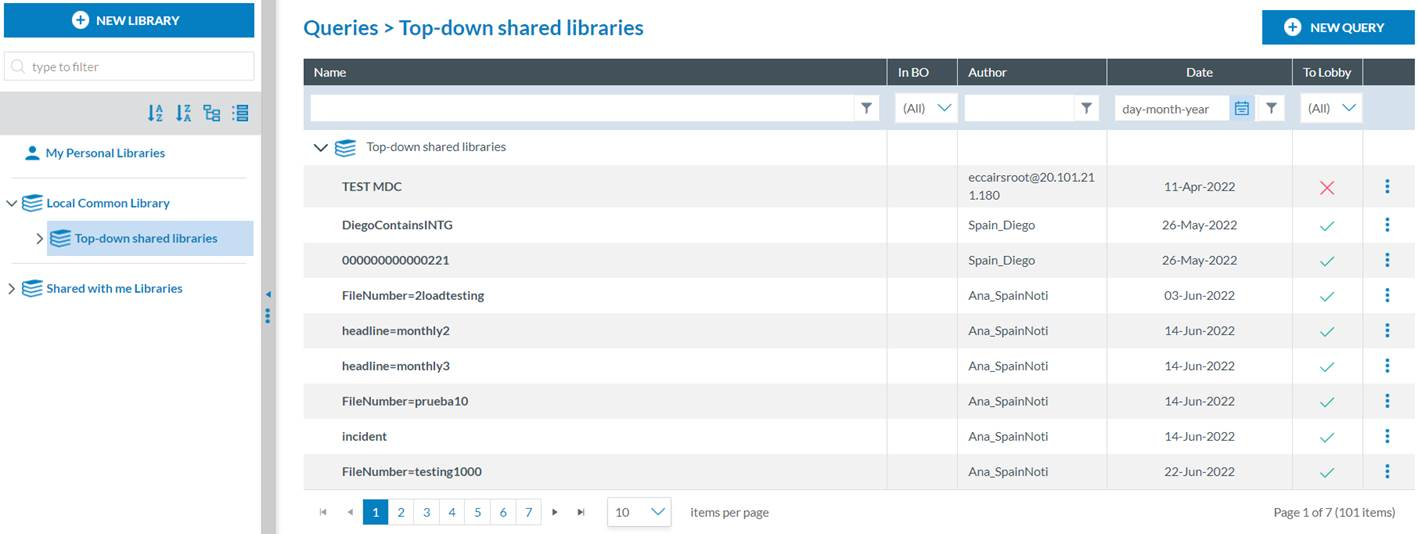
In this section, the Officer will be able to create queries, share them with other users or manage queries shared by other users with the Officer.
‘In BO’ column indicates whether the query is included in a batch operation. The Officer can see the BOs using the query by hovering over the ‘edit properties’ option in the 3-dot menu.
‘To Lobby’ column, with values yes or no, filters if the query can be exported between UAT and PROD environments or between Authorities depending on whether the query to be exported has custom attributes. If it has custom attributes, it cannot be exported.
The Officer will have a library tree on the left panel, including all the libraries available to the Officer. Those are the folders that can have categories and subcategories. Find more information about Libraries in Query libraries section.
To view the Queries inside a library, category or subcategory, the Officer has to click on the corresponding folder. The right side of the window will display the list of queries available for that selected folder:

The Officer can click the 'New Query' button to create a new one in the selected library or folder. A new window will be displayed with the Query Builder:
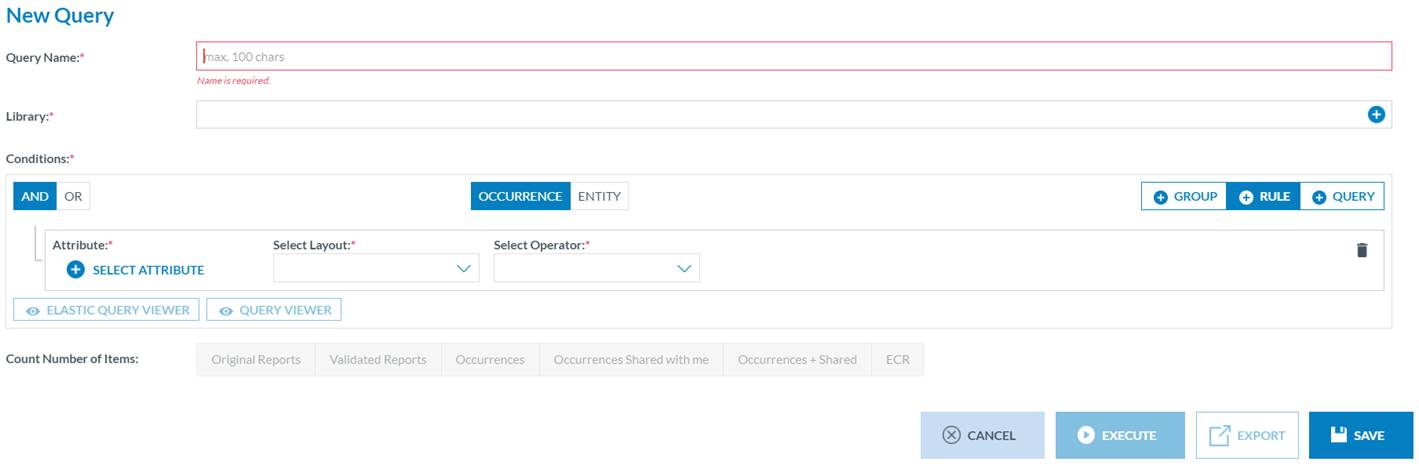
The Query Builder allows the Officer to build queries to search ORs, VRs, and OCs with attributes or metadata fields that meet the given conditions.
The queries are executed against the reports indexed in ElasticSearch.
The Officer has to fill in the unique Query Name for each Officer query and select a Library where to store the query. See Query libraries section for more information on the libraries.
Before executing, exporting or saving a query from the Query Builder, it is required to select over which reports the query will be executed on the ‘Count Number of Items’ section:

They will be activated as soon as the mandatory fields of the query are filled.
ECCAIRS queries (based on ECCAIRS Taxonomy)
· Original Reports, including the ‘Archived’ ones
· Validated Reports, including the ‘Archived’ ones (Draft versions are not included)
· Occurrences: including ‘Archived’ ones (Draft versions are not included).
· Occurrence shared with me: Occurrences shared by other Authorities, specifically with my Authority (so not the ones shared with us as they were shared to the ECR)
· Occurrence + Shared: My major occurrences and the ones shared by other Authorities, specifically with my Authority
· ECR: All occurrences shared to the ECR by mine and other Authorities (major versions only)
4.1.2. Query conditions – Attributes and metadata
Once in the Query Builder, the Officer has to select the query parameters to set each rule by clicking on ‘Select Attribute’ under the ‘Conditions’ section.

The system will display a modal window where the Officer can choose between:
· Attributes: Any of the attributes available for the Officer’s Authority Taxonomy:
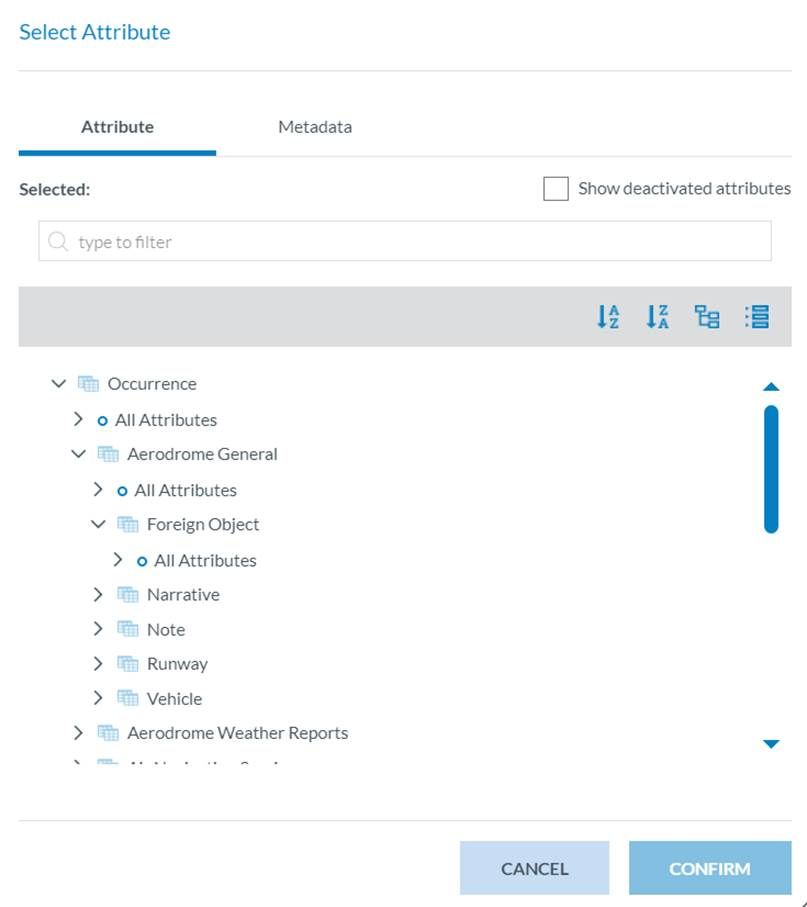
· Metadata: additional information found at the database level that can be relevant for the Officer to query by:
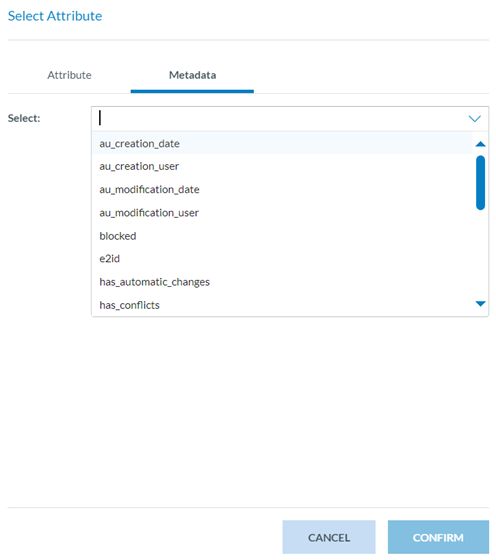
· e2id – E2 identifier of ORs, VRs or OCs
· Audit fields – they refer to the information of the specific version of the report:
ü au_creation_date: the date when the report has been created
ü au_creation_user: user who has created the report
ü au_modification_date: the last date the report was updated
ü au_modification_user: the previous user that updated the report
ü blocked – it is set to TRUE when a batch operation blocks the report to prevent the users from editing it
· has_automatic_changes – it is set to TRUE when the report has had any automatic changes from the OR that no Officer has acknowledged yet.
· has_conflicts – it is set to NOT NULL if the report (VR or OC) has any conflicts coming from an OR update.
· organisation name – the name of the Organisation of the reporter, if applicable.
· personal_details – it is set to NOT NULL if there is any personal information from the reporter.
· receiving__date – it determines when the OR was sent to the Authority.
· reporting_entity_id – Authority to which the report belongs.
· reporting_method – what reporting method was used to report the OR
· responsible_entities_id – id of the responsible entity (Authority in E2)
· status – the report status, as described in section 2.1 Occurrences lifecycle (OR to OC).
· Version – version number
4.1.3. Query structure
The queries are made using at least one rule. A rule is a condition the search made by the query has to meet.
Queries can also include various rules and groups of rules. A query can include one or more existing queries (subqueries). Queries cannot be edited while they are included as a subquery of another query.
A rule contains a condition to be met concerning an attribute or metadata field. Layouts and operators vary depending on the attribute and metadata field type, i.e.:
If the Officer selects ‘Air temperature’ as an attribute, the system will display ‘Value’ as the unique possible selectable layout and the Select Operator filter:

And will generate a ‘Decimals’ field to be filled out by the Officer.
Attributes
· Alphanumeric and Text attributes or metadata fields can be searched in documents by a complete word using the layout ‘Value (Word)’ or by a string of characters using the layout ‘Text’. i.e.:
ü Value (Word) in ‘Aircraft’ (complete word)
ü Text begins with ‘Airc’ (string of characters)
|
Data Type |
Layout |
Operators |
|
Alphanumeric, Text |
Value (Word) |
equal does not equal in not in is null is not null |
|
Text |
in not in begins with does not begin with ends with does not end with is null is not null |
· Code attributes can be searched in documents using layouts:
ü Value: selecting one or more values of the value list
ü Level: when the value list has more than one level, selecting all the values of a branch (level) in the value list, starting from the selected value(s)
ü Alias: when the value list has alias(es), selecting one of the them
|
Data Type |
Layout |
Operators |
|
Code |
Value |
equal does not equal in not in is null is not null |
|
Level * if the Value List has more than one level |
equal does not equal in not in is null is not null |
|
|
Alias * if the Value List has alias(es) |
in not in begins with does not begin with ends with does not end with |
· Code and Additional Text, Code or Alternative Text attributes can be searched in documents using layouts:
ü Value: selecting one or more values of the value list
ü Level: when the value list has more than one level, selecting all the values of a branch in the value list
ü Alias: when the value list has alias(es), selecting one of them.
ü Text: typing a string of characters
|
Data Type |
Layout |
Operators |
|
Code and Additional Text, Code or Alternative Text |
Value |
equal does not equal in not in is null is not null |
|
Level * if the Value List has more than one level |
equal does not equal in not in is null is not null |
|
|
Alias * if the Value List has alias(es) |
in not in begins with does not begin with ends with does not end with |
|
|
Text Used to search in the Text part of the attribute |
in not in begins with does not begin with ends with does not end with is null is not null |
· Date and DateTime attributes can be searched in documents using layouts:
ü Value: when searching by date or range of dates
ü Date of the Month (1-31): when searching by the day of the month
ü Date of Week (1-7): when searching by the day of the week
ü Month (1-12): when searching by the month
ü Year: when searching by year
|
Data Type |
Layout |
Operators |
|
Date, DateTime |
Value |
equal does not equal less than less or equal greater than greater or equal between not between |
|
Day of the Month (1-31) |
equal does not equal less than less or equal greater than greater or equal between not between |
|
|
Day of Week (1-7) |
equal does not equal less than less or equal greater than greater or equal between not between |
|
|
Month |
equal does not equal less than less or equal greater than greater or equal between not between |
|
|
Year |
equal does not equal less than less or equal greater than greater or equal between not between |
· Time attributes can be searched in documents using layouts:
ü Value: when searching by hours and minutes
|
Data Type |
Layout |
Operators |
|
Time |
Value |
equal does not equal less than less or equal greater than greater or equal between not between is null is not null |
· Latitude and Longitude attributes can be searched in documents using layouts:
ü Value: when searching by degrees, minutes and seconds or range of them
|
Data Type |
Layout |
Operators |
|
Latitude, Longitude |
Value |
equal does not equal less than less or equal greater than greater or equal between not between is null is not null |
· Decimal attributes can be searched in documents using layouts:
ü Value: when searching by a decimal number
|
Data Type |
Layout |
Operators |
|
Decimals |
Value |
equal does not equal less than less or equal greater than greater or equal between not between is null is not null |
· Number attributes can be searched in documents using layouts:
ü Value: when searching by an integer number
|
Data Type |
Layout |
Operators |
|
Number |
Value |
equal does not equal less than less or equal greater than greater or equal between not between is null is not null |
· ECCAIRS Resource Locator attributes can be searched in documents using layouts:
ü File Name: when searching by the name of an attached field
ü Description: when searching by the description given in the attached field
|
Data Type |
Layout |
Operators |
|
ECCAIRS Resource Locator |
File Name |
equal does not equal in not in is null is not null |
|
Description |
equal does not equal in not in is null is not null |
· ECCAIRS Embedded data attributes can be searched in documents using layouts:
ü Eccairs number: when searching the former document’s Eccairs number
|
Data Type |
Layout |
Operators |
|
Eccairs Embedded Data |
ECCAIRS number |
in not in begins with does not begin with ends with does not end with is null is not null |
· ECCAIRS Data link attributes can be searched in documents using layouts:
ü Eccairs number: when searching the former documents Eccairs number
|
Data Type |
Layout |
Operators |
|
Eccairs Data Link |
Eccairs number |
in not in begins with does not begin with ends with does not end with is null is not null |
Groups can include one or more rules and one or more groups, combined with AND/OR clauses. The Officer can click on the ‘Add Rule’ button to add more rules. For groups, on the ‘Group’ tab. If the Officer wants different sets of rules to be evaluated together, the Officer has to click on the 'Add group' button. The Officer can also add groups inside other groups.
Groups and rules can be rearranged, dragging and dropping them where needed.
At the top centre of each group are the OCCURRENCE/ENTITY alternative tabs, which show whether conditions of the given attributes shall be met in any instance of the entity or if the conditions shall be met in the same instance of the entity. Thus, when specifying restrictions in a query, the restrictions can be evaluated across all the entities of a record at once OR can be evaluated to each entity of a record one by one. By default, the restrictions of a query will be evaluated across all the entities of a record at once, with the OCCURRENCE option selected by default.
With the selector OCCURRENCE/ENTITY, the Officer can change that, and the restrictions will be evaluated entity by entity. There is a limitation in creating groups based on the restriction selected here. If a group is restricted to ENTITY, no more groups can be added inside that ENTITY group.
Example of search by occurrence and by entity:
1. OCCURRENCE: If we want to obtain the Occurrences where the Manufacturer model (21) is equal to ‘BOEING > 787’ and the Aircraft altitude (22) is greater than 1000 ft, independently if the conditions are met in different aircraft of an occurrence:
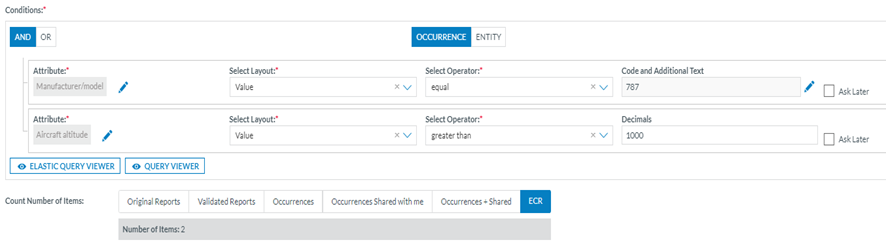
2. ENTITY: If we want to obtain the Occurrences where the Manufacturer model (21) is equal to ‘BOEING > 787’ and the Aircraft altitude (22) is greater than 1000 ft when the conditions are met in the same aircraft.

The Officer can set rules with AND/OR clauses and combine them as needed with groups by clicking on the ‘Group tab’ and selecting AND/OR clauses, i.e.:
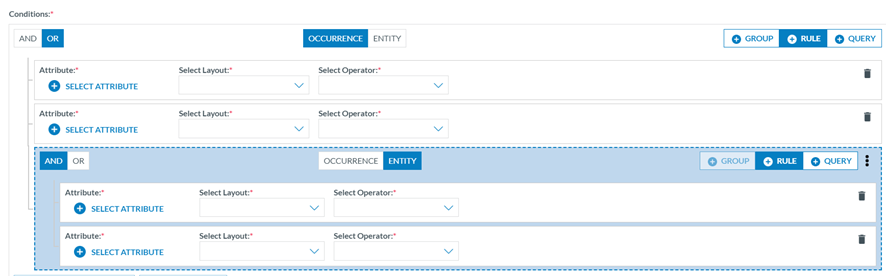
Subqueries: The officer can add a subquery to the query through the ‘Query’ tab. The aim is to add an existing query to the current query. When the Officer clicks on the ‘Query’ tab, the system will display the subquery section:

The Officer can click on ‘Select Query’, and the system will display a window to select the subquery:
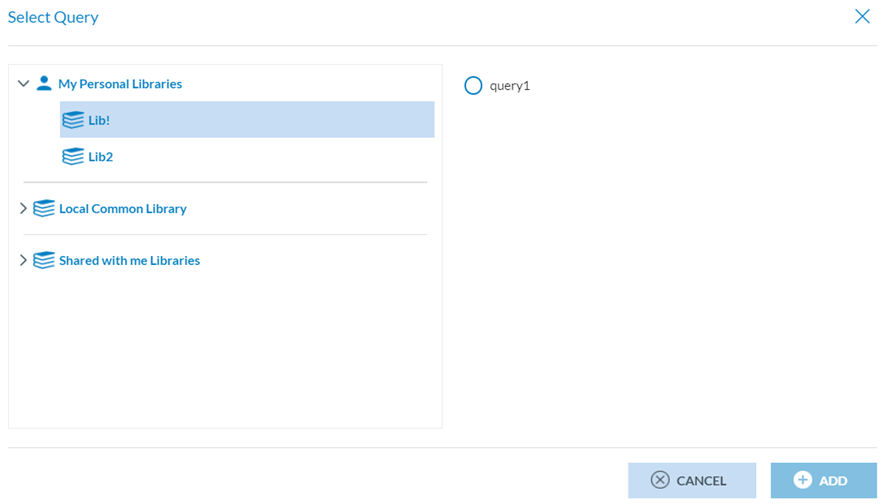
The Officer must select a query from the available libraries and click ‘Add’. The system will add the subquery to the conditions of the current query. A query included as a subquery of another query cannot be edited.
4.1.4. Query action buttons
Once the query is completed, the Officer can click on:
· Cancel button: the system will return to the Queries page.
· Execute button: the system will display the list of results according to the conditions set by the query.
· Save button: The system will save the query in the list of queries of the selected library and display the table of queries with the new query on the queries page.
· Execute button: the system will display the table of the specific reports based on the query's conditions. To re-execute the queries, the system provides the data menu that works as explained in the section Data Management - Features applicable to all reports - Data menu - Refresh Queries.
· Export button: this button only works when the Officer selects a type of report (OR, VR, OC, OC Shared with me, OC + Shared or ECR) with results for the current query. The Officer has to click on ‘Export’, and the system will display a modal window where the Officer can select the format (JSON or CSV):
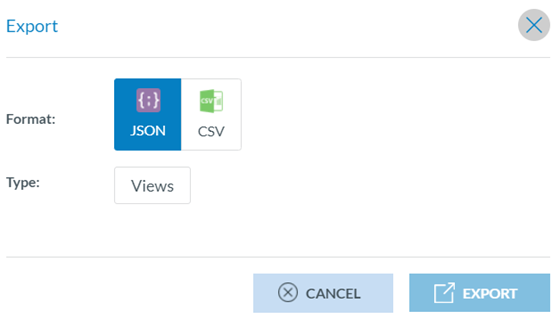
· Export in JSON: The window displays a Views tab. When the Officer clicks on it, the system displays a ‘Views’ modal window. The Officer must select one of the available views and click ‘Export’.
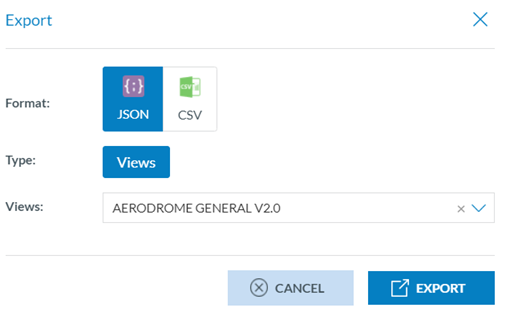
Once the process is finished, an email will be sent to the Officer with a zip file with the query results in the selected format.
· Export in CSV: The Officer clicks on the ‘CSV’ tab, and the system displays a modal window where the Officer has to select between ‘Views’ and ‘Attributes’:
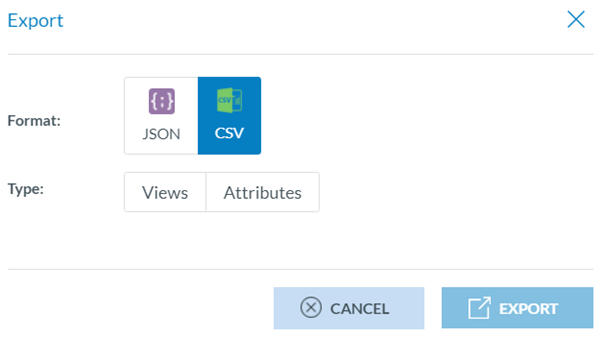
ü If the Officer clicks ‘Views’, the system will display a ‘Views’ modal window. The Officer must select one of the available views and click ‘Export’. Once the process is finished, an email will be sent to the Officer with a zip file with the query results in CSV format.
ü If the Officer selects ‘Attributes’, the system will display an Attributes List drop-down menu and a new Attributes List button:

If the attributes needed do not match any available Attribute Lists, the Officer can click on ‘New Attribute List’, and the system will display a modal window to create it:
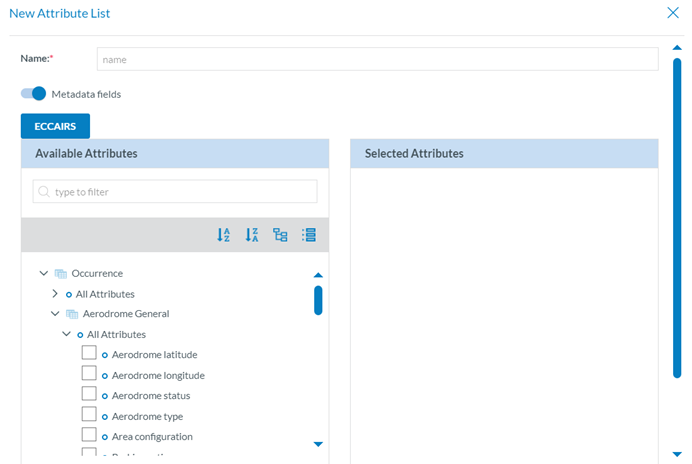
The Officer has to fill in the mandatory ‘Name’ field and deactivate the ‘Metadata fields’ if needed.
Below, the system displays the Taxonomy tree with all the ECCAIRS entities and attributes. The Officer can filter or navigate the tree to select the corresponding attributes. Once selected, they appear on the right-side panel. Attributes under the same entity can be reordered by dragging and dropping them. Then, the Officer has to click on the Save button:

The Officer will select the created Attribute List on the drop-down menu and will click on the ‘Export’ button:
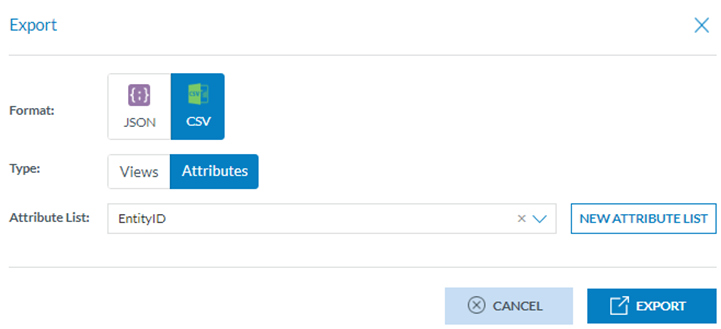
Once the process is completed, the Officer will receive an email with the CSV file, including the results of the executed query.
4.1.5. Management of queries – table of queries
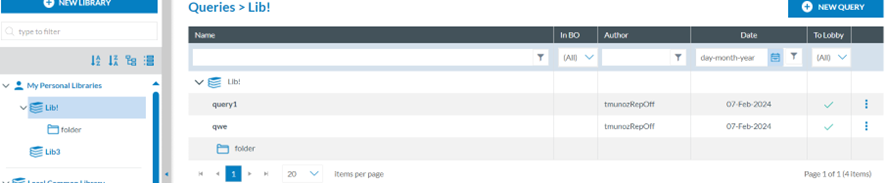
4.1.5.1. Editing a query
The Officer has to double-click on the specific query of the queries list or click on the ‘Edit’ option of the query’s 3-dot menu, and the system will display the editing page of the query:
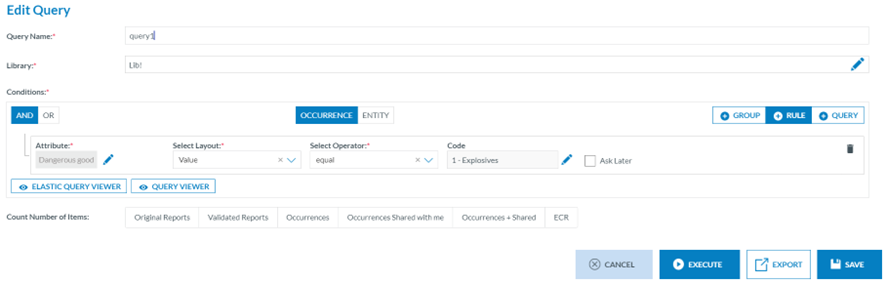
The Officer has to introduce the needed update and click on ‘Save’, ‘Export’ or ‘Execute’, as needed. See the Query action buttons section for further details.
This page also provides:
· Elastic Query Viewer button: it accesses the ElasticSearch Query Viewer window as follows:
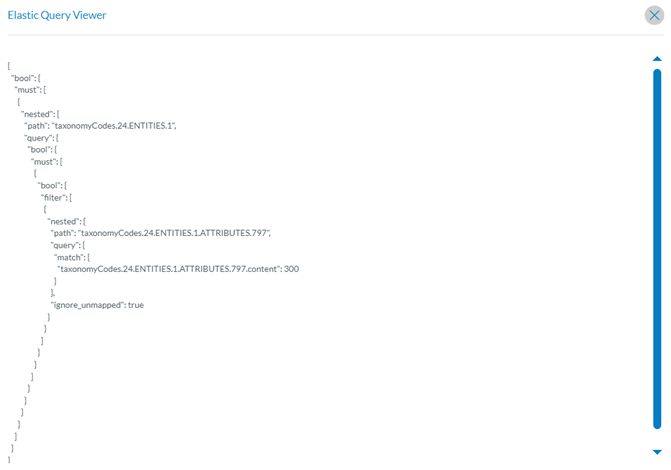
Query viewer: opens the query viewer window as follows:

4.1.5.2. Duplicating a query
The Officer can make a copy of an existing query and modify it.
The Officer has to click on the copy icon of the 3-dot menu of the specific query of the list of queries, and the system will display the Copy query window:
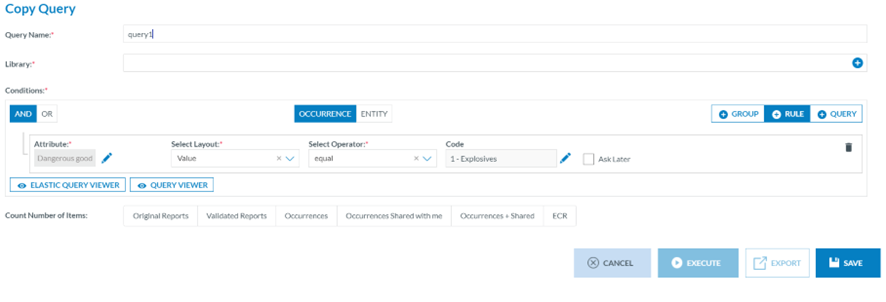
It is like the editing page above but with the mandatory Library field empty. The Officer has to fill in the library field with a library different from the original one, and then the Execute and Export button will be activated. The Save button is not available unless a Library is selected. The Officer has to introduce the needed update and click on ‘Save’, ‘Export’ or ‘Execute’, as needed. See the Query action buttons section for further details.
4.1.5.3. Sharing a query
Officers of the same Authority can exchange queries with each other, resulting in a notification being sent to the receiving Officers.
The Officer has to click on the Sharing option of the 3-dot menu of the specific query of the list of queries, and the system will display the Share query window:

The Officer has to select ‘Share to User’, and then the system will display the ‘Users’ tab below.
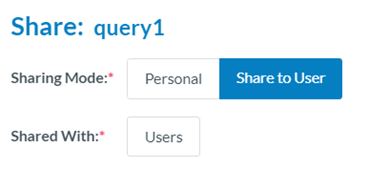
The Officer has to click on ‘Users’, and the system will display the Available Users section:

The Officer has to check the specific Users and click on the ‘ADD’ button, then click the ‘Save’ button. The system will save the updates of the query in the database and return to the list of queries that will have added a Shared icon to the specific query:

The Officer then can click on the ‘Edit share’ option that will be added to the 3-dot menu of that query and add more users or remove some of them.
4.1.5.4. Deleting a query
The Officer has to click on the ‘Delete’ option of the specific query 3-dot menu of the list of queries, and the system will delete it and update the table of queries accordingly. A query cannot be deleted if used in Batch Operations or Query-based Notifications. See the My Account-Query-based notifications section for further details.
4.1.6. Query libraries
All information presented in this section concerning the creation and management of libraries also applies to the section Word templates. The libraries store both queries and word templates.
The system provides the libraries available to the Officer on the left panel of the Queries menu:
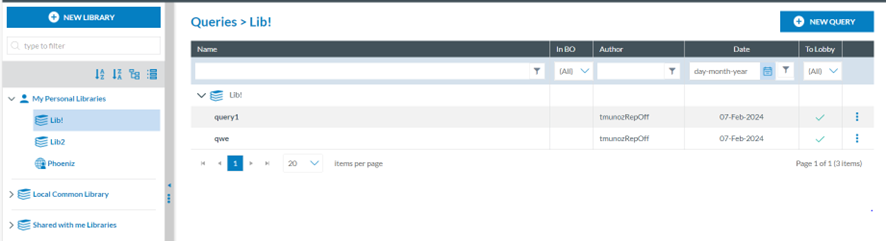
4.1.6.1. My Personal Libraries
The queries stored in personal libraries are only available to the owner of the libraries. The owner can decide to share a particular query from the personal libraries or share the complete library with other Authority users. Only users with permission to execute queries will be eligible.
4.1.6.2. Local Common Library
The queries stored in the Local Common Library are available for all Authority users with permissions to queries. Officers cannot create, edit or delete queries in the Local Common Library. They can execute the queries or copy them to their personal libraries.
4.1.6.3. Shared with me libraries
When a library or query owner has shared the library or query with the Officer, it will appear under the ‘Shared with me libraries’. They can execute the queries or copy them to their personal libraries.
4.1.7. Creation of a library
Once in the ‘Data management’ ‘Queries’ menu, the Officer has to click on ‘New Library’, and the system will display a modal window to create the library:

The Officer has to fill in the mandatory Name field, the Description if needed, and the Sharing mode, which can be ‘Personal’ or ‘Share to User’.
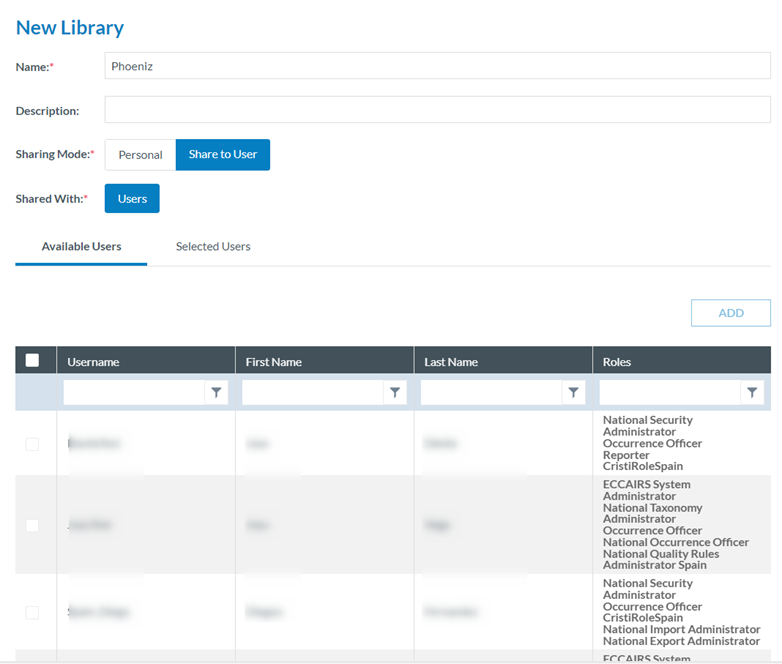
Therein, the Officer has to select the specific users through the check box and click on the ‘ADD’ button, which will be activated. The selected users will be available on the ‘Selected Users’ tab.
The Officer has to click on ‘Save’ for both Personal or Shared to User, and the Library will be saved accordingly and will appear in the left pane under ‘My Personal Libraries’:
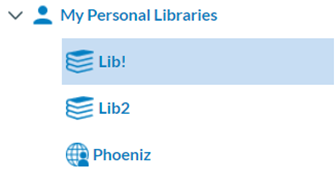
If the created library is ‘Shared to user’, it will show the ‘Shared’ icon  .
.
4.1.7.1. Management of My Personal Libraries
The system provides the deleting, adding category and editing buttons next to each library under My Personal Libraries of the Officer.
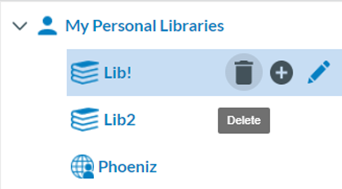
4.1.7.2. Deleting a Library
The Officer has to click on the Delete icon (rubbish) next to the specific Library, and the system will delete the library from the My Personal Libraries tree as long as it has no more queries. Otherwise, the system will display a warning message and not delete the library. The library tree will be updated accordingly.
4.1.7.3. Adding a category or folder to a Library
The Officer has to click on the ‘+’ button next to the specific library, and the system will display a folder below the library:
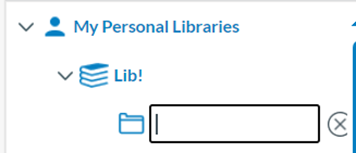
The Officer has to type a Name and click on ‘Intro’. The folder or category will be added to the tree and will be available to store queries of the Officer:

Next to the folder or category, the management buttons will appear as follows:

The category can only be deleted if it does not include queries.
4.1.7.4. Editing a Library
The Officer has to click on the editing (pencil) icon next to the specific Library, and the system will display the editing window:

This page is the same as the library creation window of the previous section. The Officer must update the corresponding fields and click ‘Save’. The changes will be saved in the database and Library tree.
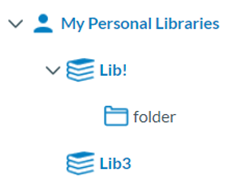
4.2. Word Templates
Word Templates in ECCAIRS2 are used to export reports in Word format. The Word template has to include the complete path of the attributes according to the Authority’s released taxonomy so that the system can fill each of the template fields with the corresponding attribute value in the report.
Each table in the Word Template corresponds to an entity in the taxonomy. i.e.:
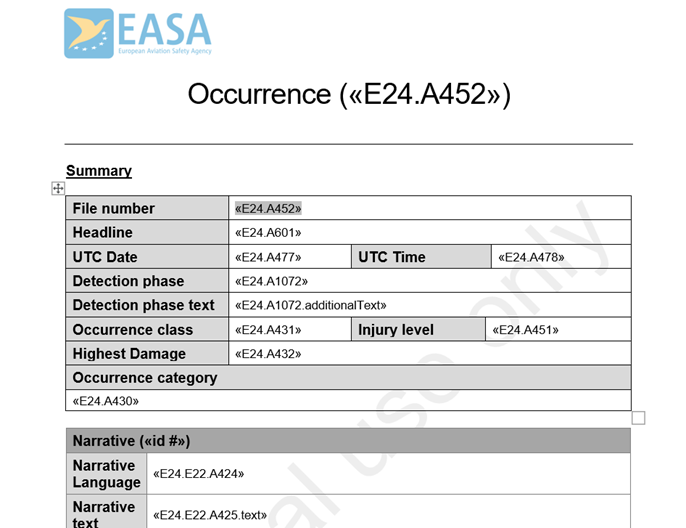
The Word Template will have tags included in token « » with the following characteristics:
· Attribute: A
· Attribute custom: AC
· Entity: E
· Separation token: .
· ID: TaxonomyCode
Examples:
· «E1.A1» -> ENTITY.1.ATTRIBUTE.1
· «E1.E45.AC1» -> ENTITY.1.ENTITY.45.ATTRIBUTES_CUSTOM.1
Depending on the attribute data type, it should be indicated what part of the attribute will be included in the Word Template:
|
Attribute Data Type |
Field |
Example |
|
Date, Time, Text, Alphanumeric, Number |
content (default) |
«E1.A1» |
|
Code |
content (default) |
«E1.A1» |
|
Code and Additional Text |
content (default) additionalText |
«E1.A1» «E1.A1.additionalText» |
|
Code or Alternative Text |
content (default) alternativeText |
«E1.A1» «E1.A1.alternativeText» |
|
Decimal |
content (default) unit |
«E1.A1» «E1.A1.unit» |
|
ECCAIRS Resource Locator |
filename (default) description |
«E1.A1» «E1.A1.description» |
|
ECCAIRS Embedded Data |
eccairsNumber (default) |
«E1.A1» |
|
ECCAIRS Data Link |
eccairsNumber (default) |
«E1.A1» |
|
Latitude & Longitude |
|
«E1.A1.degree» «E1.A1.minutes» «E1.A1.seconds» «E1.A1.direction» |
Once the Word template is configured, the Officer can save it into E2 libraries. This is the second menu of Data management:

4.2.1. Create a Word Template placeholder
To create a Word Template (from now on WT), the Officer has to click on ‘New WT’ at the top of the page, and the system will display a modal window to create it:
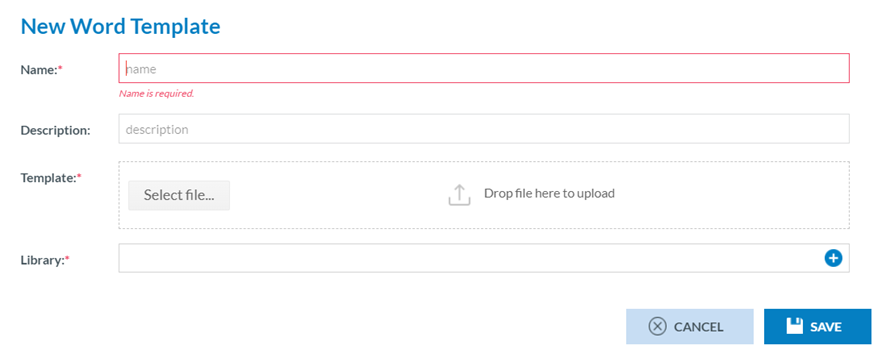
The Officer has to fill in the Name that has to be different from the existing ones, upload the needed Word Template file to the Template section through the ‘Select file’ button or drag and drop it to the section and select a Library, a category and a subcategory.
The description field is optional.
Then, the Officer has to click on the ‘Save’ button. The system will save the WT in the database, return to the WTs page, and add the specific WT to the table of WTs.
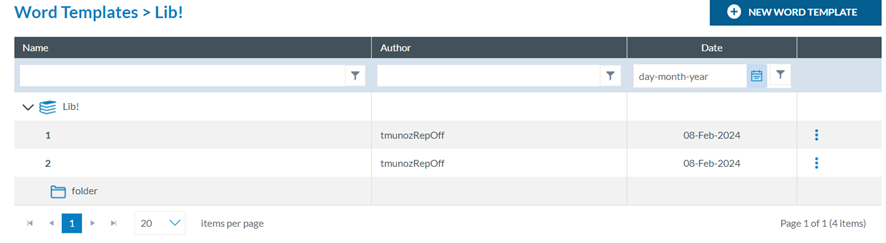
The saved WT will be available in the export options for ORs, VRs, and OCs in Word format. See the Export section, which applies to all reports, for further details.
4.2.2. Management of Word Templates
4.2.2.1. Edit a WT
The Officer has to double-click on the Name of the specific WT of the list of WTs or click on the ‘Edit’ option of the 3-dot menu of the WT on the list, and the system will display the Edit window:
The Name field cannot be updated; only the other fields of the WT, including the library, can be updated.
The Officer has to update the corresponding fields, and click ‘Save’. The system will save the updates in the database and return to the WT menu with the updated list of WTs.
4.2.2.2. Copy a WT
The Officer has to click on the ‘Copy’ option of the 3-dot menu of the WT on the list, and the system will display the Copy WT window:
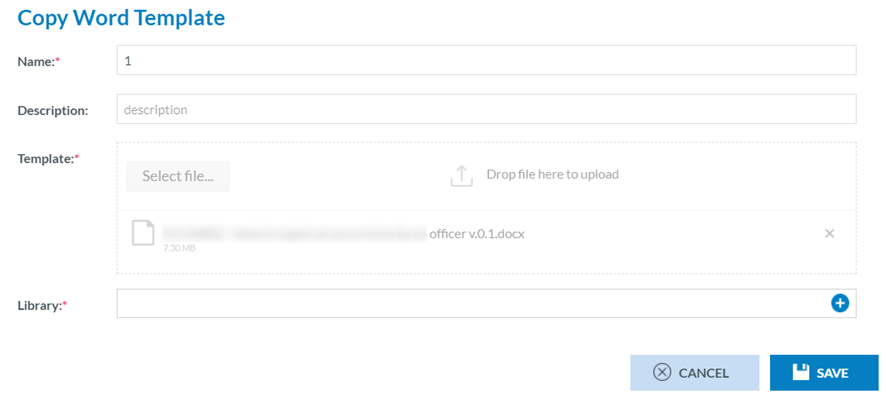
The management of this window is the same as the editing option above, with the only difference being that the Name field can be updated. The Officer can select a library different from where the WT was stored previously.
4.2.2.3. Share a WT
The Officer has to click on the ‘Share’ option of the 3-dot menu of the WT on the list and the system will display the Share WT window:

This option works as described in the ‘Share a query’ section Data Management-Queries -Management of queries – table of queries with the only difference being in the information shared.
4.2.2.4. Download a WT
The Officer has to click on the ‘Share’ option of the 3-dot menu of the WT on the list of WTs, and the system will download the WT.
4.2.2.5. Delete a WT
The Officer has to click on the ‘Delete’ option of the 3-dot menu of the WT on the list of WTs, and the system will delete it from the database and update the list of WTs accordingly.
5. Taxonomy Browser
5.1. Taxonomy
The E2 system is built around the ECCAIRS taxonomy, constituted by ADREP taxonomy + ECCAIRS/EU specific taxonomy. While most of it is centrally maintained, in accordance with specific governance through the NA’s established Data and Quality Working Group, there is also the possibility for Authorities to maintain their own custom taxonomy, which allows them to adapt their usage of E2 to their own processes.
The taxonomy browser is a portal of the E2 System that provides detailed information of all the ECCAIRS taxonomy structures, entities, attributes and value lists in an easy-to-use UI.
The taxonomy browser is only for consulting purposes.
The Officer has to access the taxonomy menu to access the central or custom taxonomy for the Officer’s Authority. See the List of taxonomies section for further details.
The Taxonomy tree and the search bar are displayed on the left side of the screen. They can be hidden by clicking on the 'arrow' icon. The left panel is resizable by clicking on the 3-dot menu and moving it to the left or the right.
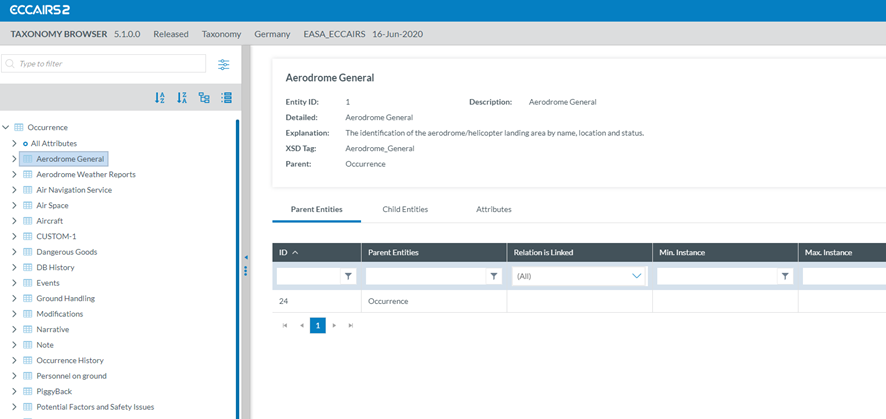
5.2. Search
Entities and attributes can be found by entering the taxonomy code or description in the search box located at the top left.
For example, if you search by Taxonomy Code using '21':
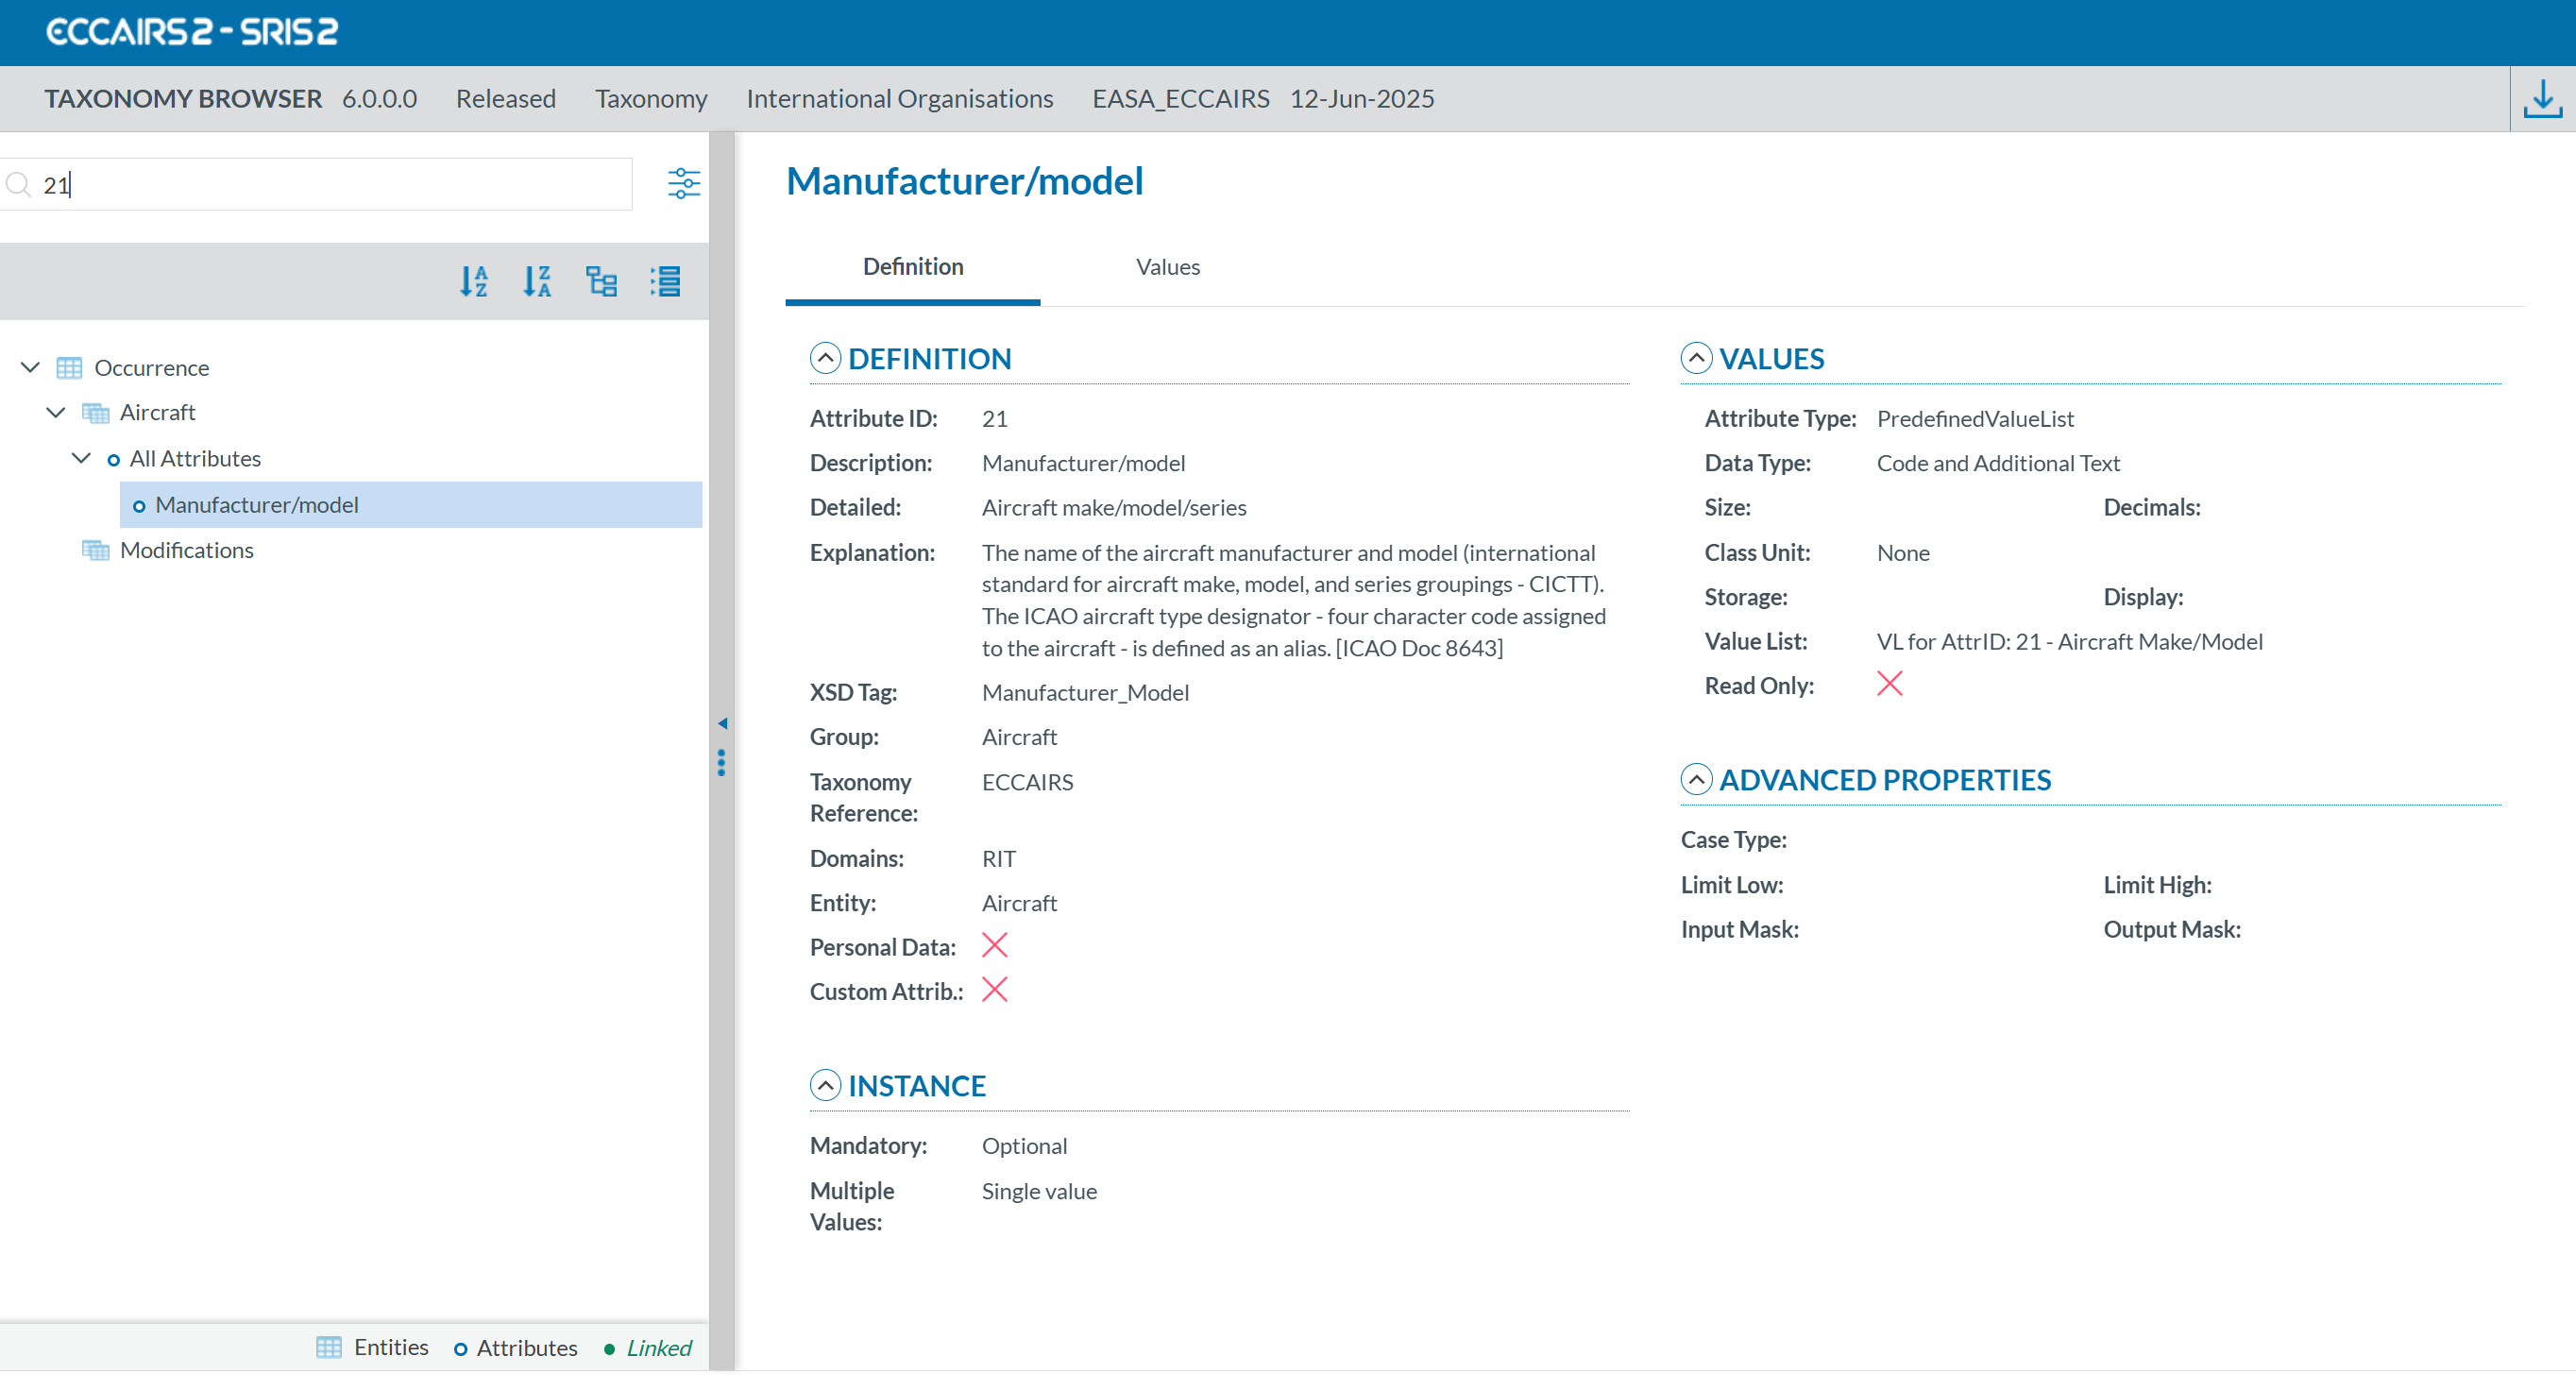
If you search by description using 'Manufacturer':
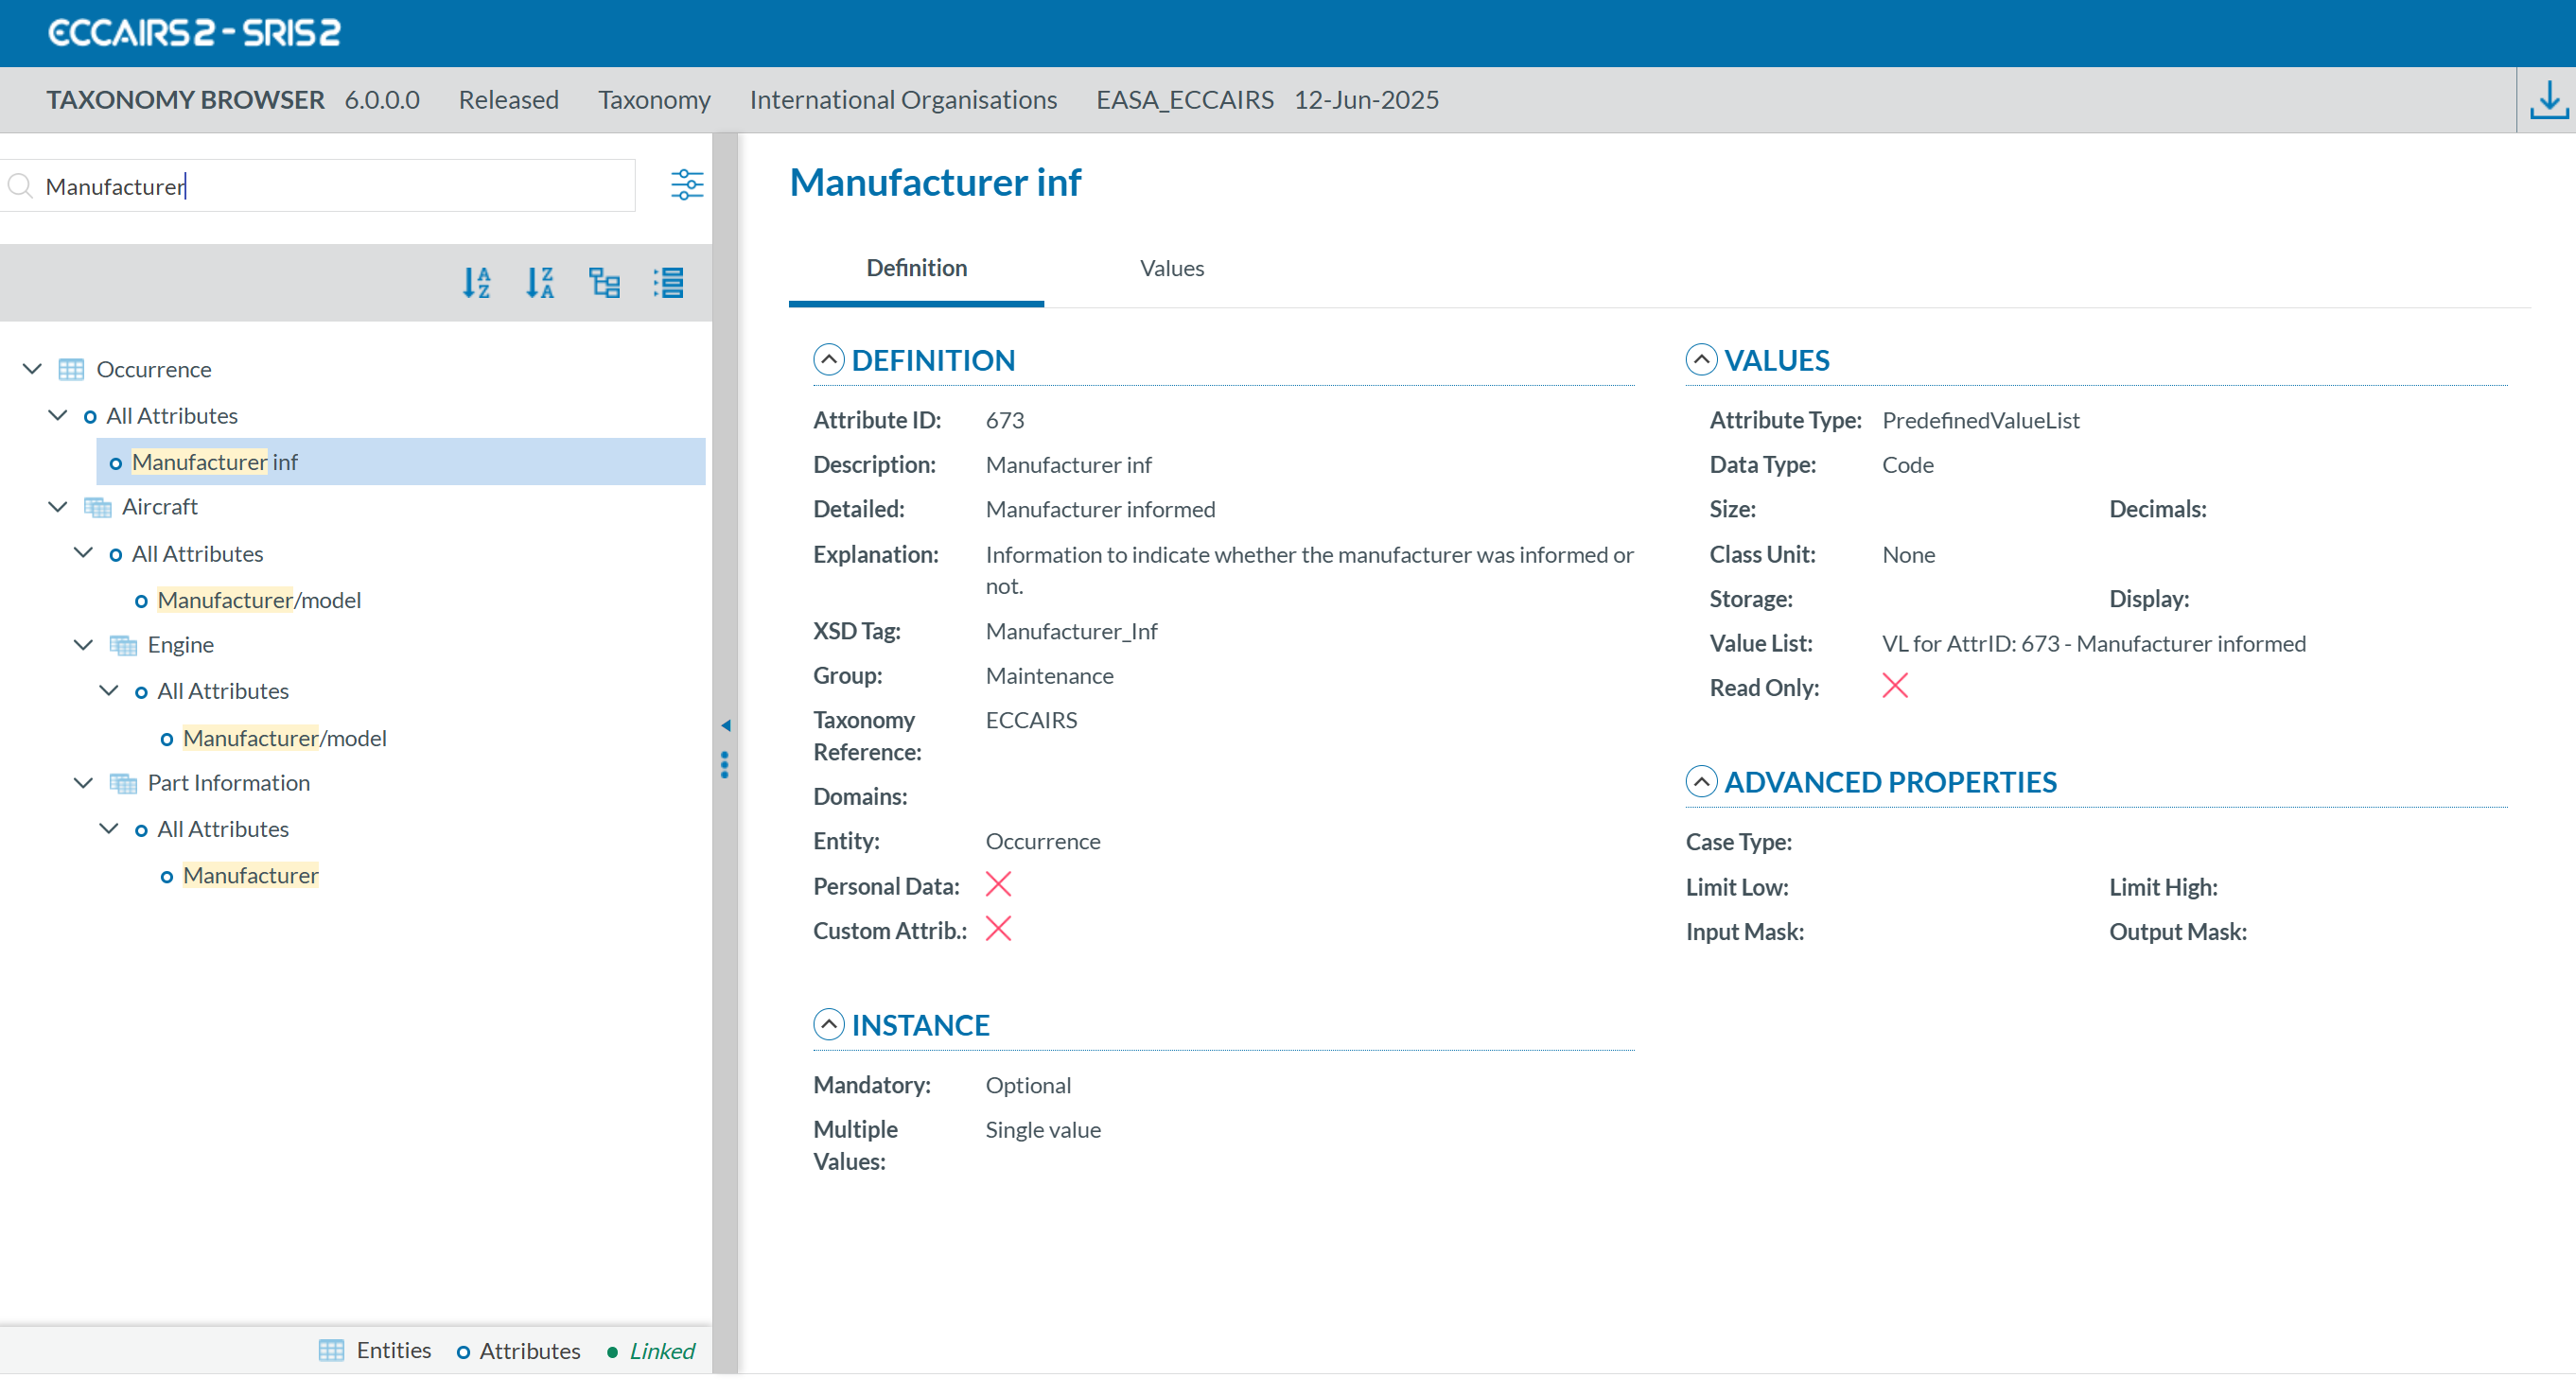
If you click on the 'Filter' button: , a layer with more filters will be displayed.
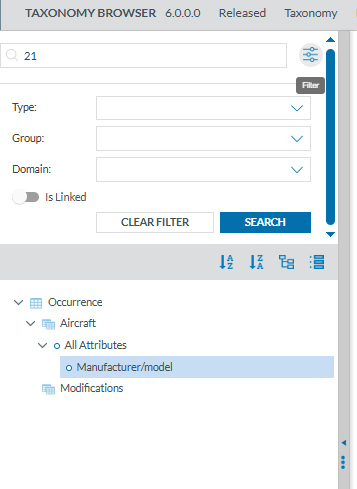
For each filter you can select one or more values. When you have finished click on 'SEARCH' to refresh the tree with your filters.
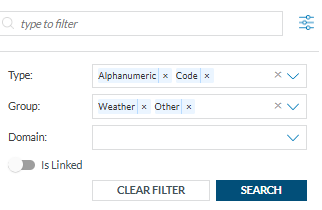
The Taxonomy Tree can be ordered alphabetically by clicking on the 'A-Z' icon or 'Z-A' icon :

You can collapse or expand all item of the Taxonomy Tree with the following buttons:
- Expand all

- Collapse all


When an entity is a Linked Entity, it is highlighted in green in the Taxonomy Tree with the toggle switch:
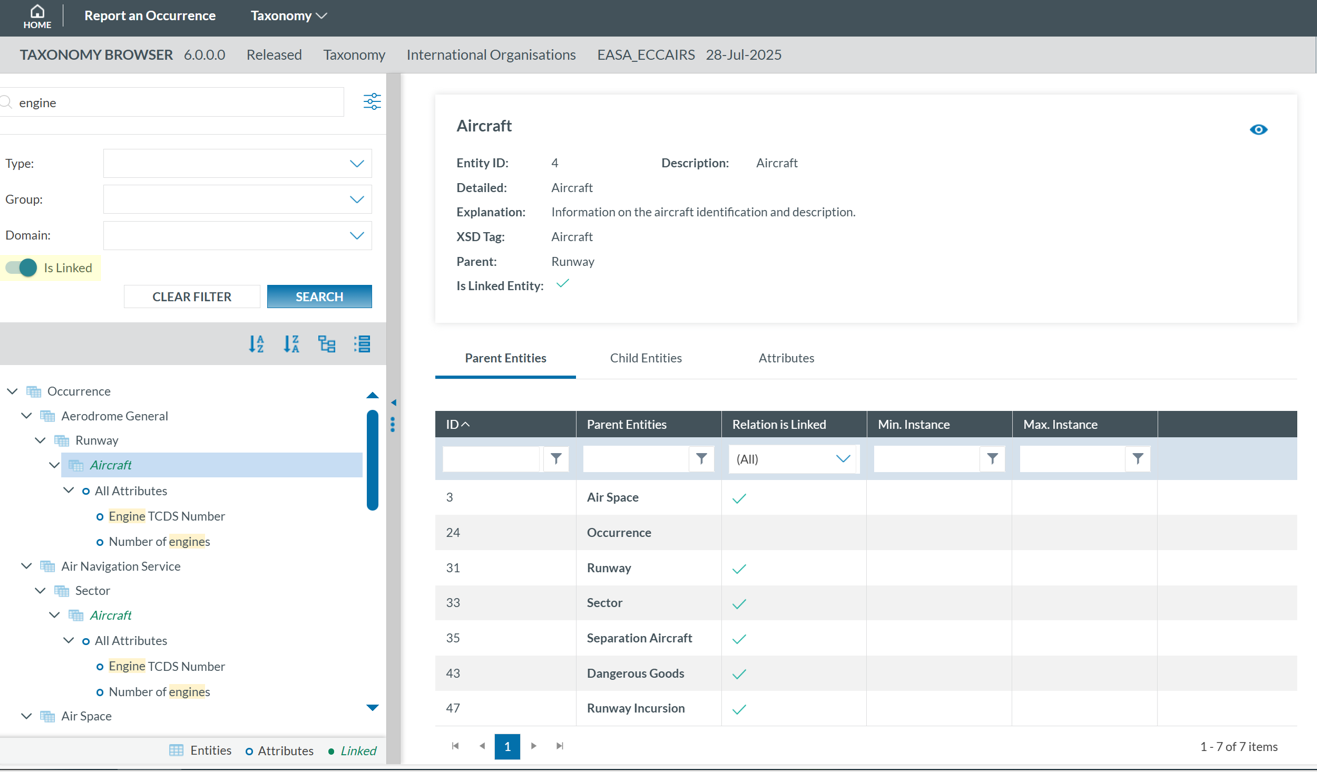
5.3. Taxonomy structure
ECCAIRS taxonomy elements are structured as follows:
-
Entities
-
Attributes
-
Value Lists
-
Values
5.3.1 Entities
Entities represent items to which specific attributes are assigned—for example, an “Aircraft” involved in an incident or the associated “Events” description.
Multiple instances of an entity may exist when several items are involved (e.g., multiple aircraft in a single incident).
Entities can have child entities (e.g., an “Engine” belonging to an “Aircraft”).
Entities may also be linked to other entities (e.g., “Airspace” or “Aerodrome” where the “Aircraft” is operating).
5.3.1.1 Entities information
Entities in the Taxonomy Tree are represented by  or
or  .
.
The following information will be displayed in the right side of the screen when you click on an Entity in the Taxonomy Tree:
-
Entity information: A brief summary of the selected Entity.
-
Parent Entities: The list of its parent Entities
-
Child Entities: The list of its children Entities
-
Attributes. The list of its Attributes
Click on each tab (Parent Entities, Child Entities, Attributes) to view its information.
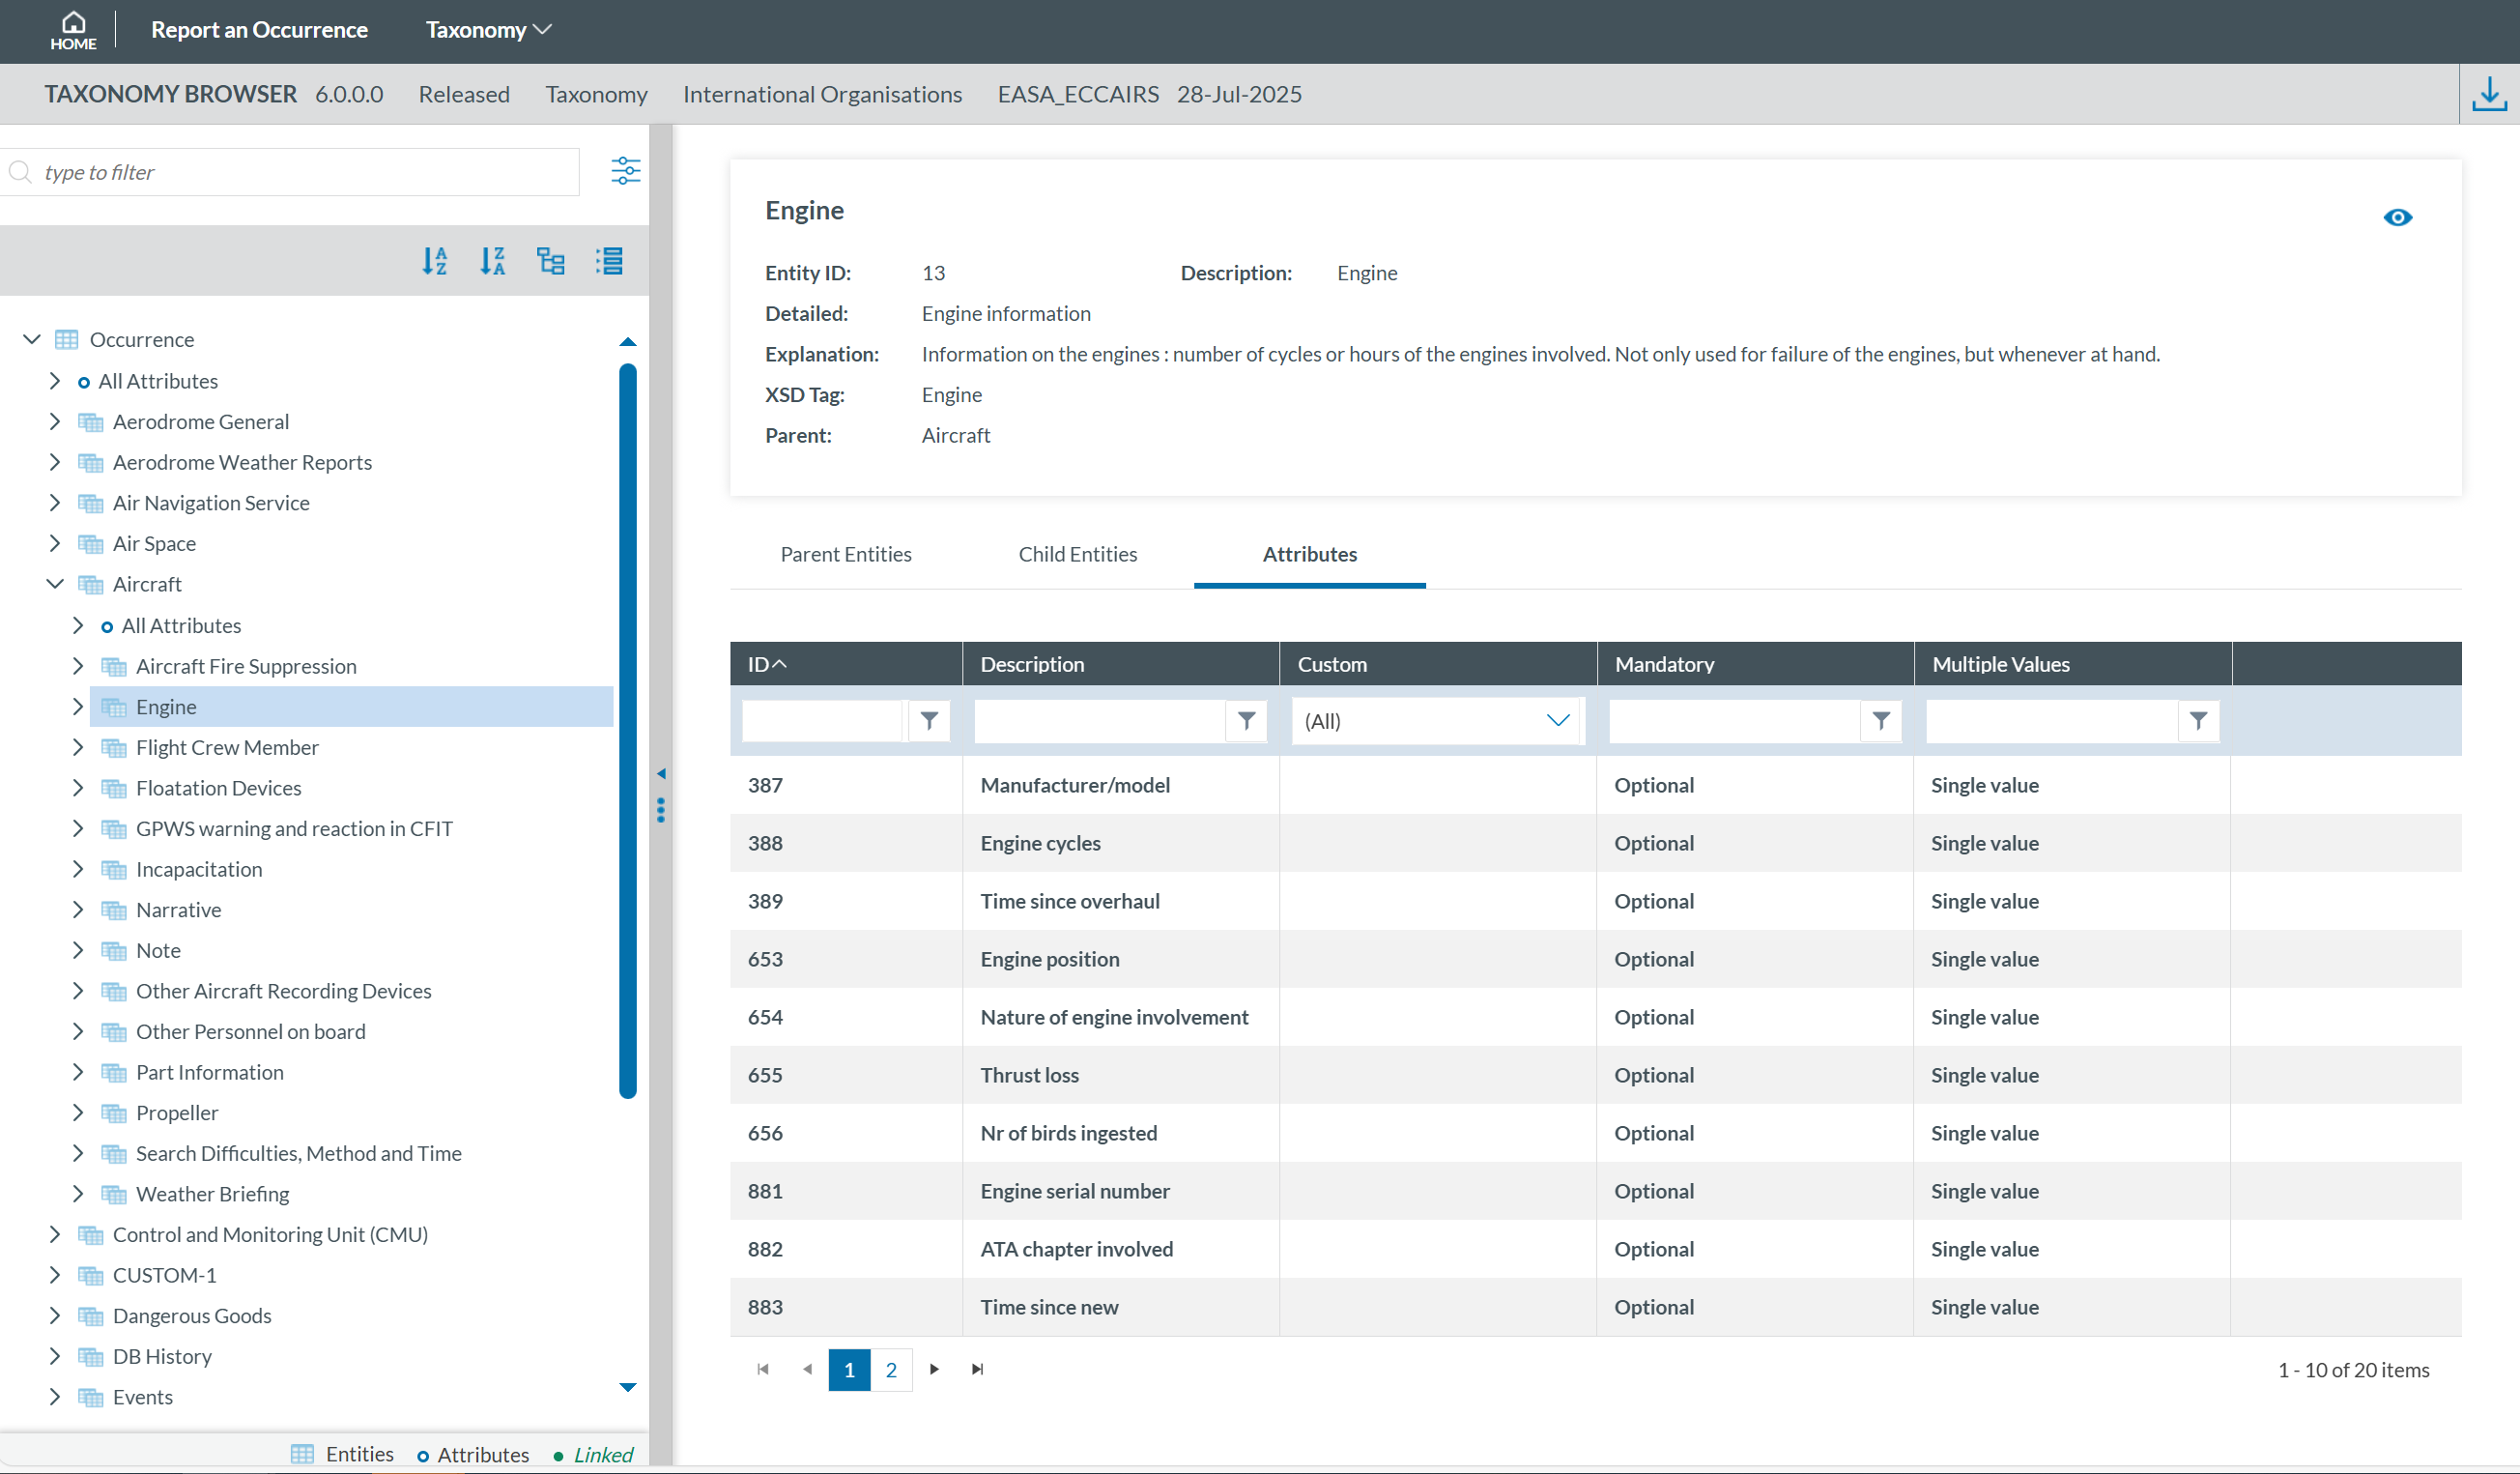
Clicking the 'eye' icon  you can see detailed information from the entity.
5.3.2 Attributes
Attributes describe properties/values associated to an entity and represented by  . An example of an attribute of the “Aircraft” entity is its "manufacturer/model". Attributes may have either single or multiple values and can be of the following types:
-
Number
-
Decimals
-
Text
-
Alphanumeric
-
Date
-
Time
-
DateTime
-
Longitude
-
Latitude
-
Code
-
Code and Additional Text
-
Code or Alternative Text
-
ECCAIRS Resource Locator
-
ECCAIRS Data Link
-
ECCAIRS Embedded Data
5.3.2.1 Attributes information
Attribute information can be viewed from two locations within the Taxonomy Browser:
- Locate the attribute in the Taxonomy Tree and click on it (1). The information will then be displayed in the right-hand pane.

-
Select the entity to which the attribute belongs in the Taxonomy Tree (1), then click the 'Attribute' tab in the right-hand pane (2). Finally locate the attribute in the list and click the 'eye' icon
 to view its detailed information (3):

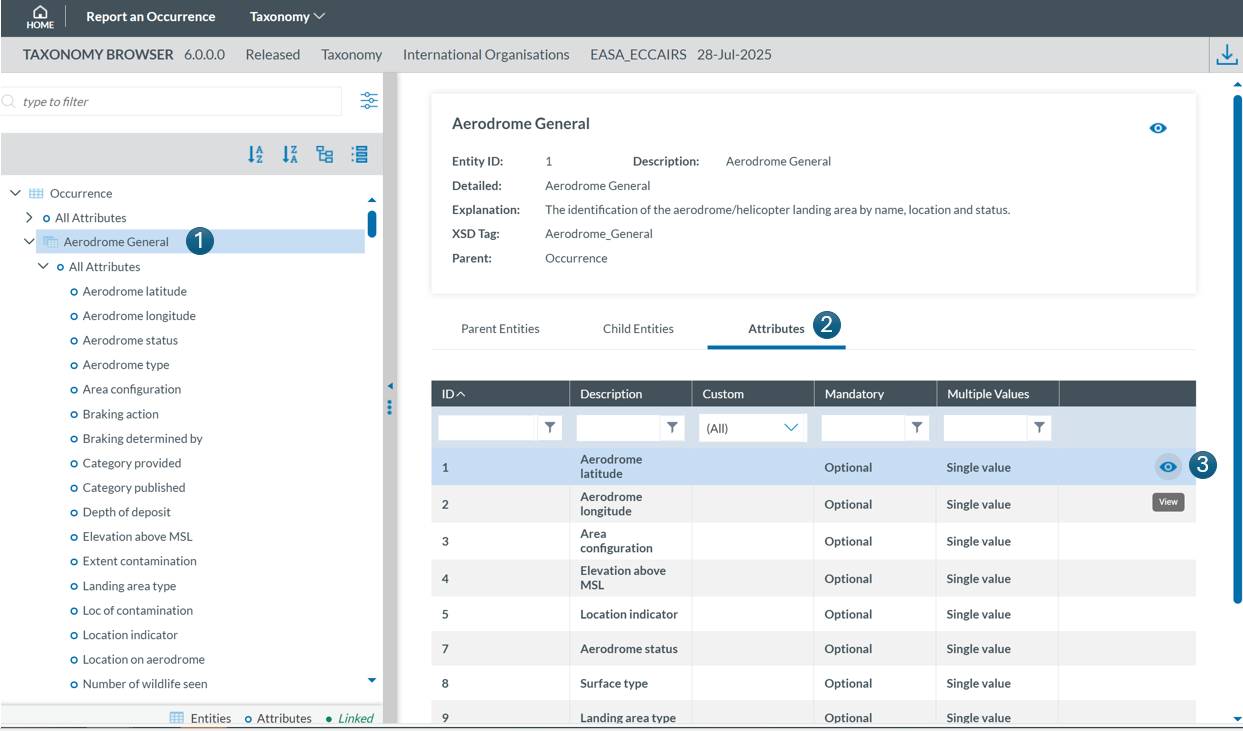
The information will be displayed:
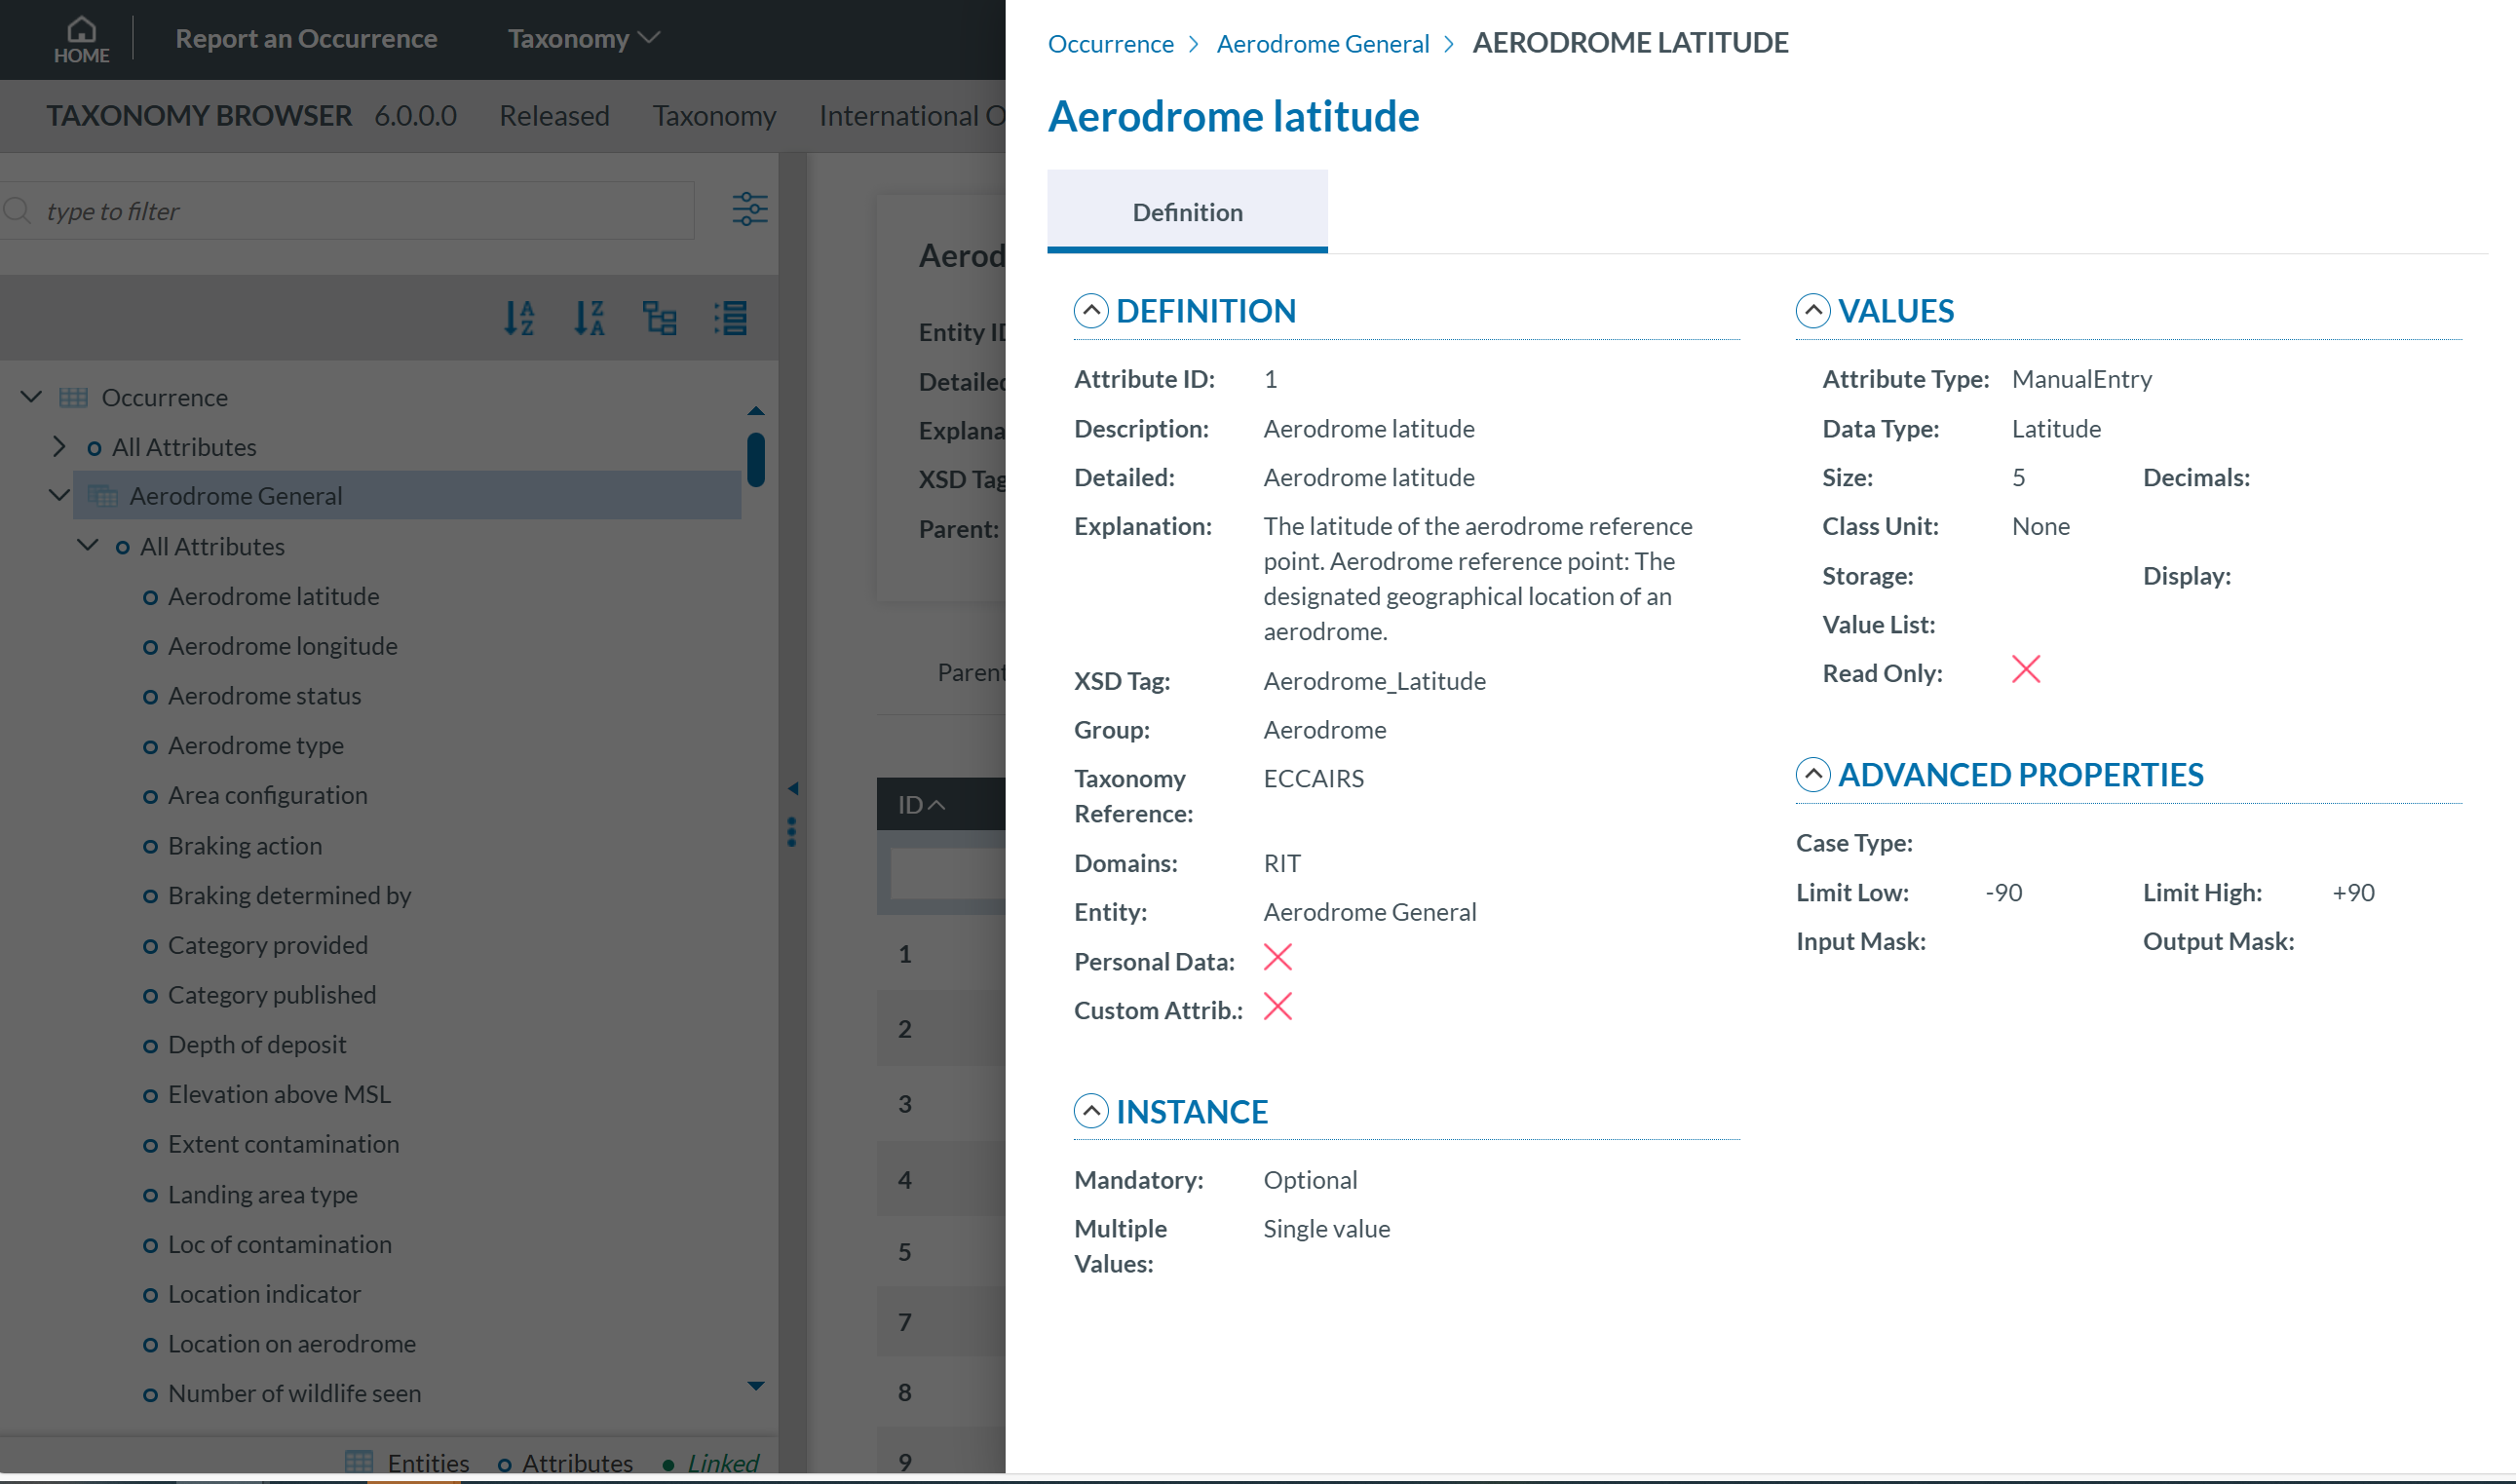
Attribute information may be displayed across two tabs:
- Definition
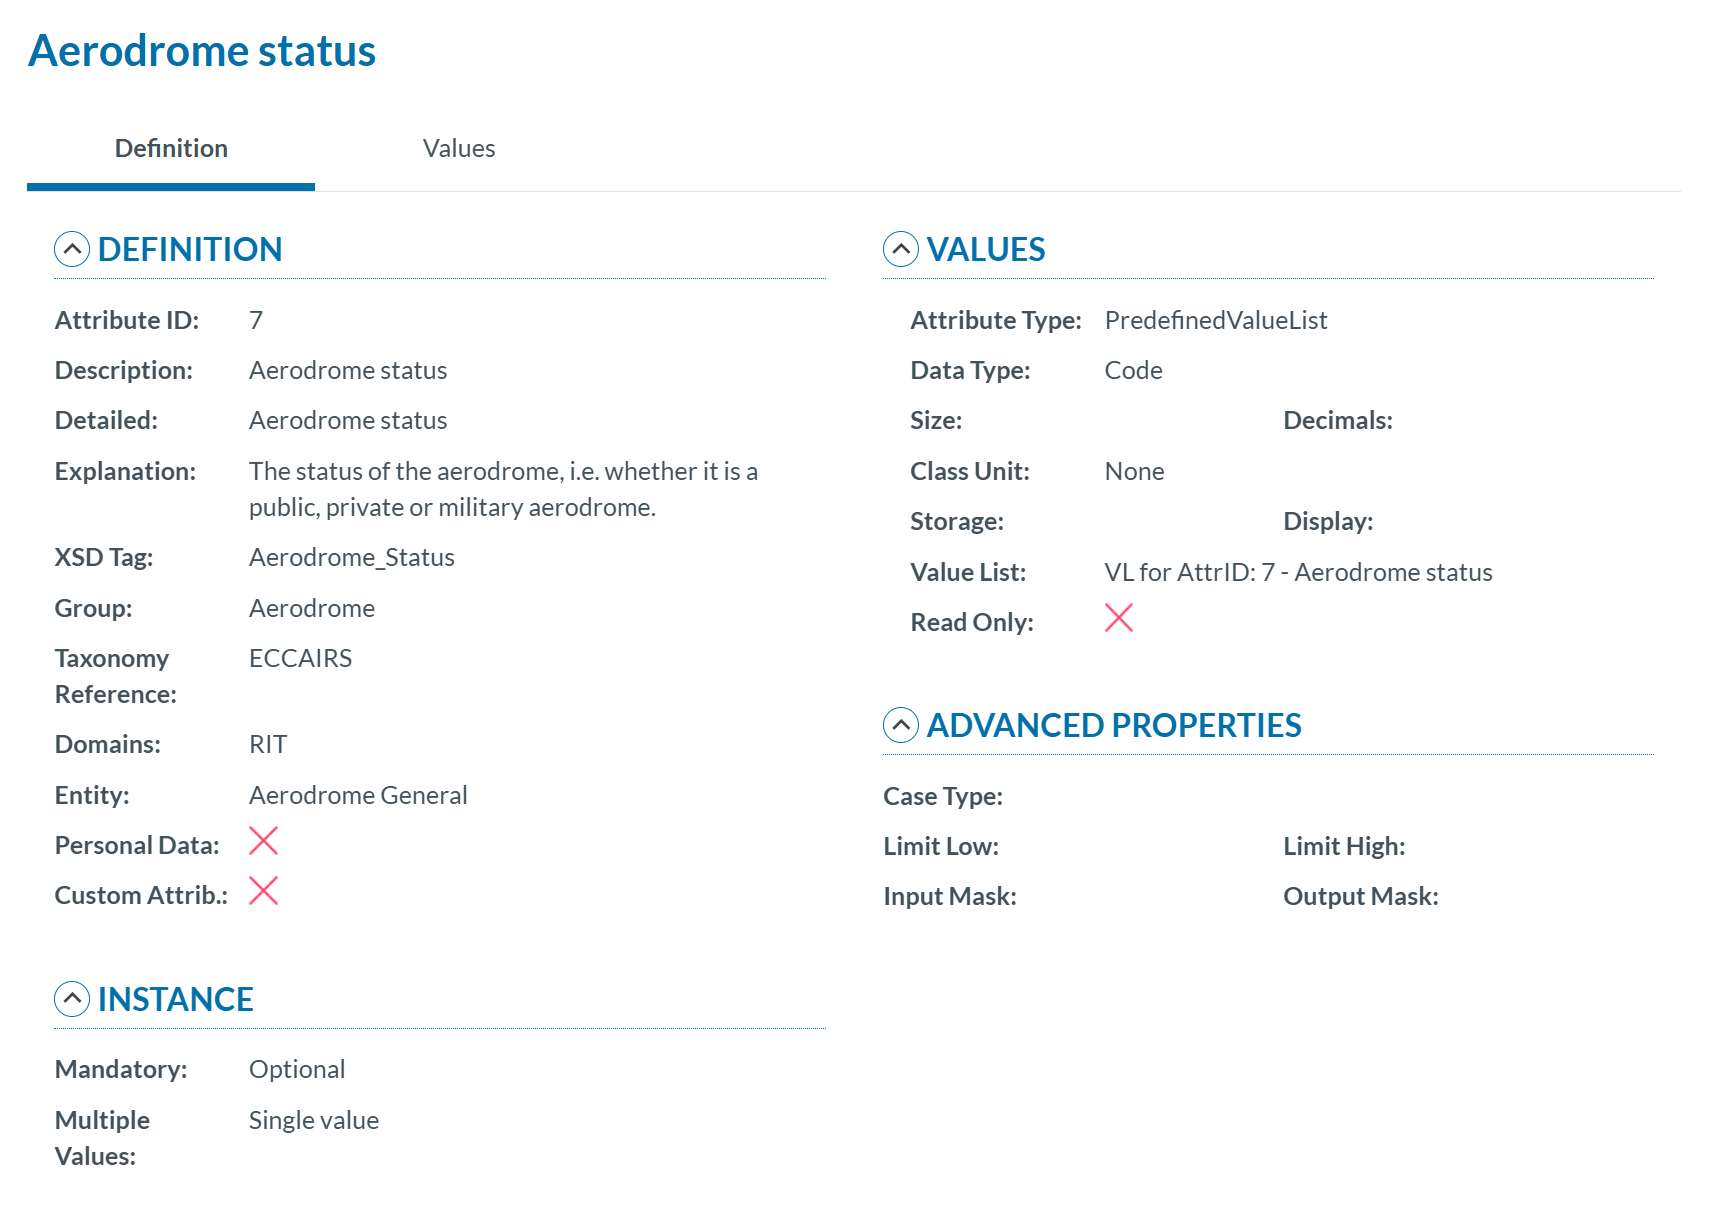
- Values: If the attribute has a predefined value list, you can navigate through the values in the Values Tree by clicking on each element. The selected value will display its definition. Values can be searched by Taxonomy Code or Description and can be sorted alphabetically.
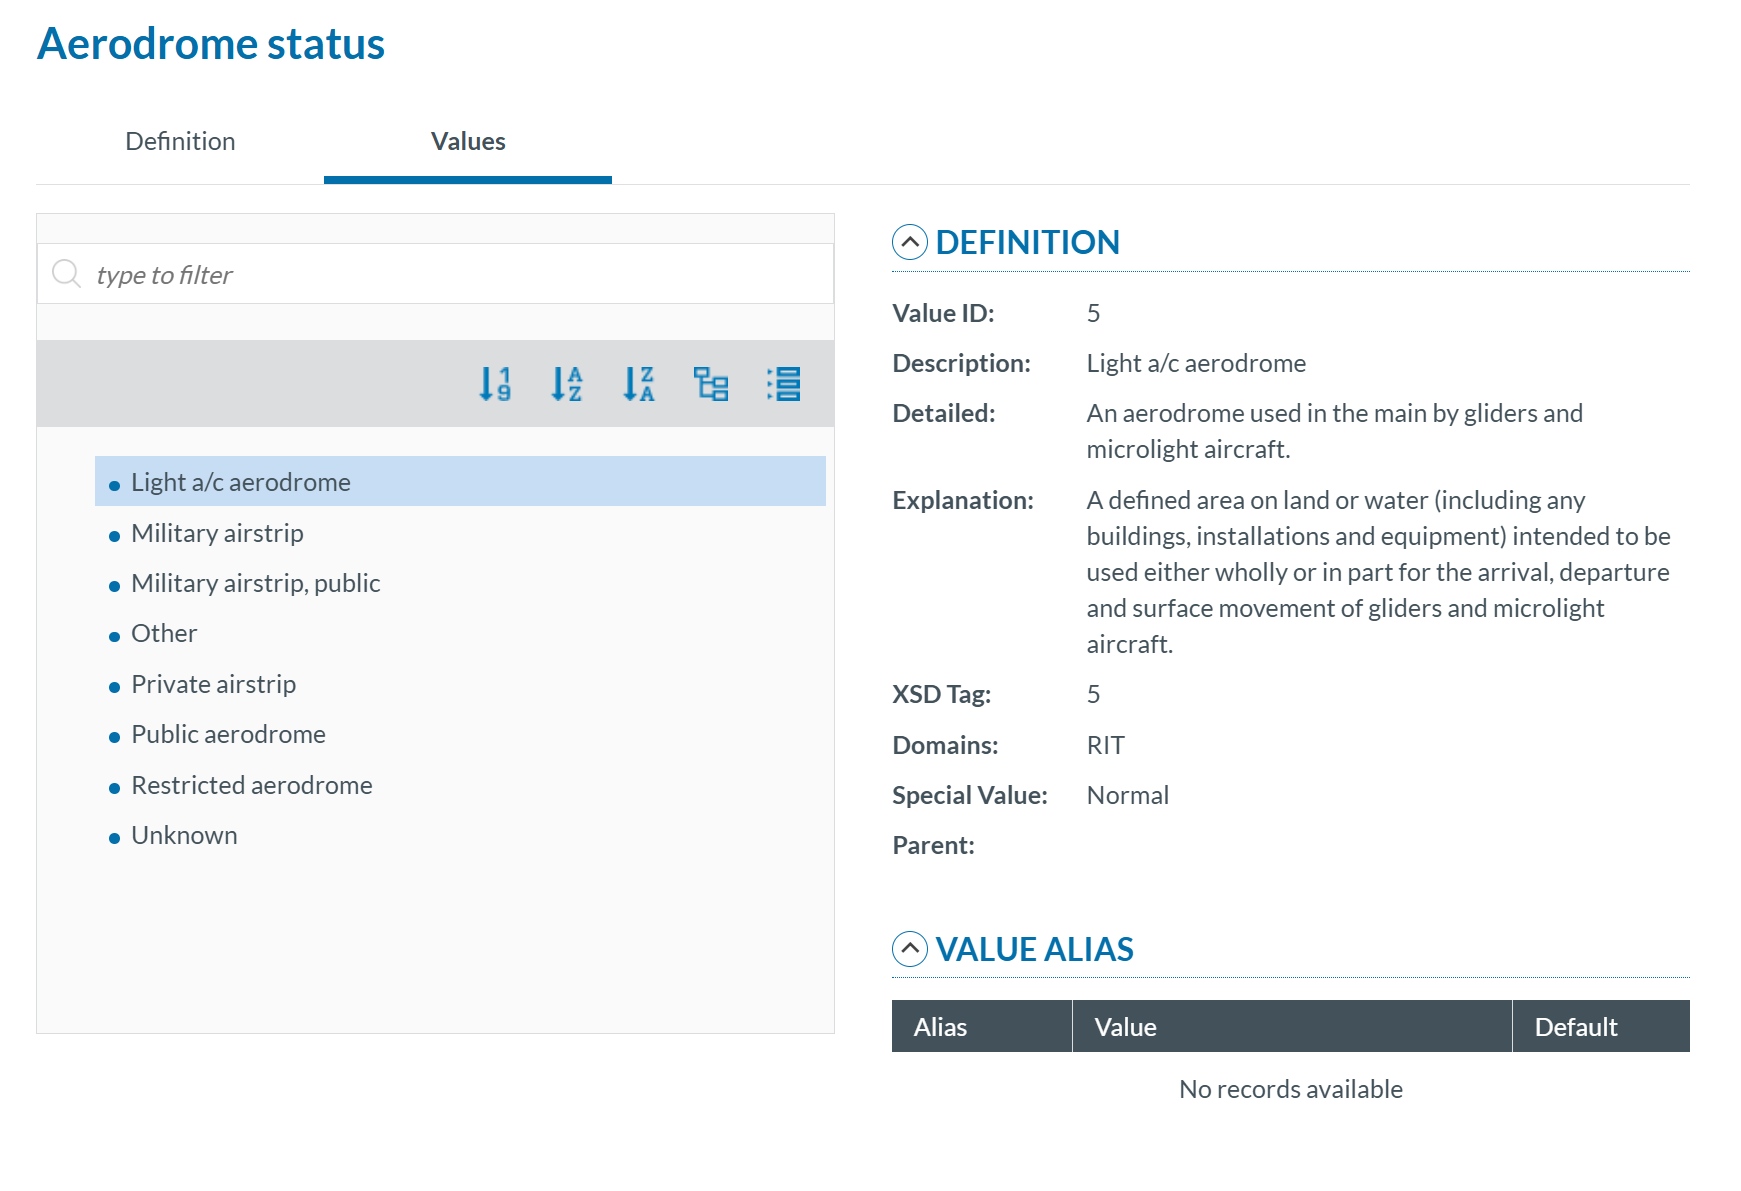
5.3.3 Value Lists
The list of values an attribute can have is defined in a Value List. The Value List can have multiple level where values are organized in a tree mode.
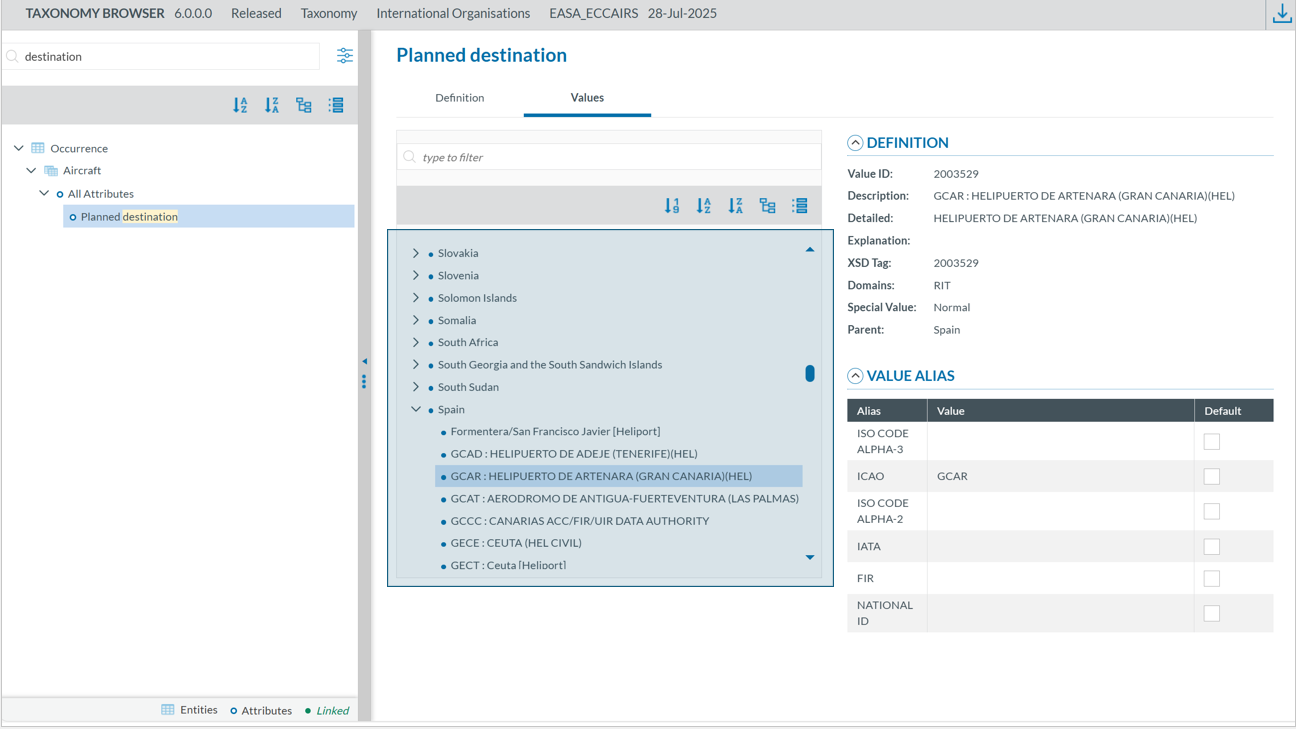
Value list can have Alias:
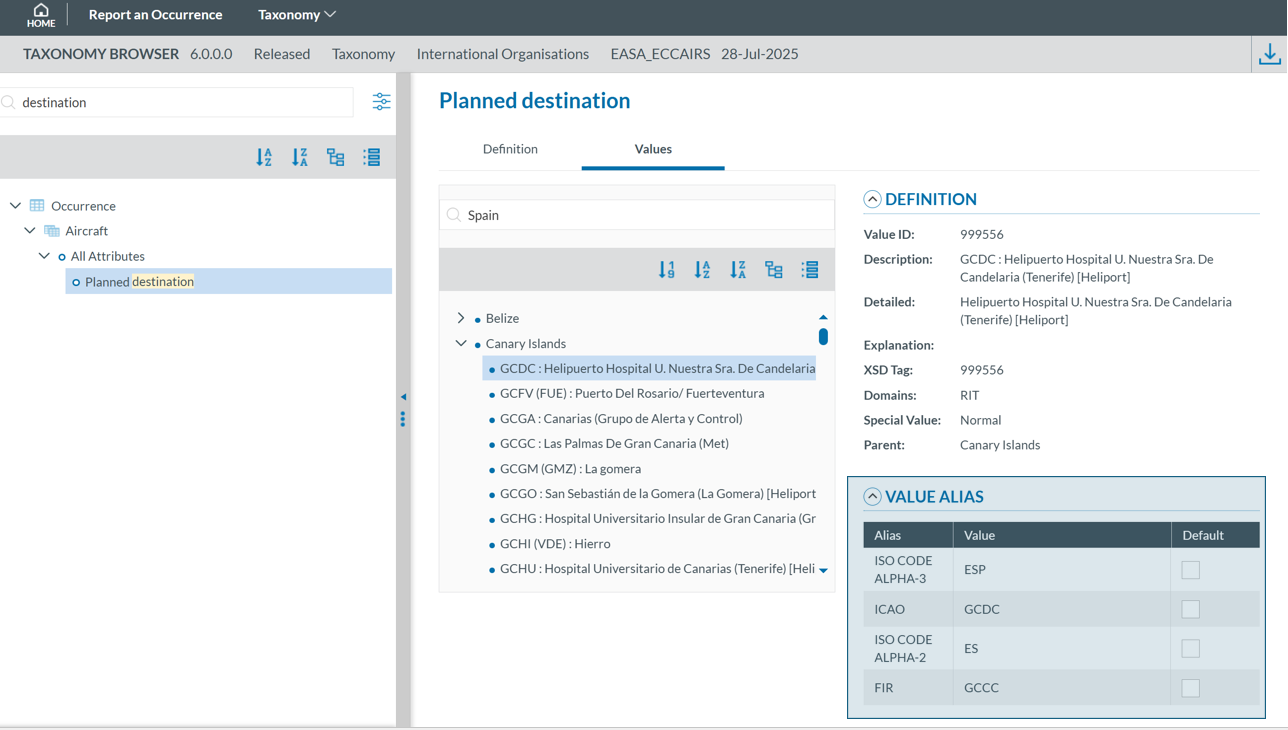
5.3.4. Values
Depending on the attribute type, values may either be manually entered or selected from a predefined list (Value List). For example, for the Manufacturer/Model of an aircraft, a value can be chosen from a Value List:
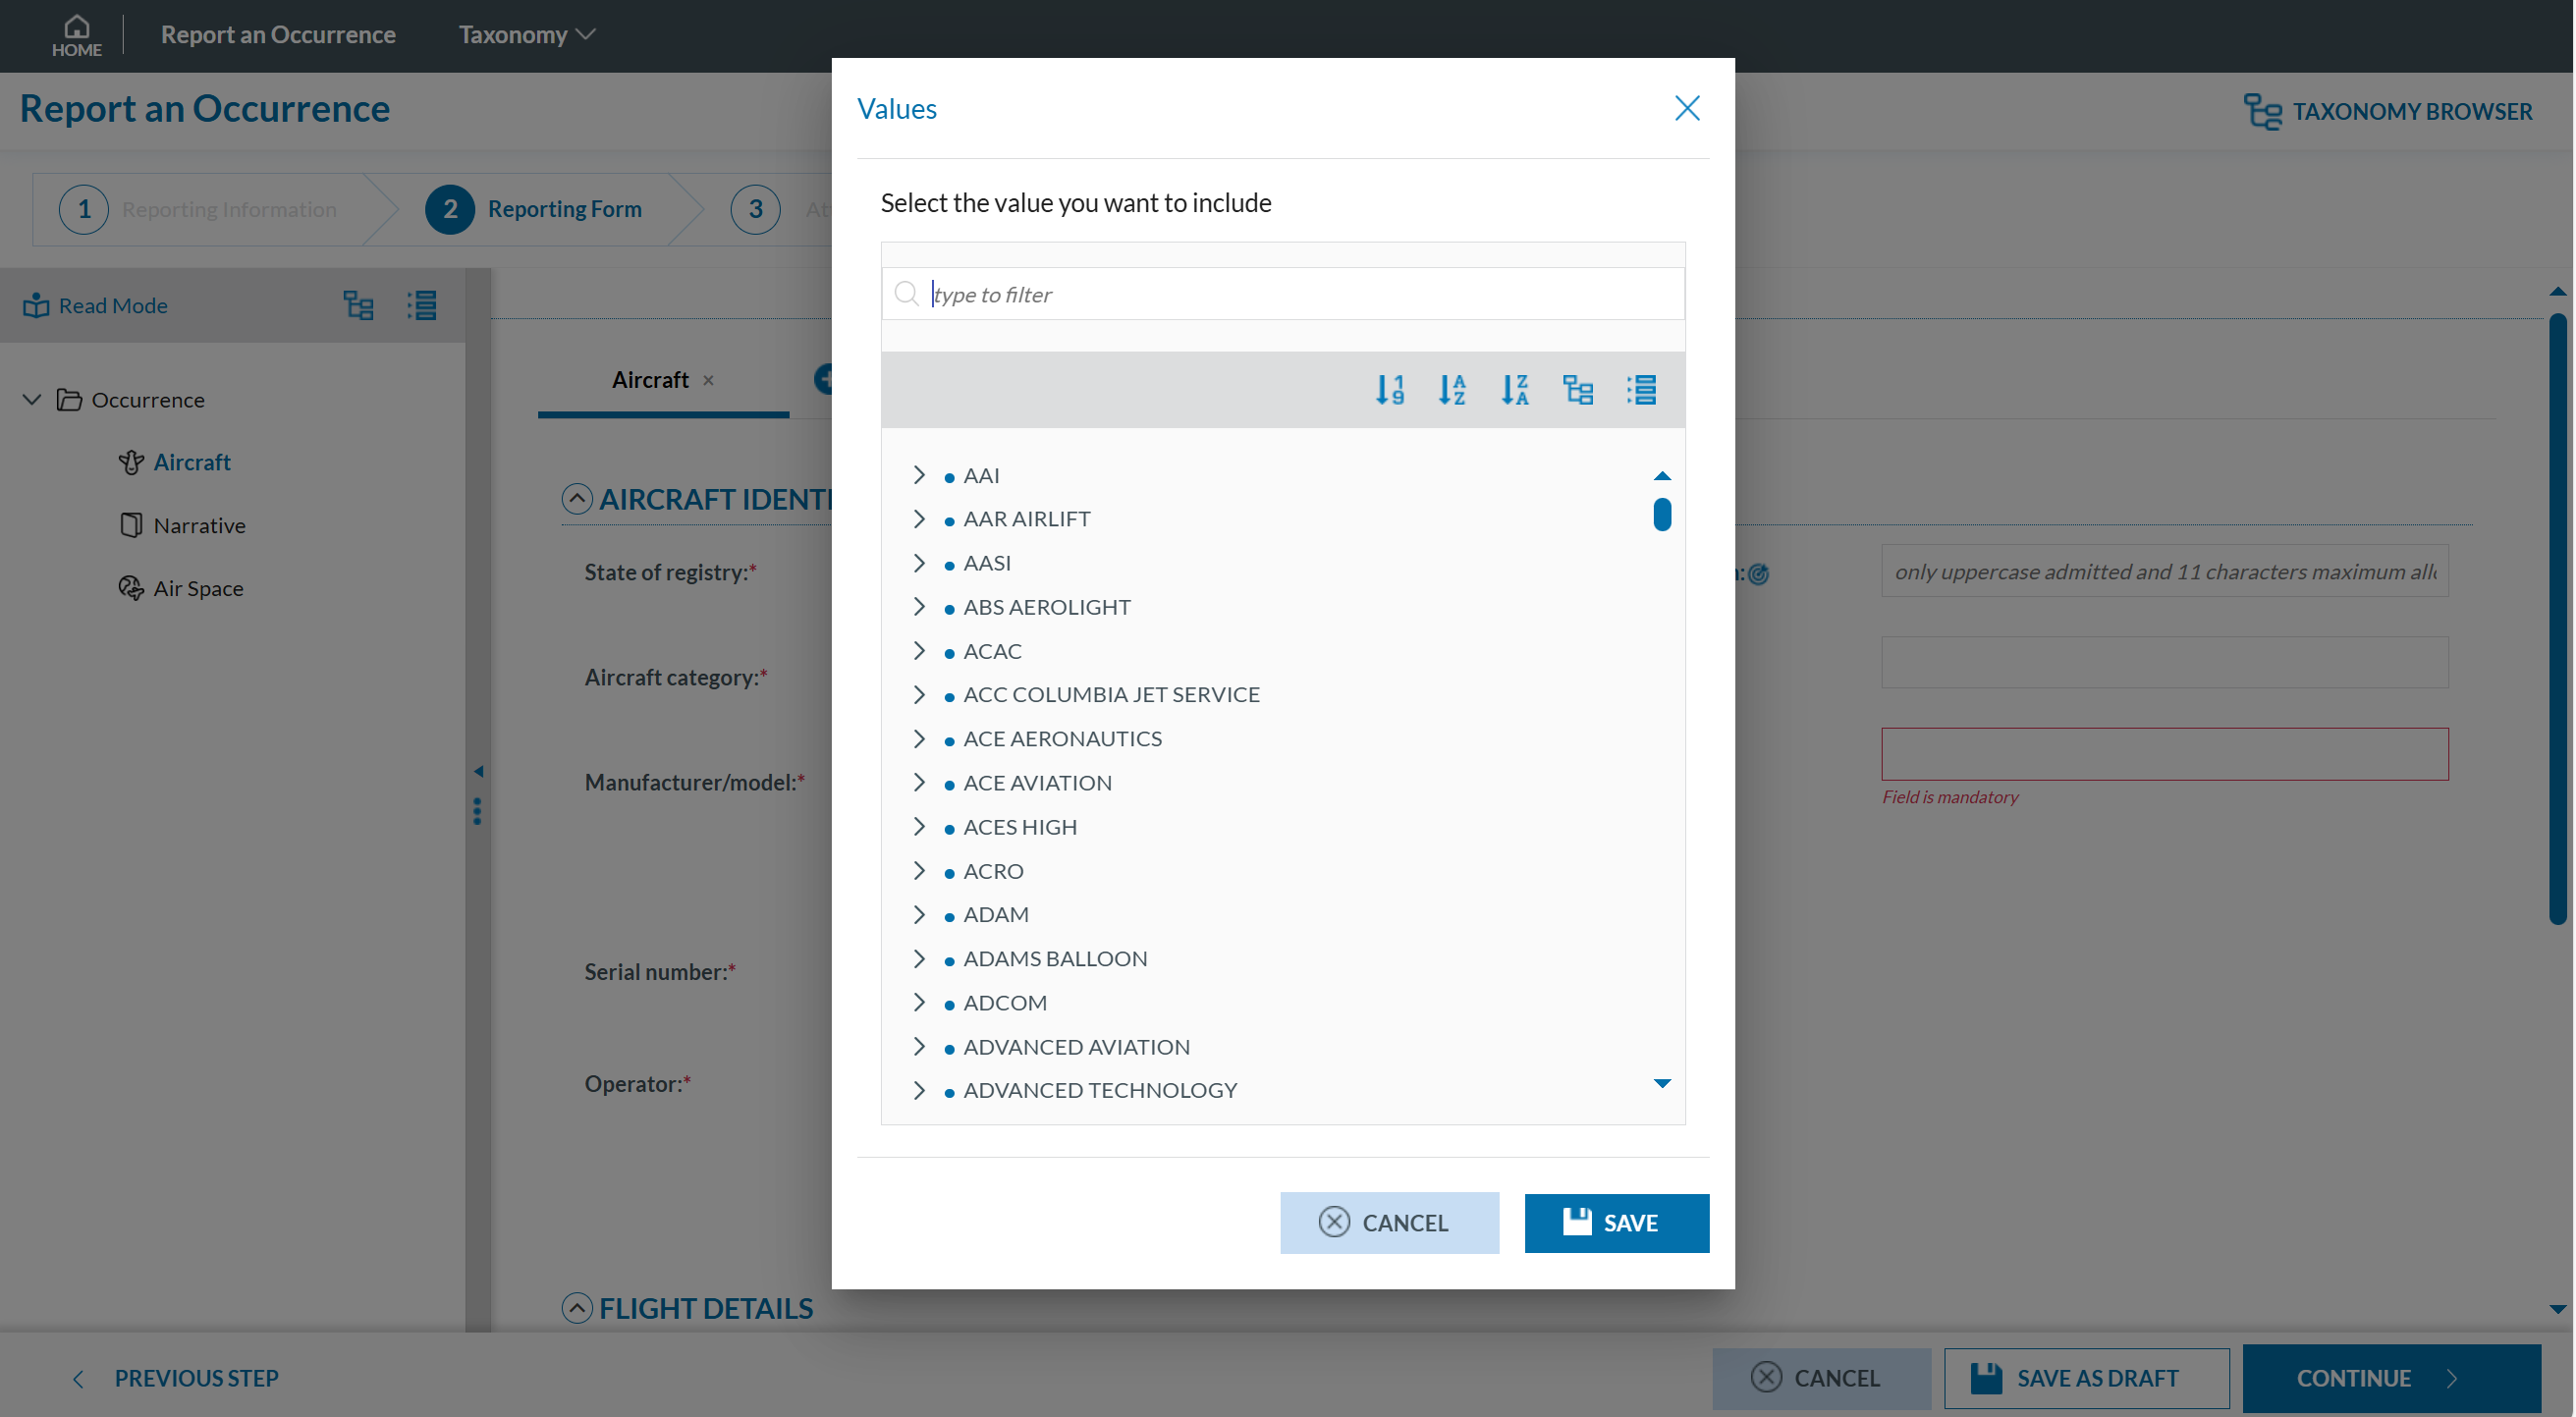
However, for the Location Name attribute, values must be entered as free text only:

Filter the information
You can filter the Parent Entities, Child Entities and Attributes table by typing the term to be searched in the filter row. You can restrict the results by clicking the 'filter' icon  To delete the filter, you must click the
  'clear filter' icon.
By default, the 'contains' condition is selected:
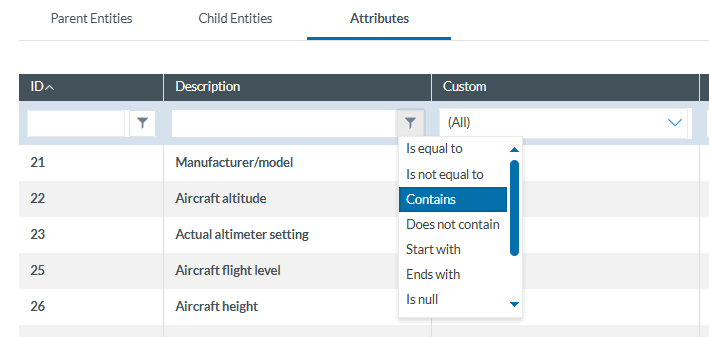
The filter options are:
-
Is equal to: the filter will look for fields that match the exact same string
-
Is not equal to: the filter will avoid the fields that match the exact same string
-
Contains: the filter will display all the fields that have the string written in any position
-
Does not contain: the filter will display the fields that do not have the string written in any position
-
Start with: the filter will look for the string at the beginning of the field
-
Ends with: the filter will look for the string at the end of the field
-
Is null: field does not exist
-
Is not null: field exists
-
Is empty: fields exist but does not have information
-
Is not empty: field exists and has information
5.4. List of Taxonomies
You can access the list of taxonomies through the ‘Taxonomy’ menu displayed in the bar next to 'Report an Occurrence':

By clicking on this link, the system displays the list of taxonomies in force for the Reporter’s competent Authority:

If the competent Authority the user is reporting to has defined a custom taxonomy, the system displays both the central and the custom taxonomies:
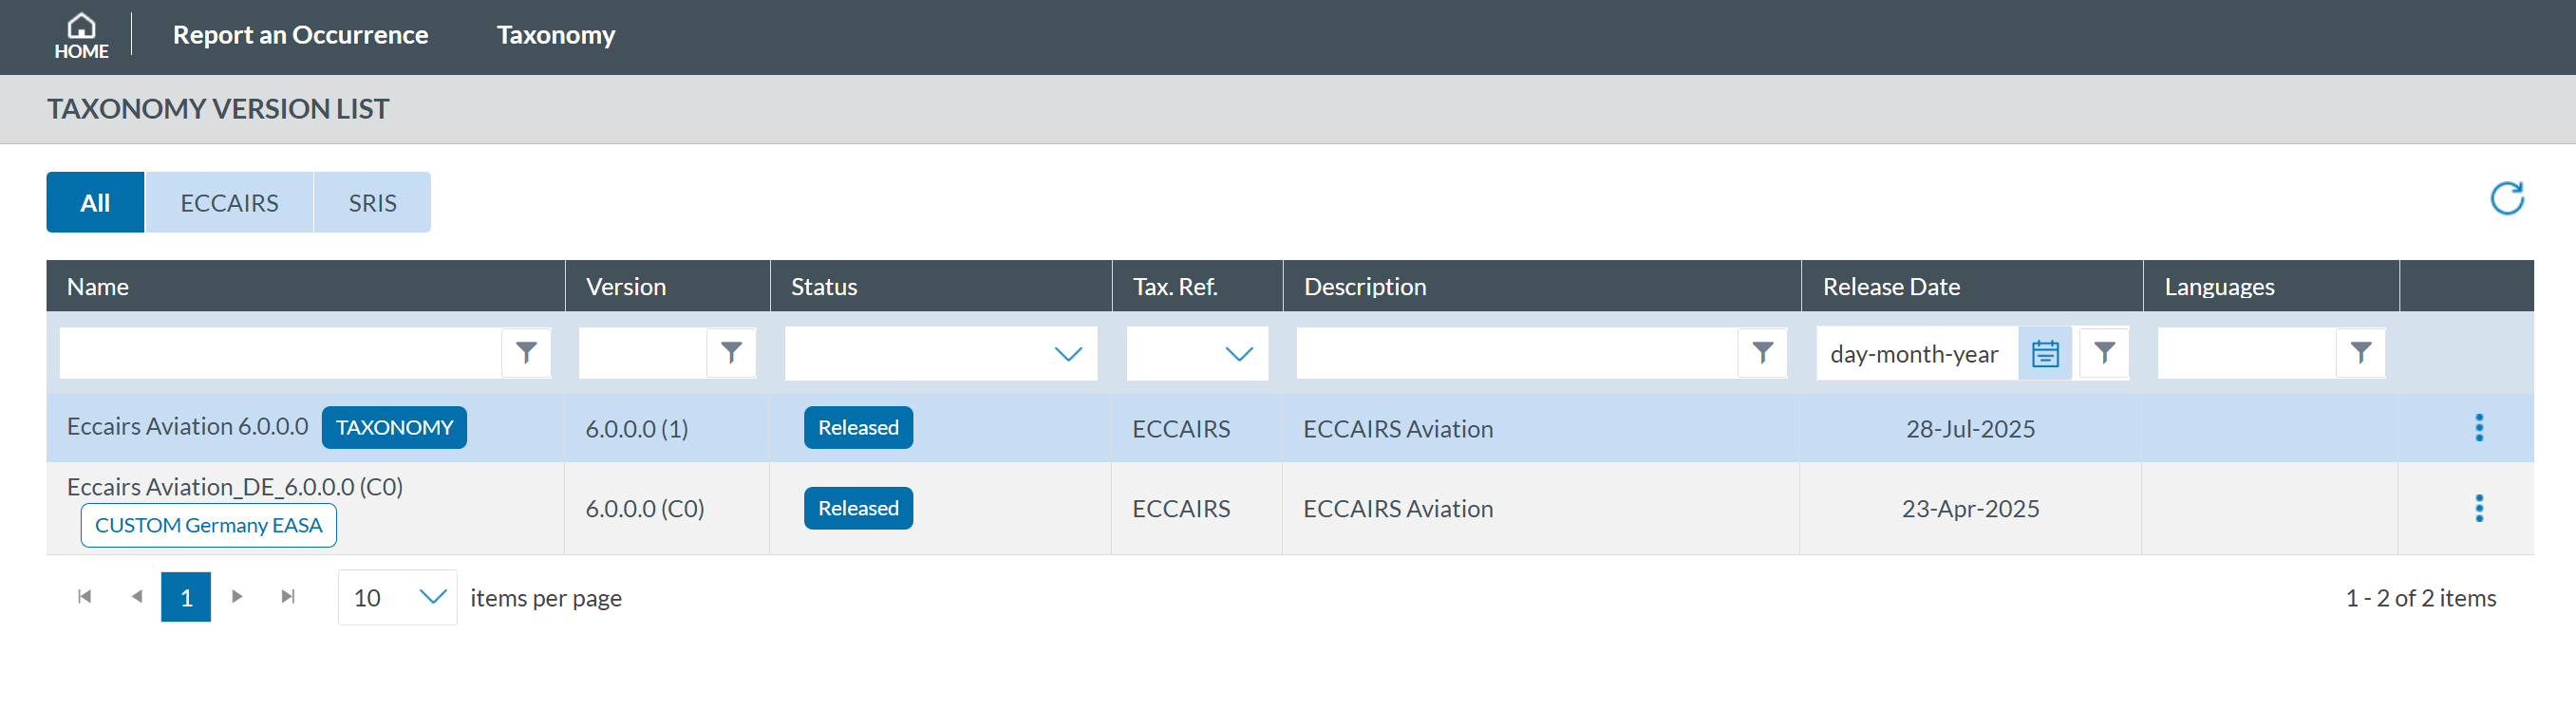
If you click on any of them,you will access the taxonomy browser for that taxonomy. By clicking on the 3-dots button of each taxonomy of the list, the system will display the following options:
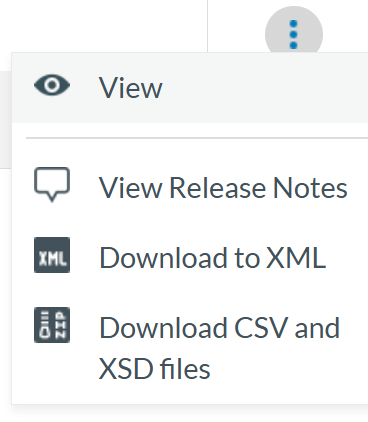
- 'View' shows the taxonomy as detailed in Taxonomy section.
-
‘View Release Notes’ this option shows the user the changes made in the Taxonomy with the latest update.

- ‘Download to XML’ allows any user to download the taxonomy in an xml file format with all the Entities and Attributes.
- ‘Download CSV and XSD files’ by clicking in this option the user downloads a compressed file in zip format that includes all the Value List and Attribute List in that Taxonomy
7. My account
7.1. My account menu
Users can edit their personal settings through the “My Account” management interface. This menu is accessible once the Officer clicks on their username

7.2. Personal Details
This is the first tab of “My Account” page.
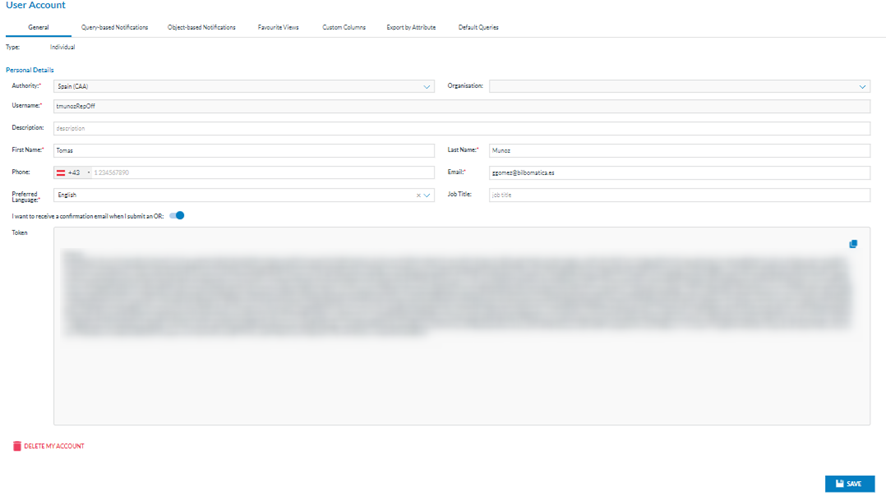
The first tab is ‘General’, indicating the type of account (individual or organisation) and the edit page for the personal details.
The personal details fields are the following:
· Organisation: to which the user belongs
· Username: of the user, it is not editable
· Description: optional field and editable
· First name: of the user, editable mandatory field
· Last name: of the user, editable mandatory field
· Phone: optional and editable
· Email: mandatory and editable
· Preferred language: mandatory and editable; doesn’t affect system behaviour at this stage of development.
· Job title: optional and editable
· ‘I want to receive an email when I submit an ‘OR’ toggle
· Token: it connects the Officer to the API. It is not editable
· Delete my account icon: it sends a request to the Authority administrator to delete the account after a confirmation message
The Officer can update the editable fields by clicking on the ‘Save’ button. The system will save the updates on the Personal details in the database.
7.3. Query-based notifications
E2 can notify selected users of the creation, update, deletion or sharing actions over ORs. VRs and OCs that meet the conditions of a query through query-based notifications.
This is the second tab of ‘My Account’ page:

It displays the table of query-based notifications indicating per notification row the following columns that also work as filters:
· Notification name: unique for each notification
· Source: OR, VR or OC
· Triggering action: create, update, delete or share with my Authority (only available for OCs)
· Query name: unique for each notification
· Created by: the author of the notification
· Email preferences: frequency of notification emails
When the user clicks on the last section of each notification row, the system displays the view and configuration icons for those notifications defined by the Authority administrator.

7.3.1. View the notification:
The Officer clicks on the view (eye) icon in the image above, and the system displays the View notification page:
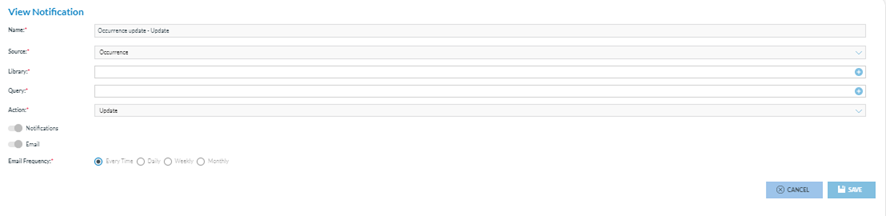
This page is not editable. It shows the following not editable fields:
· Name: unique per notification
· Source: OR, VR or OC
· Library: where the query is stored
· Query: that generates the notification
· Action: create, update, delete or share with my Authority (only available for OCs);
· Notifications toggle: to activate the notifications in the landing page.
· Email frequency toggle can be used every time, daily, weekly, or monthly.
The Configuration icon opens the ‘Set the notification preferences’ window:
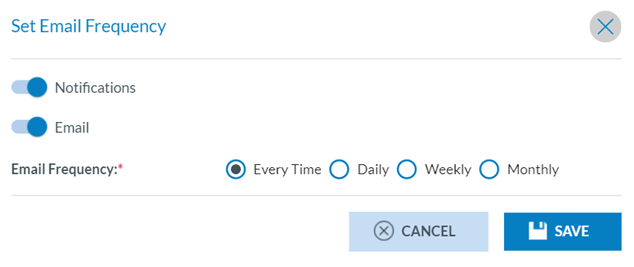
Notifications toggle: refers to the notifications appearing on the landing page of the Officer;
Email toggle: refers to the reception of an email with the notifications (Every Time, Daily, Weekly or Monthly). The Officer can update the fields and click' Save' to store the updates in the database.
7.3.2. Create a notification
Officers can create their own notifications. The Officer has to click on ‘New Notification’ above the table, and the system will display the ‘New Notification’ page:
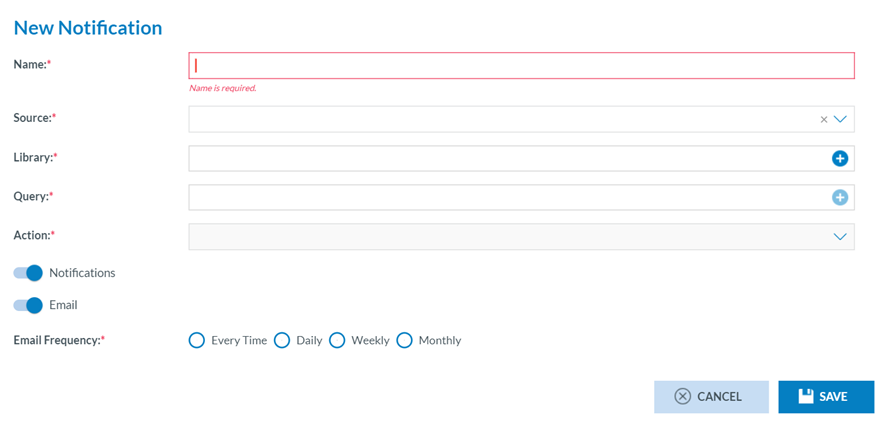
The fields are the same as in the ‘View notification’ of the previous section, but all the fields will be editable except the mandatory ‘Action’, which is only editable as soon as the source is selected in the previous field.
Name, source, library and query are mandatory.
The Officer has to fill in the Name, select a Source, and select a Library through the Library ‘+’ icon that opens the Library selection page:
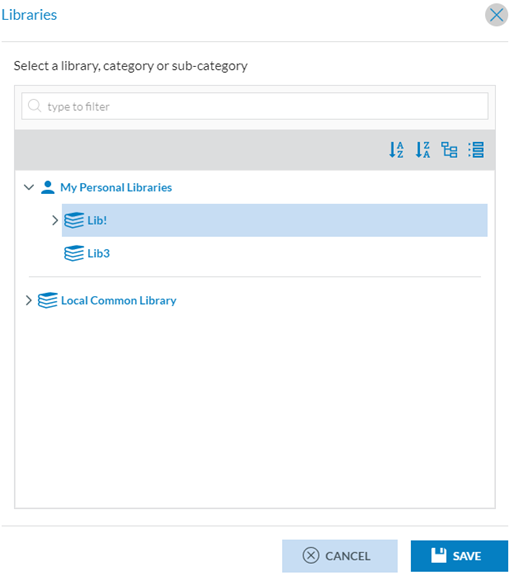
The Officer has to select a Library and click on Save.
Then, the Officer has to click on the ‘+’ icon of the Query field, and the system will display the queries available for the selected library:
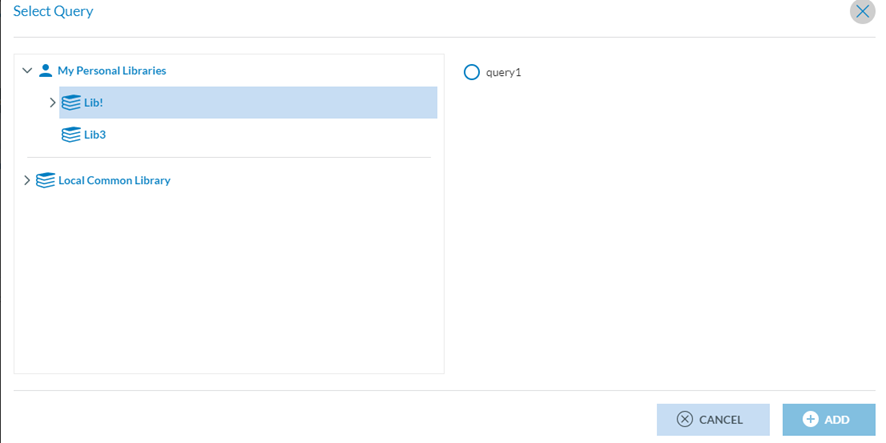
The Officer has to select a query and click on ‘Add’. Then, select the ‘Action’ from the drop-down menu with the following options:

The Officer must check one option and set the Notifications and Email toggles as needed.
By default, both toggles are activated. When the Email toggle is activated, the Officer has to set the Email frequency by checking the corresponding radio button:

And click on the Save button below. The system will save the notification with the selected query in the database and my account's list of query-based notifications.
The Officer can edit and delete the notifications that have been created.
7.4. Object-based notifications
Object-based notifications are manually defined in the different list views on each or multiple records. The Officer clicks on it, and the system displays the Object-based tab:
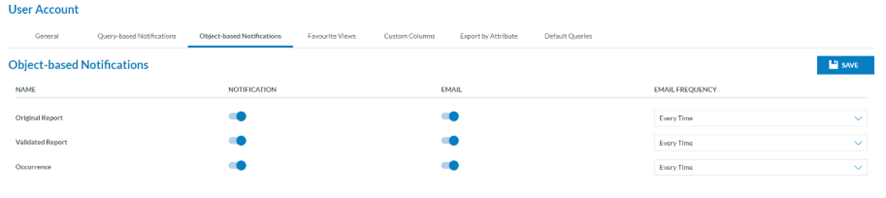
This page is to activate the notifications both on the landing page of the Officer and or in the email on updates on ORs, VR and OCs.
By default, it activates notifications and emails with updates on all the reports with an every-time frequency. It can be updated per type of report.
The Email frequency options are: Every time, daily, weekly and monthly.
The Officer can update the toggles and frequencies as needed by clicking on the ‘Save’ button.
The system will save the database updates and set the landing page notifications and the reports emails as selected.
7.5. Favourite Views
Views are used to display the information contained in a record, featuring varying numbers of attributes/entities, a specific design, and other custom elements. They enable certain users within organisations to concentrate on the elements relevant to their tasks. The fourth tab of the ‘My Account’ menu opens the ‘Favourite Views’:
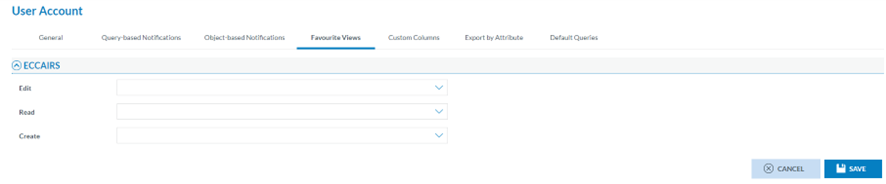
The page displays the following drop-down menus with the available views:
· Edit: favourite view for editing reports
· Read: favourite view for reading reports
· Create: favourite view for creating reports
Thus, the Officer must select a view in the specific drop-down menus and click Save in the image above. The system will save the updates in the database. When later the Officer in the OR, VR and OCs lists clicks on ‘Edit’ or accesses the Read mode or clicks on ‘New’, the system will offer the view of the specific report, the View selected in this menu. i.e. when the Officer accesses the VR menu and clicks on ‘New VR’, the system will open the ‘New VR’ page with the View selected in the ‘My Account’ tab:

7.6. Custom Column
Officers can customise the list view for the different reports available in the system. They can set which columns are available in the lists, reorder, sort, etc. The columns can be attributes or metadata fields.
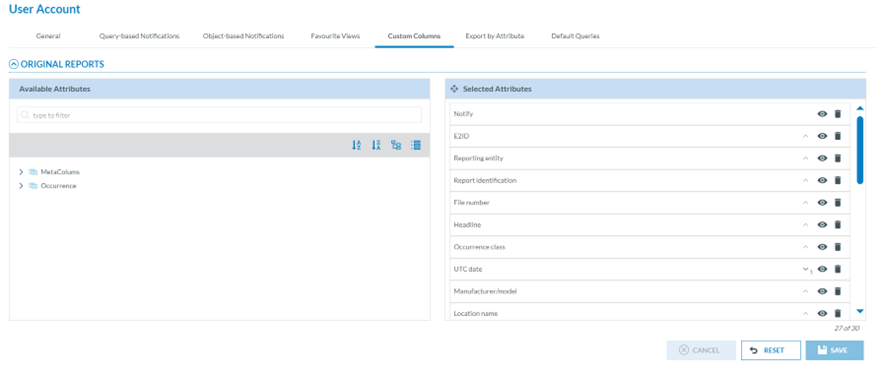
Through this page, the Officer can select the attributes available in the ORs, VRs and OCs lists in the corresponding ‘Safety Data’ menus.
By default, the list of ORs, VRs and OCs in their menus provides a list of attributes, i.e.:
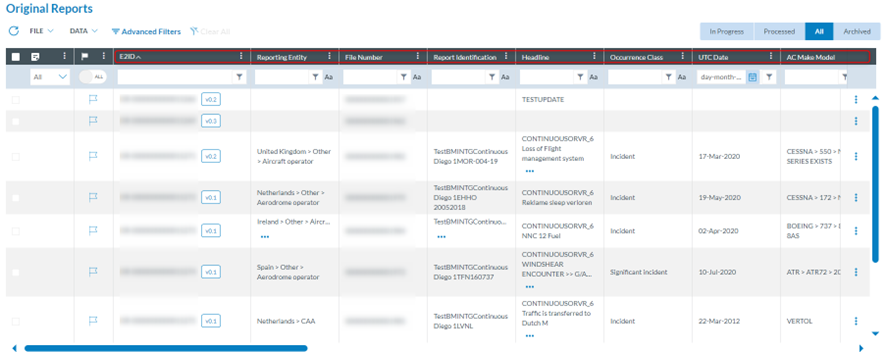
Through this Custom Columns menu, the Officer can decide which attributes appear in each list; the Officer can add and remove the attributes as well as altering their order.
Thus, the left pane includes a search filter and the metaColumns, with all its fields checked by default:
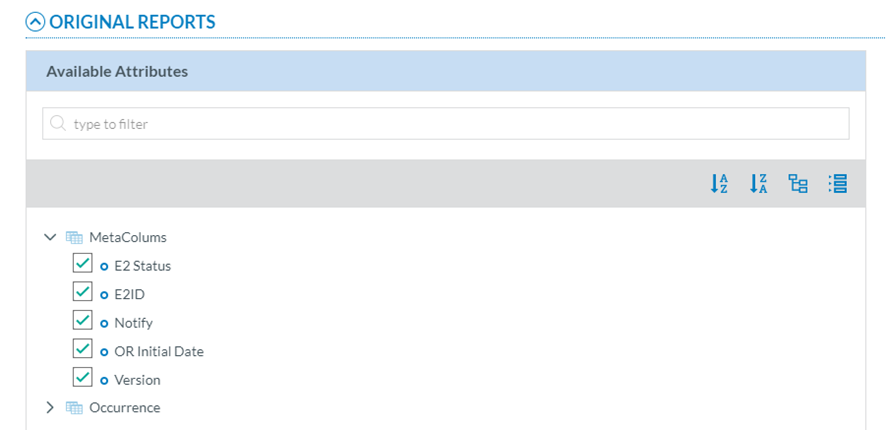
Below is the ECCAIRS taxonomy, which the Officer can navigate to select more attributes. See Taxonomy browser section for further details on its navigation.
The right pane provides the selected metacolumns and attributes. By default, the system provides a list of metacolumns and attributes.
The Officer can hide them through the eye icon next to each one:
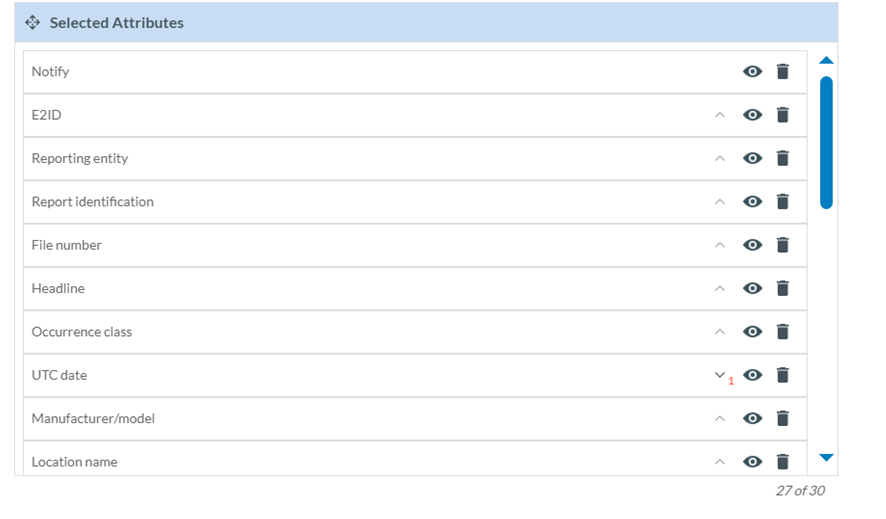
The rubbish icon is to delete the attribute or metacolumn of the list of reports.
The Officer can alter their order by dragging and dropping them or by clicking on each arrow, i.e.: E2ID is number 1, then each time the Officer marks an arrow, it sets the order of the attributes in the list:
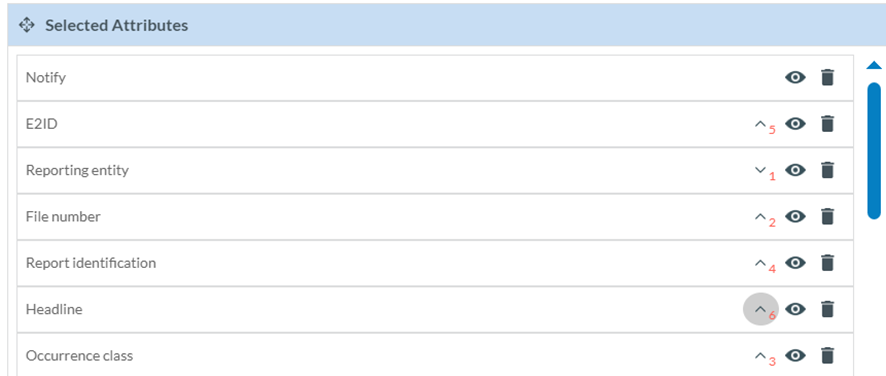
Note: ‘Notify’ does not have an arrow since it always appears at the beginning of each report row:

When the Officer is updating the attributes, before saving the updates, they can always click on the ‘Reset’ button below the list of selected attributes so that the system will set the ‘Selected attributes’ page to the default selection and order.
Note that there is a maximum number of attributes per list; if the Officer does not remove any from the default selection, only two more can be selected from the available list.
Once the Officer has updated the selected attributes and metacolumns, they have to click on the ‘Save’ button, and the tables of reports will be updated accordingly.
7.7. Export by Attribute
Officers can define attribute lists containing attributes and metadata fields. These Attribute Lists will be available to the Officer when exporting ORs, VRs and OCs from the lists.
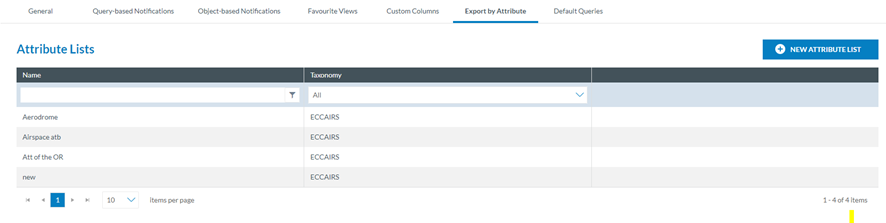
It is the table of Attribute Lists. Each row refers to a list of attributes defined by the Officer concerning the Authority’s ECCAIRS taxonomy, either central or custom.
These lists are available in the Exports options of the ORs, VRs and OCs menus of the Safety Data menu, i.e.:

On the last section of each Attribute List of the table, when the Officer moves the mouse over it, a Delete icon and an Edit icon appear:

The Delete icon deletes the Attribute List directly without asking.
7.7.1 Edit an attribute list
The edit icon opens the editing attributes’ list page:
 The mandatory name field is editable.
A ‘Metadata fields’ toggle exists, so the list can include or hide the metadata fields.
Below, there is a left pane with the taxonomy attributes. See Taxonomy browser for further details on its navigation. The attributes can also be searched by Description or Taxonomy code in the Search field.
The right pane includes the selected attributes.
The Officer can update the Name, Metadata toggle or any of the selected attributes (drag and drop to change the order or remove from the right panel) and click on ‘Save’ and the updates will be saved in the database. The table of Attributes lists will be updated accordingly.
7.7.2 Create an attribute list
The Officer can click on ‘New Attribute List’ above the table of attributes lists, and the system will open the following page:
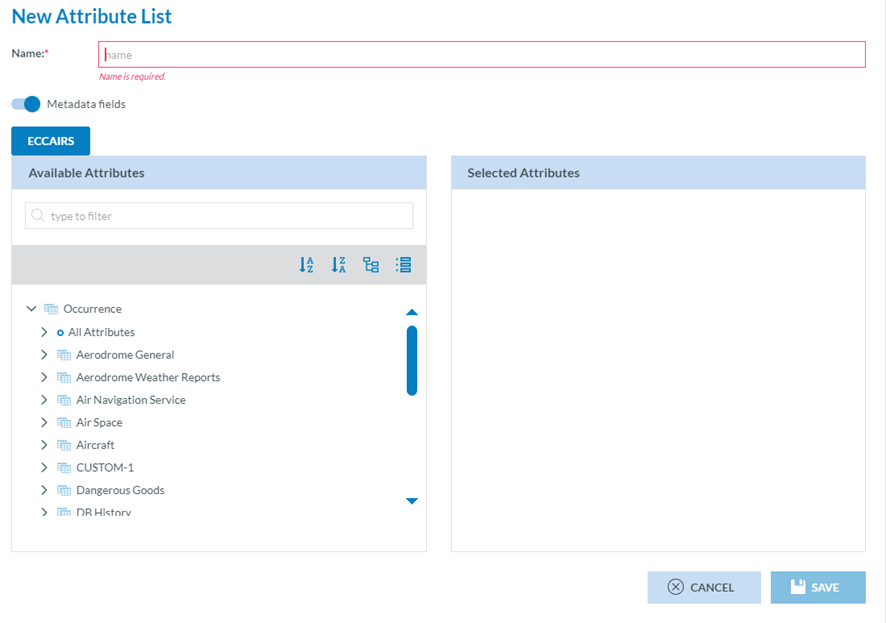
It works as the editing page of the previous section. The Officer has to add a mandatory name, update the metadata fields toggle if needed and add the required attributes to the list through the Taxonomy tree left page. The selected attributes will appear on the right pane. The Officer can click the ‘Save’ button when all the attributes are selected. The system will save the record in the database, and the list of attributes will be updated accordingly.
7.8. Default Queries
Officers can select the queries the system triggers when opening the ORs, the VR or OCs menus from the Safety Data menu.
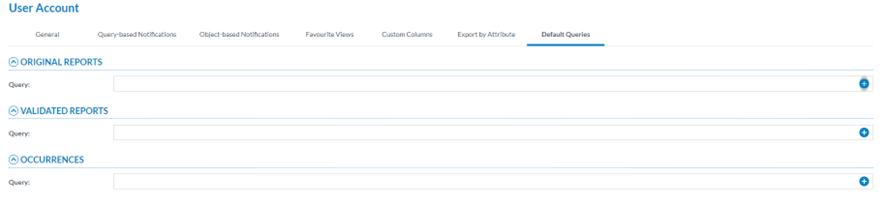
Through this page, the Officer can select the queries the system triggers when opening the ORs, the VR or OCs menus.
The Officer can click on the ‘+’ icon of the query field of the OR, VR or OC, and the system will open the Select Query window:
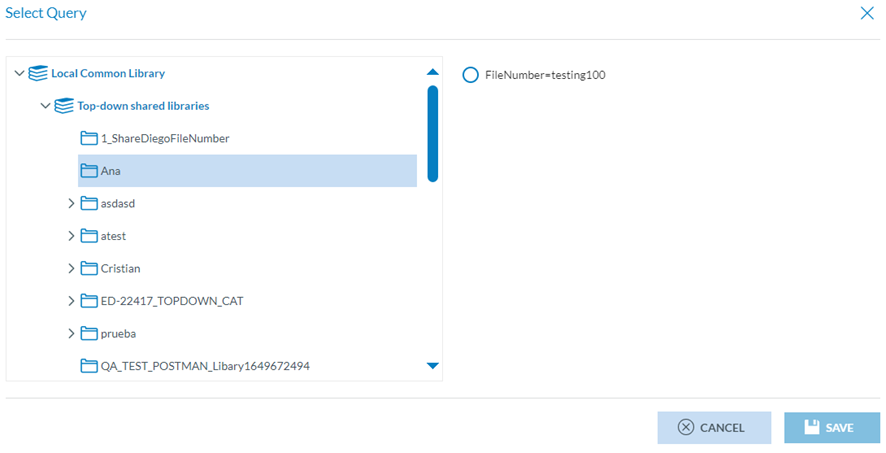
This window will provide on the left the libraries available to the Officer. The Officer can select the corresponding library or category, and the right pane will present the stored queries in the selected location. The Officer can only choose one and click the ‘Save’ button, which will be activated. The updates will be saved in the database.
The Officer can do this operation in each reports section where they want to trigger the queries. When they have saved all the default queries, they will be triggered any time the corresponding reports menu is opened in the ECCAIRS Web Application
8. Metadata fields
This section includes the list of metadata fields used in E2.
8.1. Metadata fields accessibility
The metadata fields stored in an OR, VR, OC, or SR (report, from now on), along with the taxonomy entities and attributes, provide essential information that is automatically populated by the system throughout the report lifecycle. These metadata fields are visible when reports are exported, when they are selected as custom columns in the report lists, utilized in queries, or when API methods are executed.
8.1.1. Metadata fields list
The following table includes the list of the E2 metadata fields:
|
Metadata field name for both Query and Columns/Exports |
Metadata field name in API response |
Description |
|
ºIsActive |
active |
Indicates if the report is currently active. |
|
ºCreationDate |
creationDate |
The date when this version of the report was created. |
|
ºCreationUser |
creationUser |
Identifier of the user who created the report. |
|
ºModificationDate |
lastmodificationDate |
The date when this version of the report was last modified. |
|
ºModificationUser |
lastmodificationUser |
Identifier of the user who last modified the report. |
|
ºIsBlocked |
blocked |
Specifies whether the report is blocked by a process. |
|
ºE2ID |
e2Id |
The |
|
ºHasNotes |
hasNotes |
Indicates whether the report contains any notes. |
|
ºE5zMigrationFile |
e5zName |
Name of the migration file (e5z or e5x). |
|
ºE5zMigrationFileXMLFile |
xmlName |
Name of the XML file inside the migration file (e5z or e5x). |
|
ºORInitialDate |
orInitialDate |
Date the report was first sent (v0.1). |
|
ºVRInitialDate |
vrInitialDate |
Date the report was first validated or manually created (v0.1). |
|
ºOCInitialDate |
ocInitialDate |
Date the report was first processed as an occurrence or created from scratch (v0.1 or V1.0) |
|
ºSRInitialDate |
receivingDate |
Date the report was first submitted as a recommendation. |
|
ºWebformID |
pdfCode |
Code of the webform used to report the case. |
|
ºReporterFirstname |
firstName |
First name of the user who submitted the report. |
|
ºReporterLastname |
lastName |
Last name of the user who submitted the report. |
|
ºReporterTelephone |
telephone |
Telephone number of the user who submitted the report. |
|
ºReporterEmail |
|
Email address of the user who submitted the report. |
|
ºOrganisationID |
organisation_id |
ID of the organisation of the reporting user. |
|
ºOrganisationname |
name |
Name of the organisation of the reporting user. |
|
ºRelatedE2IDs |
relatedReports |
Contains |
|
ºOC_ReportToGeneratedORID |
asOR |
In an OC, the |
|
ºOC_ReportedToAuthorityID |
authorityId |
In an OC, the ID of the authority to which it was reported. |
|
ºOC_ReportToGeneratedORDate |
reportDate |
In an OC, the date the OR was generated from the report. |
|
ºOR_ReportToGeneratedORDate |
reportToDate |
In an OR, the date it was reported to this authority. |
|
ºOR_ReportToGeneratedORAuthorityID |
reportToFromAuthority |
In an OR, the authority that reported it to this one. |
|
ºReportingEntityID |
reportingEntityId |
ID of the entity that submitted the report (attribute 447). |
|
ºReportingMethod |
reportingMethod |
Method used to report the occurrence (e.g., online, e5x). |
|
ºResponsibleEntityID |
responsibleEntityId |
ID of the authority responsible for managing the report (Authority table in MySQL). |
|
ºSharedWithAuthorityIDs |
sharedEntitiesId |
Authority IDs that the report is shared with. |
|
ºSharedWithAuthorityIDsAttachments |
sharedAttachmentsEntitiesId |
Authorities allowed to view attachments in shared reports. |
|
ºSharedWithExclusionAttributes |
deidentifiedTaxonomyCodes |
List of attribute IDs excluded from sharing with the authority. |
|
ºStatus |
status |
Current status of the report (e.g., open, sent, draft). |
|
ºTransferDate |
transferredDate |
Date the report was transferred. |
|
ºTransferFromAuthorityID |
transferredFromAuthority |
Authority from which the report was transferred. |
|
ºConflictingE2ID |
updated |
|
|
ºHasAutomaticChanges |
has_automatic_changes |
Indicates whether automatic changes exist in the report. |
|
ºReportVersion |
version |
Version number of the report. |
|
ºLastSharedECR |
lastSharedEcr |
Date the report was last shared to the ECR |